


Skin Acacdemy

Back Acne: Why It’s Different and How to Treat It Right
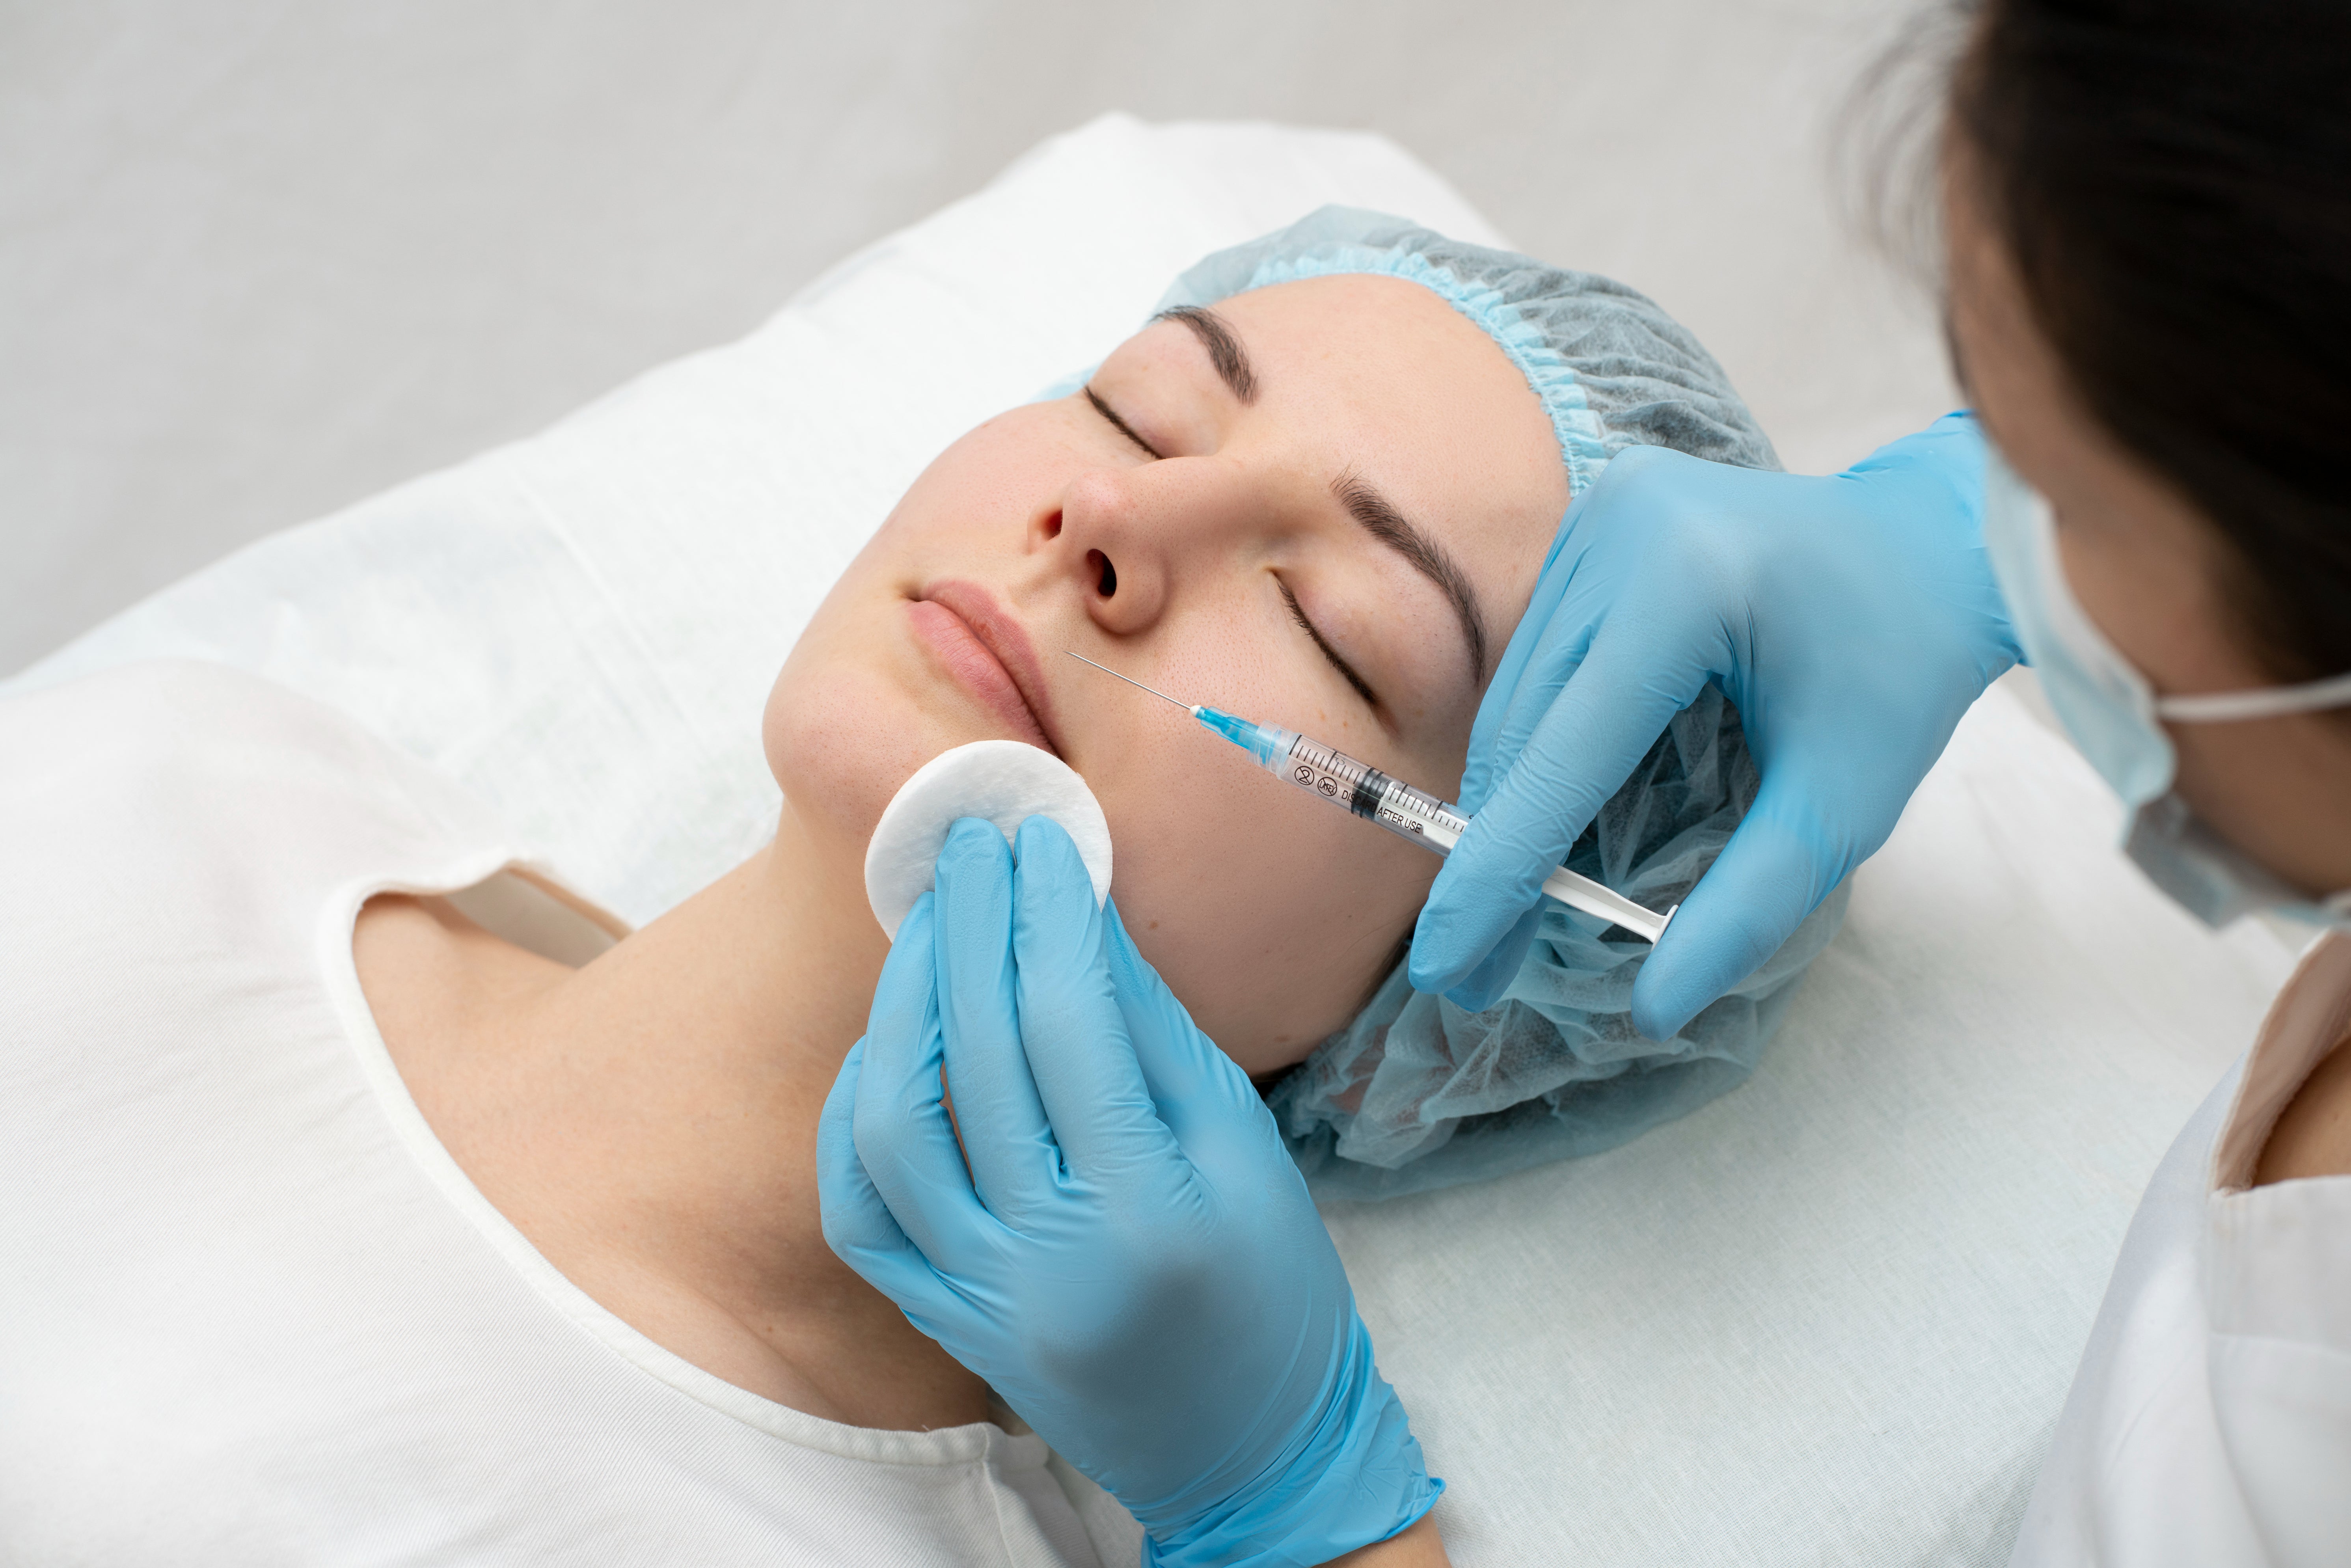
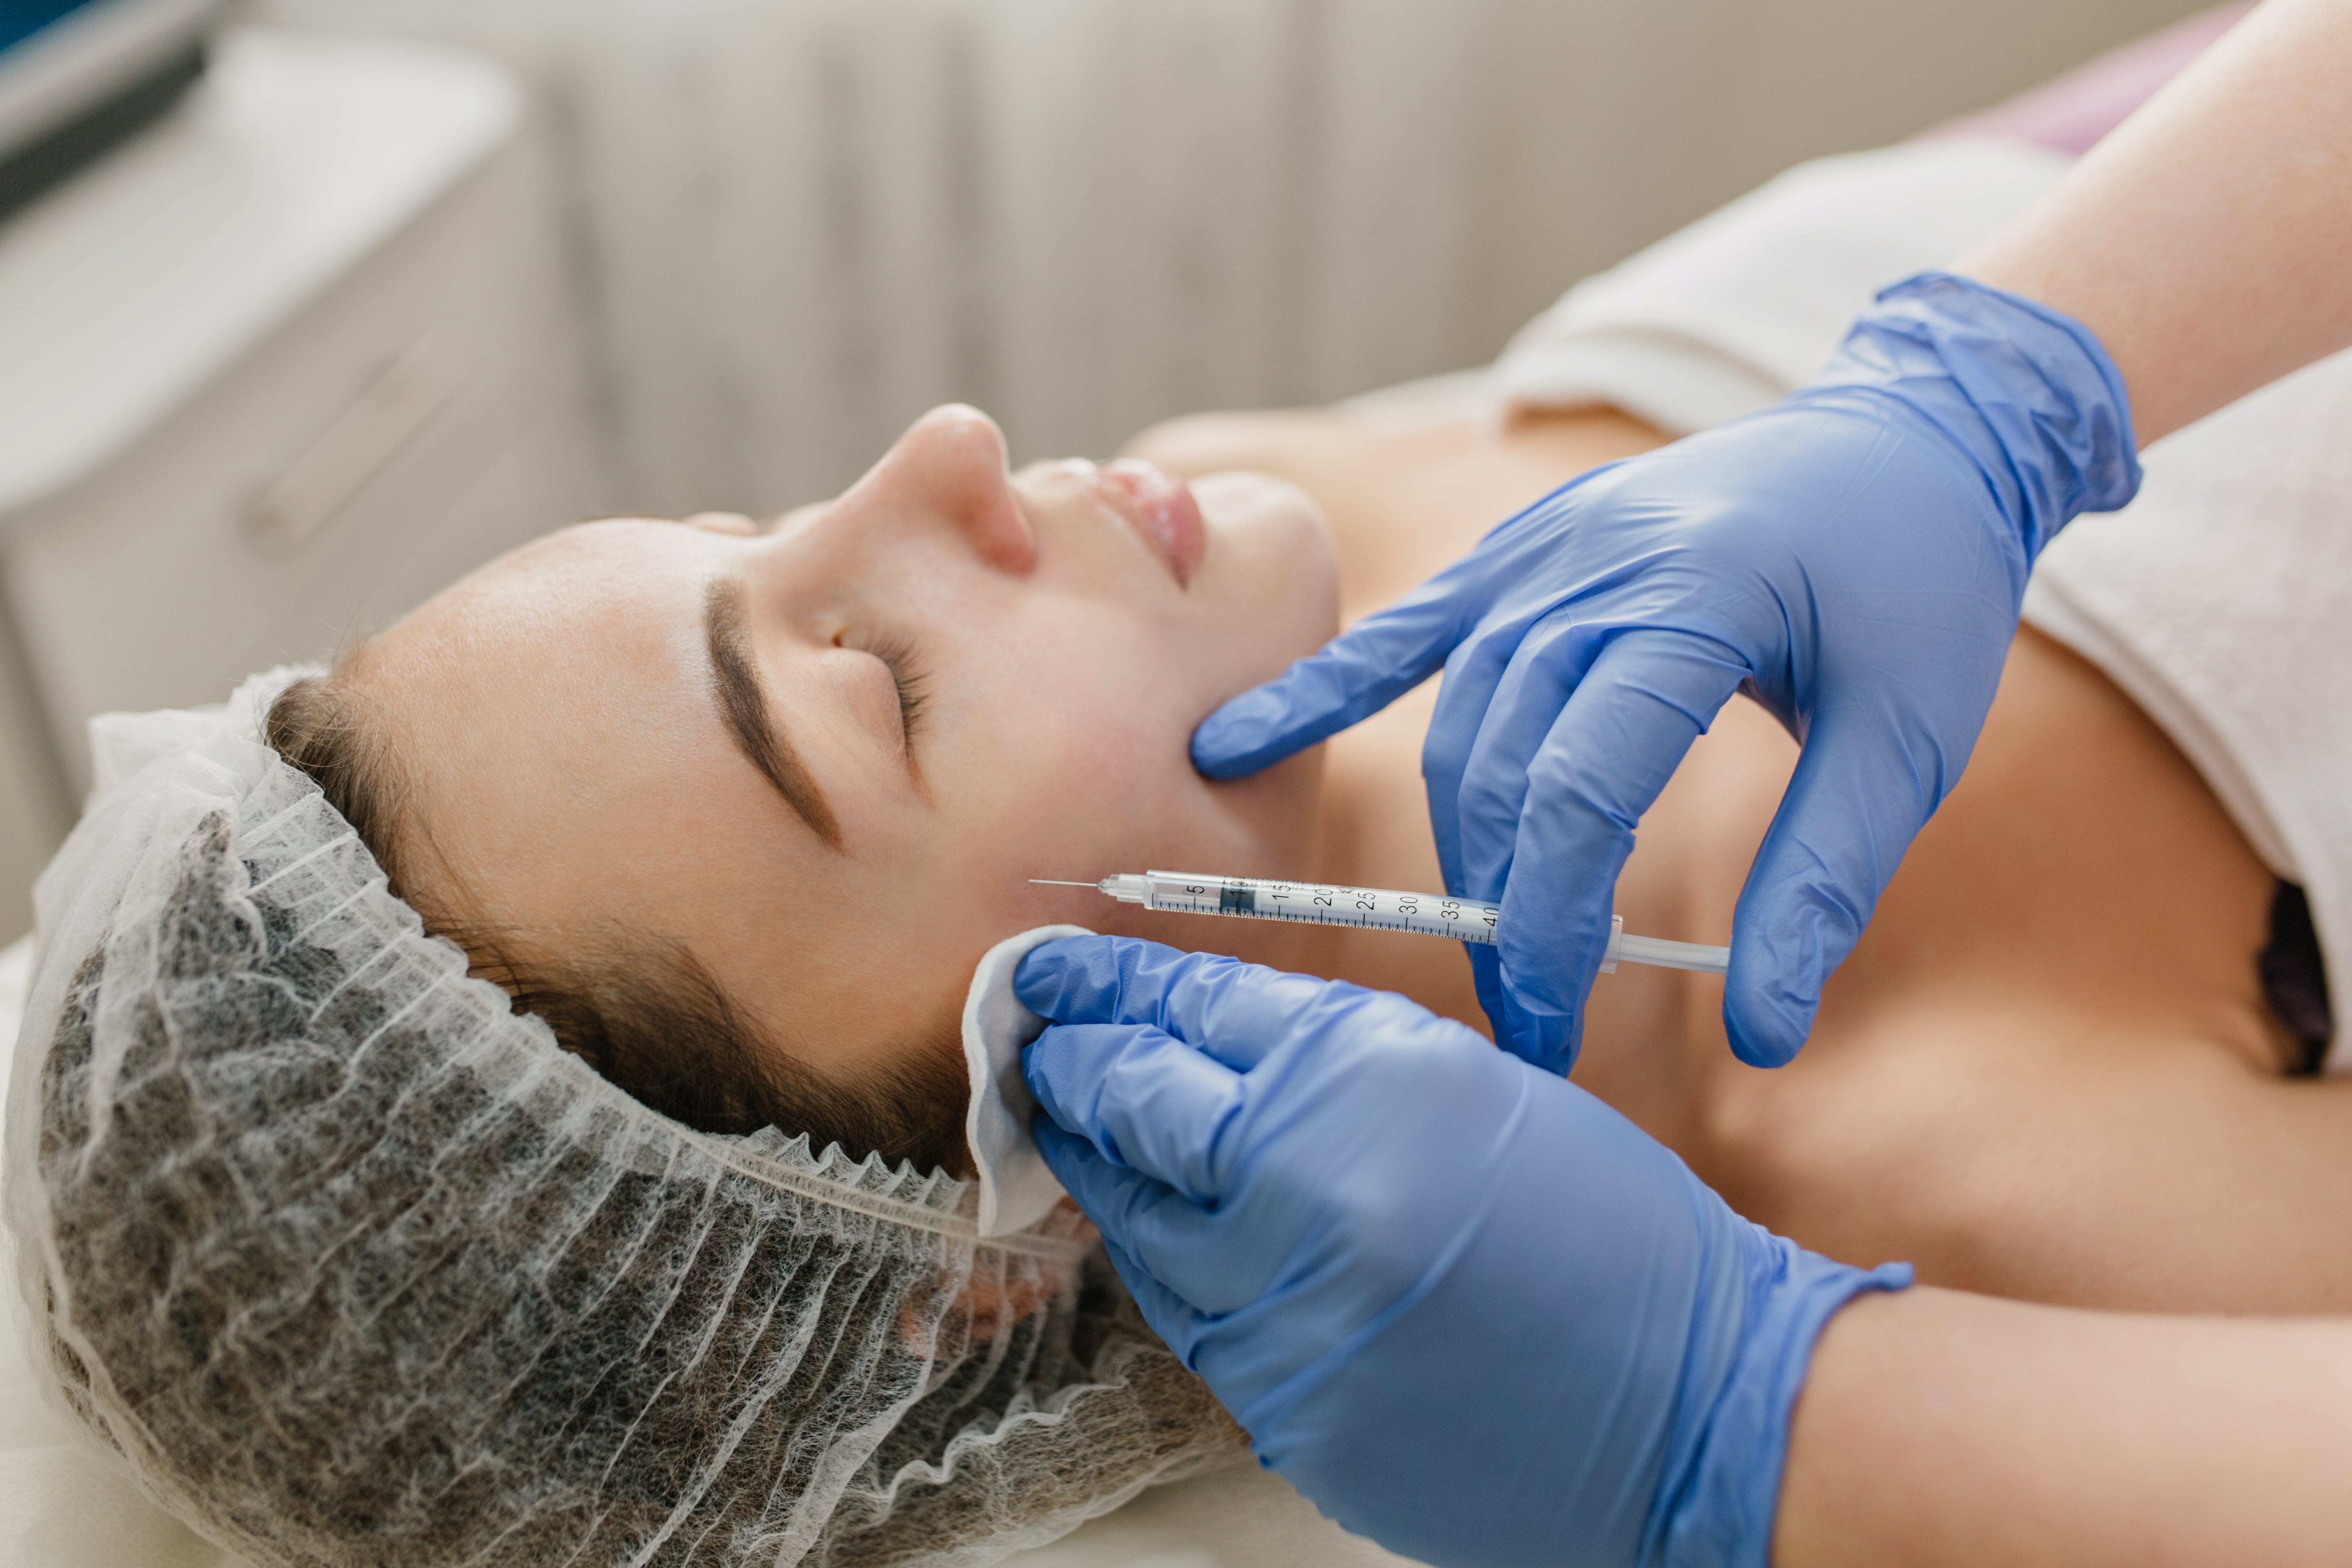
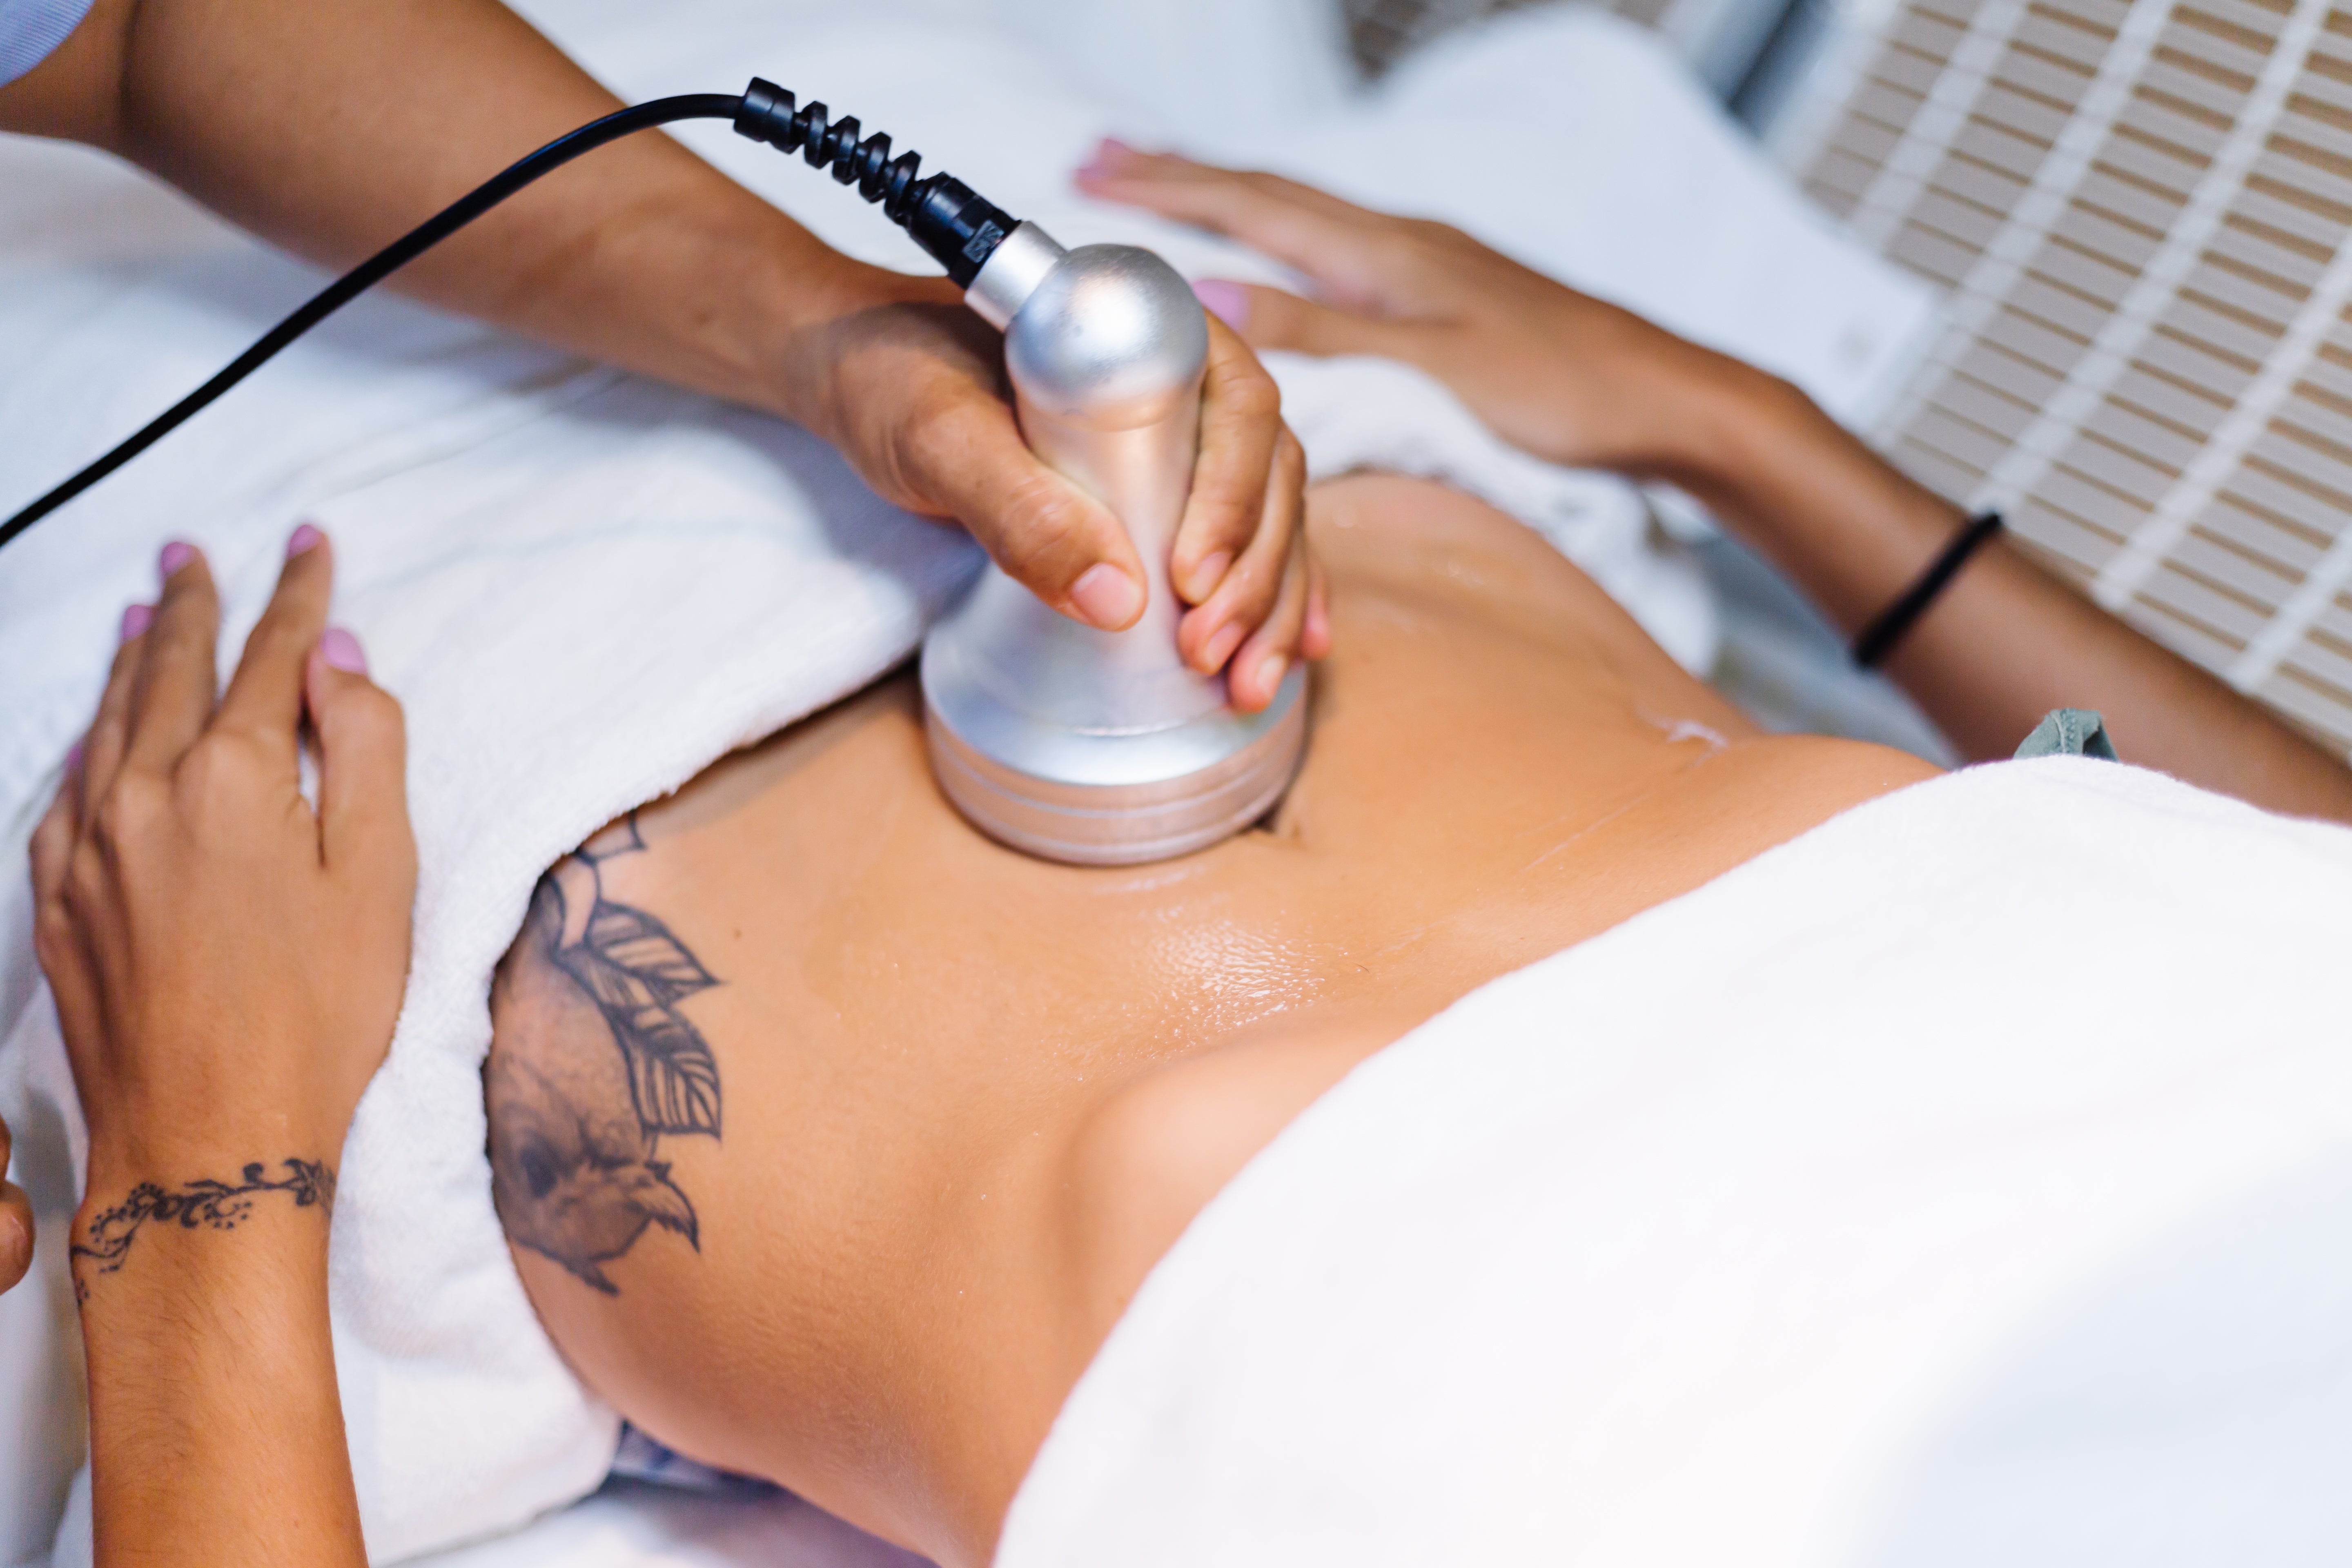
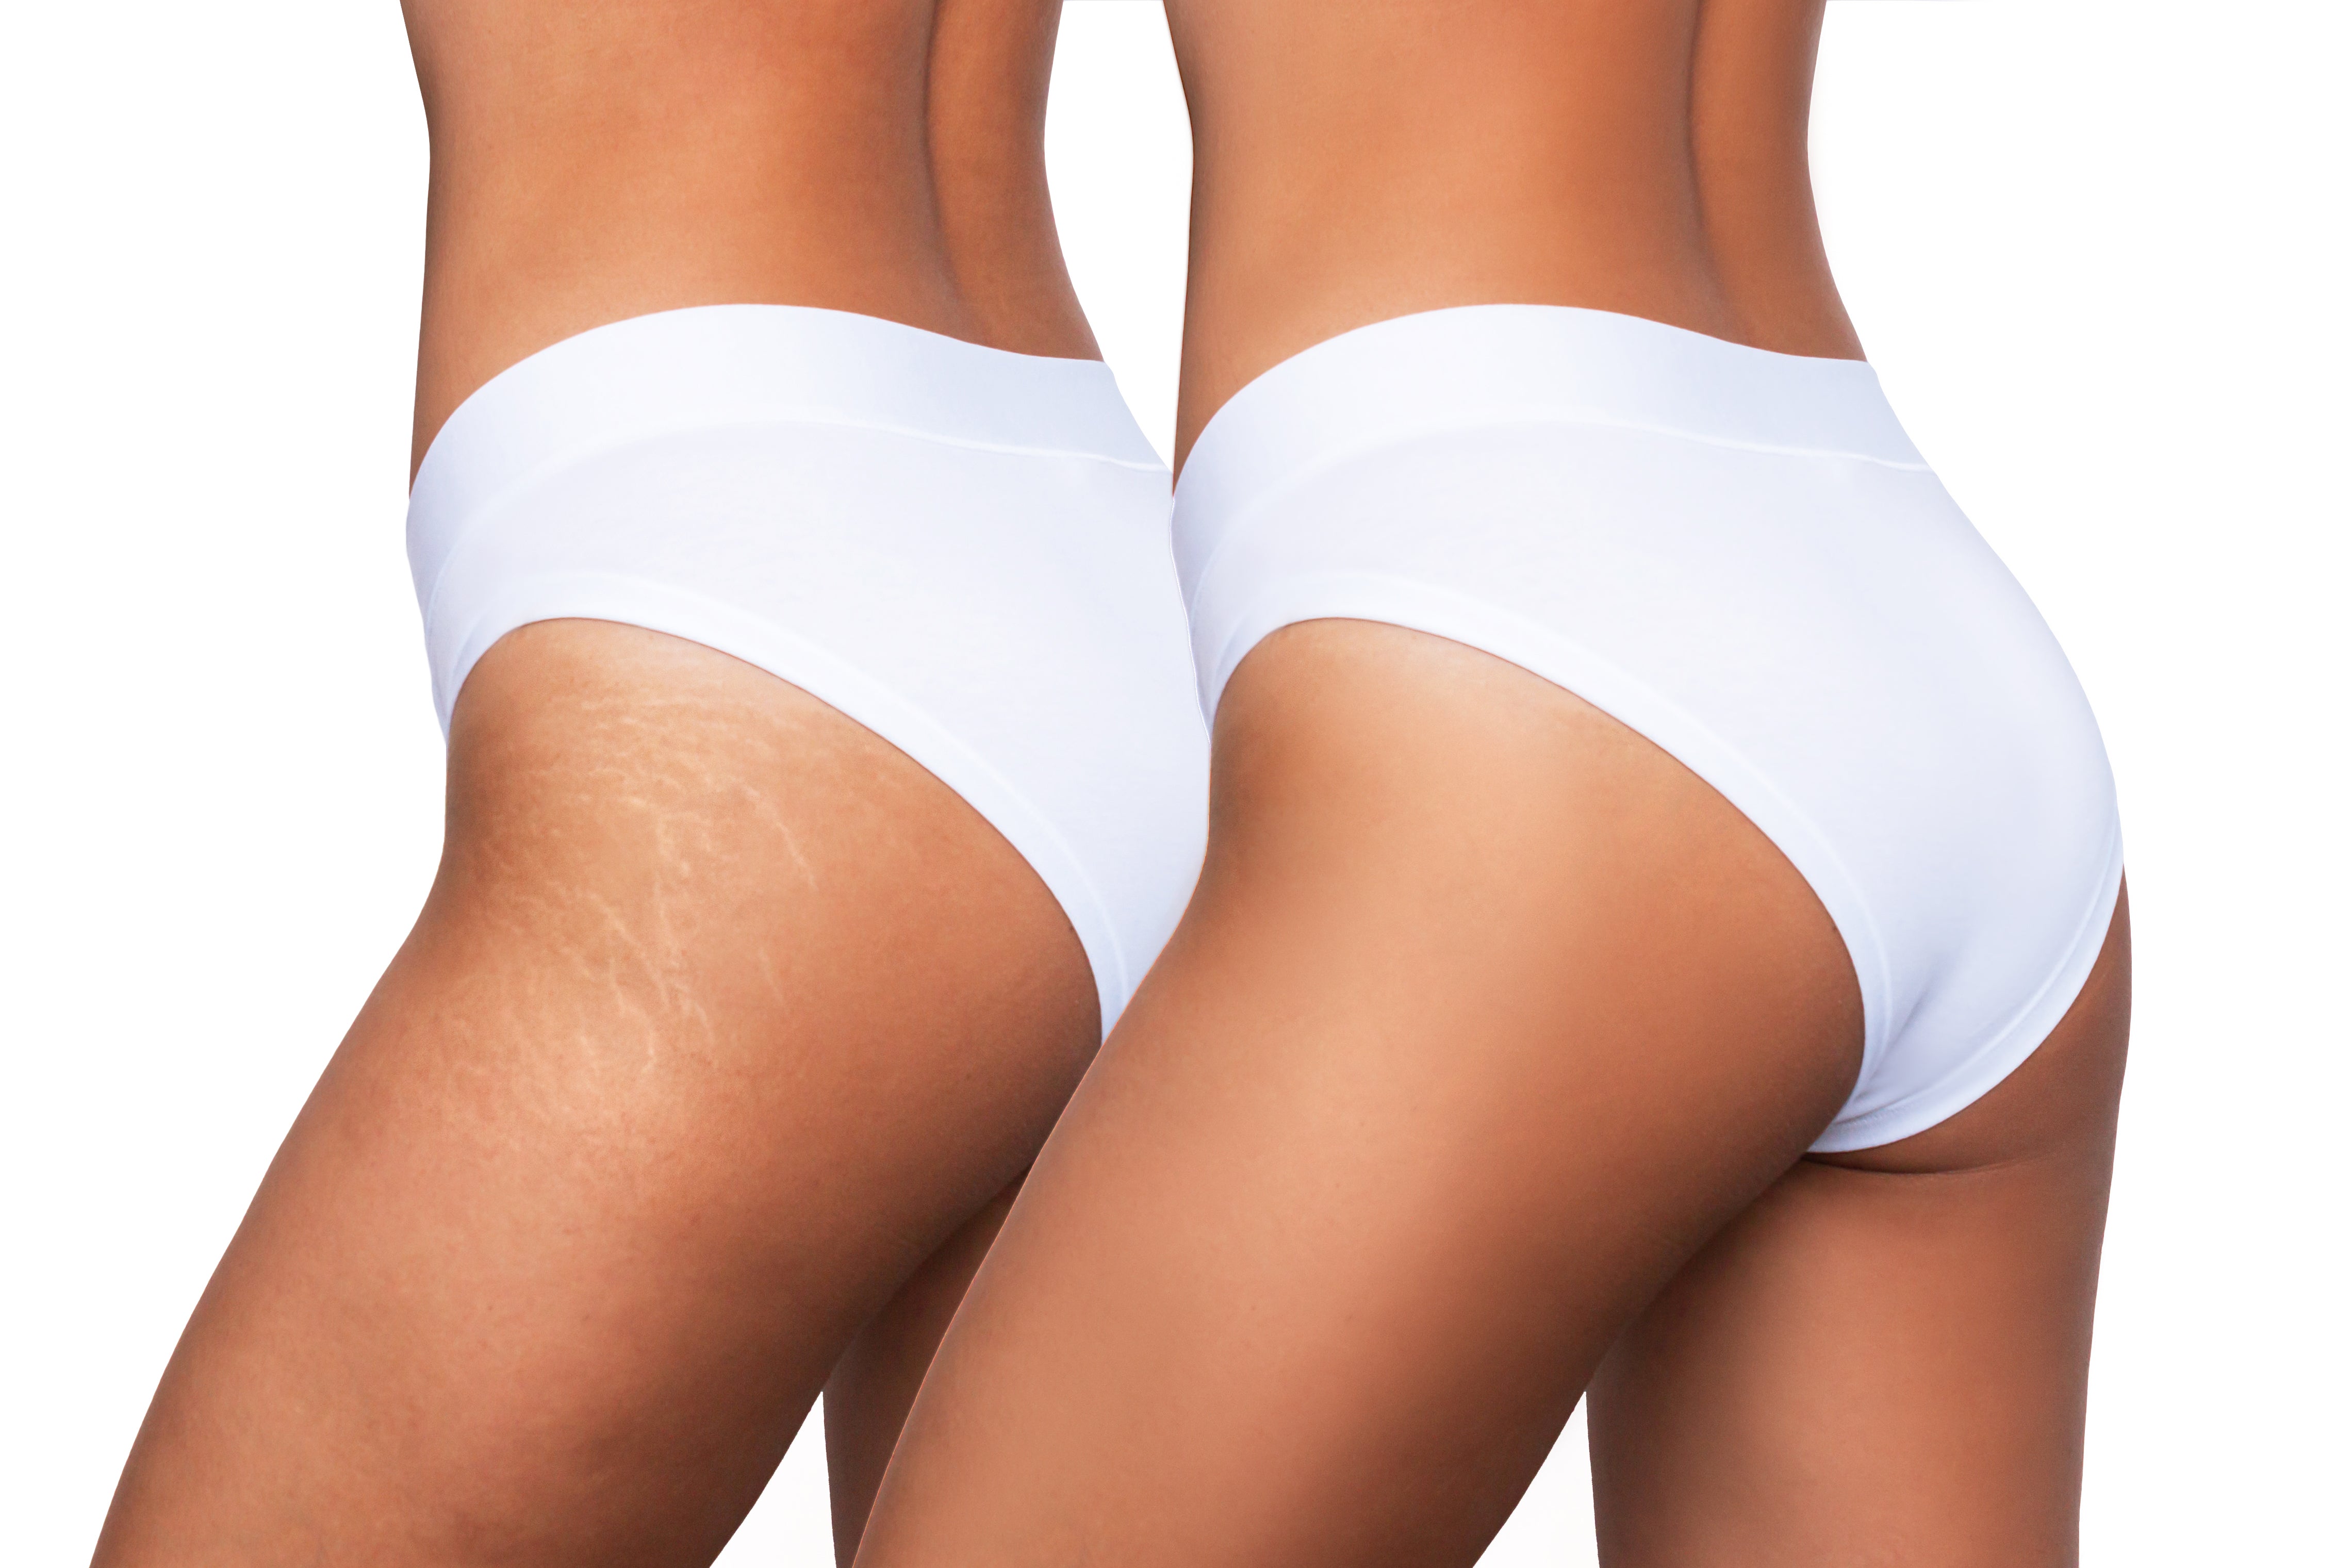
Back acne—or bacne—is more common than most people realize, but it often goes ignored until it becomes painful or leaves marks. At Allodermis, we frequently see patients who’ve tried scrubs, home remedies, or harsh soaps—only to end up with worse inflammation or scarring. Just like facial acne, back acne ranges from blackheads to deep cysts. But the skin on your back behaves differently—so the causes, triggers, and treatment approach must be different too. Understanding what back acne means, and when to see a dermatologist or skin doctor, can help you treat it right from the start. What Causes Back Acne in the First Place? At the core of acne—whether on the face or body—is excess sebum (oil) production. On the back, this oil combines with dead skin and sweat to block pores. This environment becomes a breeding ground for Cutibacterium acnes (formerly P. acnes), leading to inflammation and pus-filled lesions [Dreno et al., 2018]. Triggers for back acne include: Tight clothing or gym wear that traps sweat Friction from backpacks or prolonged sitting Skipping showers after workouts Use of steroids or protein supplements Hot and humid climates Poor exfoliation of thick back skin In some cases, back acne is hormonal—especially in females experiencing simultaneous breakouts on the jawline, chest, or shoulders [Nagler & Orlow, 2014; Poli et al., 2001]. This condition is referred to as truncal acne, and research confirms it is often more persistent than facial acne due to delayed treatment and higher friction exposure [Dreno et al., 2020]. Types of Back Acne: More Than Just a Spot Back acne may appear as: Non-inflammatory lesions: Blackheads and whiteheads (comedones) Inflammatory lesions: Red papules, pustules, nodules, and cysts The thicker skin on your back means breakouts may go unnoticed in early stages, giving them time to worsen. Nodulocystic back acne can cause deeper inflammation and increase the risk of scarring—especially in people with keloid tendencies. How to Prevent and Manage Back Acne Daily For mild back acne, a few lifestyle changes and targeted skincare may help: Use body washes with salicylic acid to exfoliate pores [Bowe & Shalita, 2008] Rotate with benzoyl peroxide-based soaps to reduce bacteria Avoid wearing sweaty clothes for extended periods Shower immediately after workouts or sweating Choose breathable fabrics and avoid tight-fitting gear However, if acne persists for more than a few weeks or becomes painful or infected, it's time to seek professional care from a dermatologist. How to Get Rid of Back Acne Scars Back acne often leaves behind dark marks, pigmentation, or keloid scars. The healing process on the back is slower and often less visible to patients, which can delay treatment. Options for back acne scar treatment include: Chemical peels or body peels Microneedling for textural irregularities Q-Switch laser for pigmentation Steroid injections or cryotherapy for raised scars The choice depends on the scar type—flat, dark, raised, or indented—and your skin’s healing response [Sardana et al., 2017]. What Dermatologists Recommend for Back Acne Treatment Treatment depends on severity and progression: Mild: Salicylic acid or benzoyl peroxide-based cleansers, exfoliants Moderate: Topical retinoids, antibiotic gels, or glycolic acid scrubs Severe/nodulocystic: Oral antibiotics, hormonal treatment (for women), or oral retinoids (like isotretinoin) Scarring acne: In-clinic procedures like lasers, peels, or injectables Back acne is often more chronic than facial acne, with healing taking 4–6 months or longer [Dreno et al., 2020]. That’s why early intervention with the back acne best treatment plan is key. Don’t Ignore Back Acne—Treat It Early Left untreated, back acne can leave long-lasting signs: Post-inflammatory hyperpigmentation (PIH) Keloidal or hypertrophic scars Thickened, bumpy texture If you're wondering how to get rid of back acne scars, the best results come from treating the underlying acne first—and starting scar management early. If over-the-counter options aren't helping, don’t wait. Book a visit with a skin doctor or dermatologist for a personalized solution. Your Skin Deserves Expert Care Back acne isn’t just a cosmetic issue—it reflects deeper skin imbalances, lifestyle factors, or hormonal triggers. A one-size-fits-all approach doesn’t work here. At Allodermis, we offer dermatologist-led treatment plans tailored to your skin type, acne severity, and scar risk. Whether it’s a few stubborn spots or full truncal acne, we help you treat it at the root—safely and effectively. Looking for the back acne best treatment? Book your skin consultation with Allodermis today. Also Read: Retinol Gone Wrong at 20: Why Skincare is Not One-Size-Fits-All References Dreno, B., et al. (2020). Understanding and Management of Truncal Acne: An Expert Opinion. JEADV, 34(S4), 3–14. https://doi.org/10.1111/jdv.16839 Nagler, A.R., Orlow, S.J. (2014). Hormonal Agents in Adolescent Female Acne. J Pediatric Adolescent Gynecology, 27(2), 61–65. https://doi.org/10.1016/j.jpag.2013.11.004 Bowe, W.P., Shalita, A.R. (2008). Effective OTC Acne Treatments: A Review. J Clin Aesthetic Dermatol, 1(4), 32–36. https://www.ncbi.nlm.nih.gov/pmc/articles/PMC3016935/ Poli, F., Dreno, B., Verschoore, M. (2001). Epidemiology of Female Adult Acne. JEADV, 15(6), 541–545. https://doi.org/10.1046/j.1468-3083.2001.00345.x Dreno, B., et al. (2018). Pathophysiology of Acne. Dermato-Endocrinology, 9(1), e1351570. https://doi.org/10.1080/19381980.2017.1351570 Sardana, K., et al. (2017). Management of Acne Vulgaris: Review & Update. Indian J Dermatol, 62(4), 332–340. https://www.ncbi.nlm.nih.gov/pmc/articles/PMC5605214/
Learn more
Hydrating Facial Serums: How to Choose for Plump Skin
Updated on: 2026-05-25 Hydrating facial serums support a comfortable, healthy-looking complexion by delivering water-binding and skin-conditioning ingredients. A well-formulated serum can help strengthen the appearance of the skin barrier while reducing visible dryness. The right routine includes gentle cleansing, consistent application, and thoughtful layering with moisturizers and sunscreen. When you match your serum to your skin type and concerns, results can feel more reliable over time. TLDR Introduction Product Spotlight Step-by-Step How-To Personal Experience Summary & Recommendations Q&A Section About the Author TLDR Hydrating facial serums are lightweight formulas designed to improve comfort and appearance by supporting hydration and barrier function. Choose a serum with humectants such as glycerin or hyaluronic acid, plus soothing barrier-supporting ingredients. Apply on clean, slightly damp skin, then seal with a moisturizer. Finish every morning with sunscreen for consistent daily protection. Introduction Hydration is not only about moisture on the surface. It is also about how well skin holds water and how comfortably it behaves throughout the day. Hydrating facial serums are popular because they deliver targeted hydration in a lightweight texture that usually layers well under moisturizers. This guide explains what to look for, how to use hydrating serums effectively, and how to build an everyday routine that respects your skin type. By the end, you will understand how to select a serum that fits your goals such as dryness, rough texture, or sensitivity. You will also learn practical application steps and how to avoid common routine errors that can reduce results. Product Spotlight When you want a dependable hydration step, focus on formulas that combine water-attracting humectants with calming support. For a simple starting point in a hydration routine, consider a rich facial hydrating lotion to pair with a serum workflow. One option from Cipla Excela hydrating lotion can help you seal in moisture after applying a serum. This approach is useful because many serums deliver hydration first, while a moisturizer helps reduce water loss. Together, these steps can improve comfort, especially when skin feels dry after cleansing or environmental exposure. Hydration layers: mist, droplet, and soft shield icons Hydrating facial serums often work best when paired with an appropriate cleanser. If your cleanser is overly stripping, your serum may not perform as well. You can support a more balanced base by using a gentle cleanser such as Cetaphil Gentle Cleanser. Gentle cleansing reduces the risk of tightness, which makes it easier for hydration ingredients to integrate smoothly into your routine. Step-by-Step How-To Use this method to make your hydrating facial serums feel consistent and effective across seasons. The steps are designed for clarity and repeatability. Cleanse with care. Use a gentle cleanser to remove residue without leaving the skin overly dry. If you wear sunscreen daily, cleansing should be thorough but not harsh. Apply on slightly damp skin. After cleansing, wait briefly, then apply your serum while skin still feels lightly moisturized. This can support even spreading and better hydration comfort. Use the right amount. Apply a thin, even layer. A serum should glide smoothly rather than leave a heavy film. Consistency matters more than over-application. Layer strategically. Follow with a moisturizer to help reduce water loss. If your skin is prone to dryness, a richer moisturizer can improve comfort. Choose morning protection. Apply sunscreen in the morning. Hydration support works best when paired with daily UV protection, especially for sensitive or barrier-stressed skin. Adjust based on skin signals. If skin feels sticky, reduce serum amount or switch to a lighter texture. If skin feels rough or tight, strengthen your moisturizing step. To support daytime hydration and skin comfort, you may also consider a targeted serum that complements your needs. For example, if you are managing acne-prone skin, you can keep your routine lightweight and balance hydration with a non-stripping approach using Acne UV Gel SPF 50 in the morning. This keeps your sun protection step functional without disrupting your hydration layer. If your skin experiences dullness and you want a more comprehensive brightening routine, consider a hydrating approach that does not overwhelm the skin. A serum can provide hydration first, while you keep other actives controlled and spaced out. For an example of a hydration-forward brightening serum category, you may review Brightening Serum to understand how lightweight serums can integrate with moisturizers in daily use. Routine flow: cleanser to serum to moisturizer icons Personal Experience Several years ago, I noticed that my skin looked fine in the morning but felt tight and textured later in the day. I assumed I needed a stronger face cream. After reviewing my routine, I found the real issue was not the moisturizer itself, but the lack of a consistent hydration step immediately after cleansing. My cleanser left a slight dryness, and then I went straight to a heavier product. The skin felt coated, but comfort was not improving. Once I added a hydrating serum step and applied it on slightly damp skin, the texture issue softened. The difference was subtle at first. Within days, my skin felt smoother after washing, and my moisturizer sat more evenly. The largest change was routine clarity: cleanse gently, add hydration, seal with cream, and use sunscreen every morning. This experience matched what many skincare professionals emphasize: hydration works as a system. Serums are the targeted step, but moisturizers and sun protection are what help maintain that hydrated feeling between routines. Summary & Recommendations Hydrating facial serums can be an efficient way to improve comfort, softness, and overall hydration balance. Look for ingredients known for water-binding support, such as humectants and barrier-friendly components. Use them on clean skin while it is still slightly damp, then seal the effect with a moisturizer. For practical routine building, consider these recommendations: Start simple. Choose one reliable serum and pair it with a gentle cleanser and a consistent moisturizer. Layer with intention. Apply hydration first, then moisturize to reduce water loss. Protect daily. Use sunscreen in the morning to maintain skin comfort and reduce the impact of environmental stress. Adjust gradually. Change one variable at a time when you evaluate results. If you want to streamline your hydration routine, you can also explore complementary face-care steps available at Allodermis skin care. Choose products that match your skin profile and use them consistently rather than switching frequently. Q&A Section How often should I use hydrating facial serums? Most people benefit from using a hydrating serum once daily at minimum, often in the morning or evening. If your skin is very dry or climate conditions are harsh, using the serum twice daily can be appropriate. Keep the overall routine simple and adjust only if skin feels sticky or overly heavy. Can hydrating serums be used with other skincare actives? Yes, hydrating serums generally work well as a supportive base. Apply the serum first, then follow with your targeted products in the order you normally use. If you use multiple actives, monitor how your skin reacts, and keep one routine change at a time to maintain clarity. What signs indicate that my serum is not the right fit? If you experience persistent stinging, unusual redness, or a film that feels uncomfortable, the serum may not suit your skin needs. Also consider whether your cleanser is leaving skin too dry or whether your moisturizer is not sealing hydration. Adjusting cleansing and moisturizing often improves results before changing the serum. Should I apply serum before or after moisturizer? In a typical routine, apply the serum first and then apply moisturizer to help lock in hydration. This layering sequence supports comfort and can help reduce the feel of tightness after cleansing. About the Author Skin Care Research Writer Allodermis is focused on evidence-informed guidance for skincare routines, including the role of hydrating facial serums and barrier-friendly hydration strategies. Our expertise covers ingredient function, routine layering, and practical use recommendations for everyday skin care. Thank you for reading, and we hope this guide helps you build a consistent hydration routine with confidence. Disclaimer: This content is for general informational purposes only and does not constitute medical advice. Individual skin needs vary. If you experience irritation or have specific skin conditions, consult a qualified healthcare professional or dermatologist before making changes to your routine.
Learn more
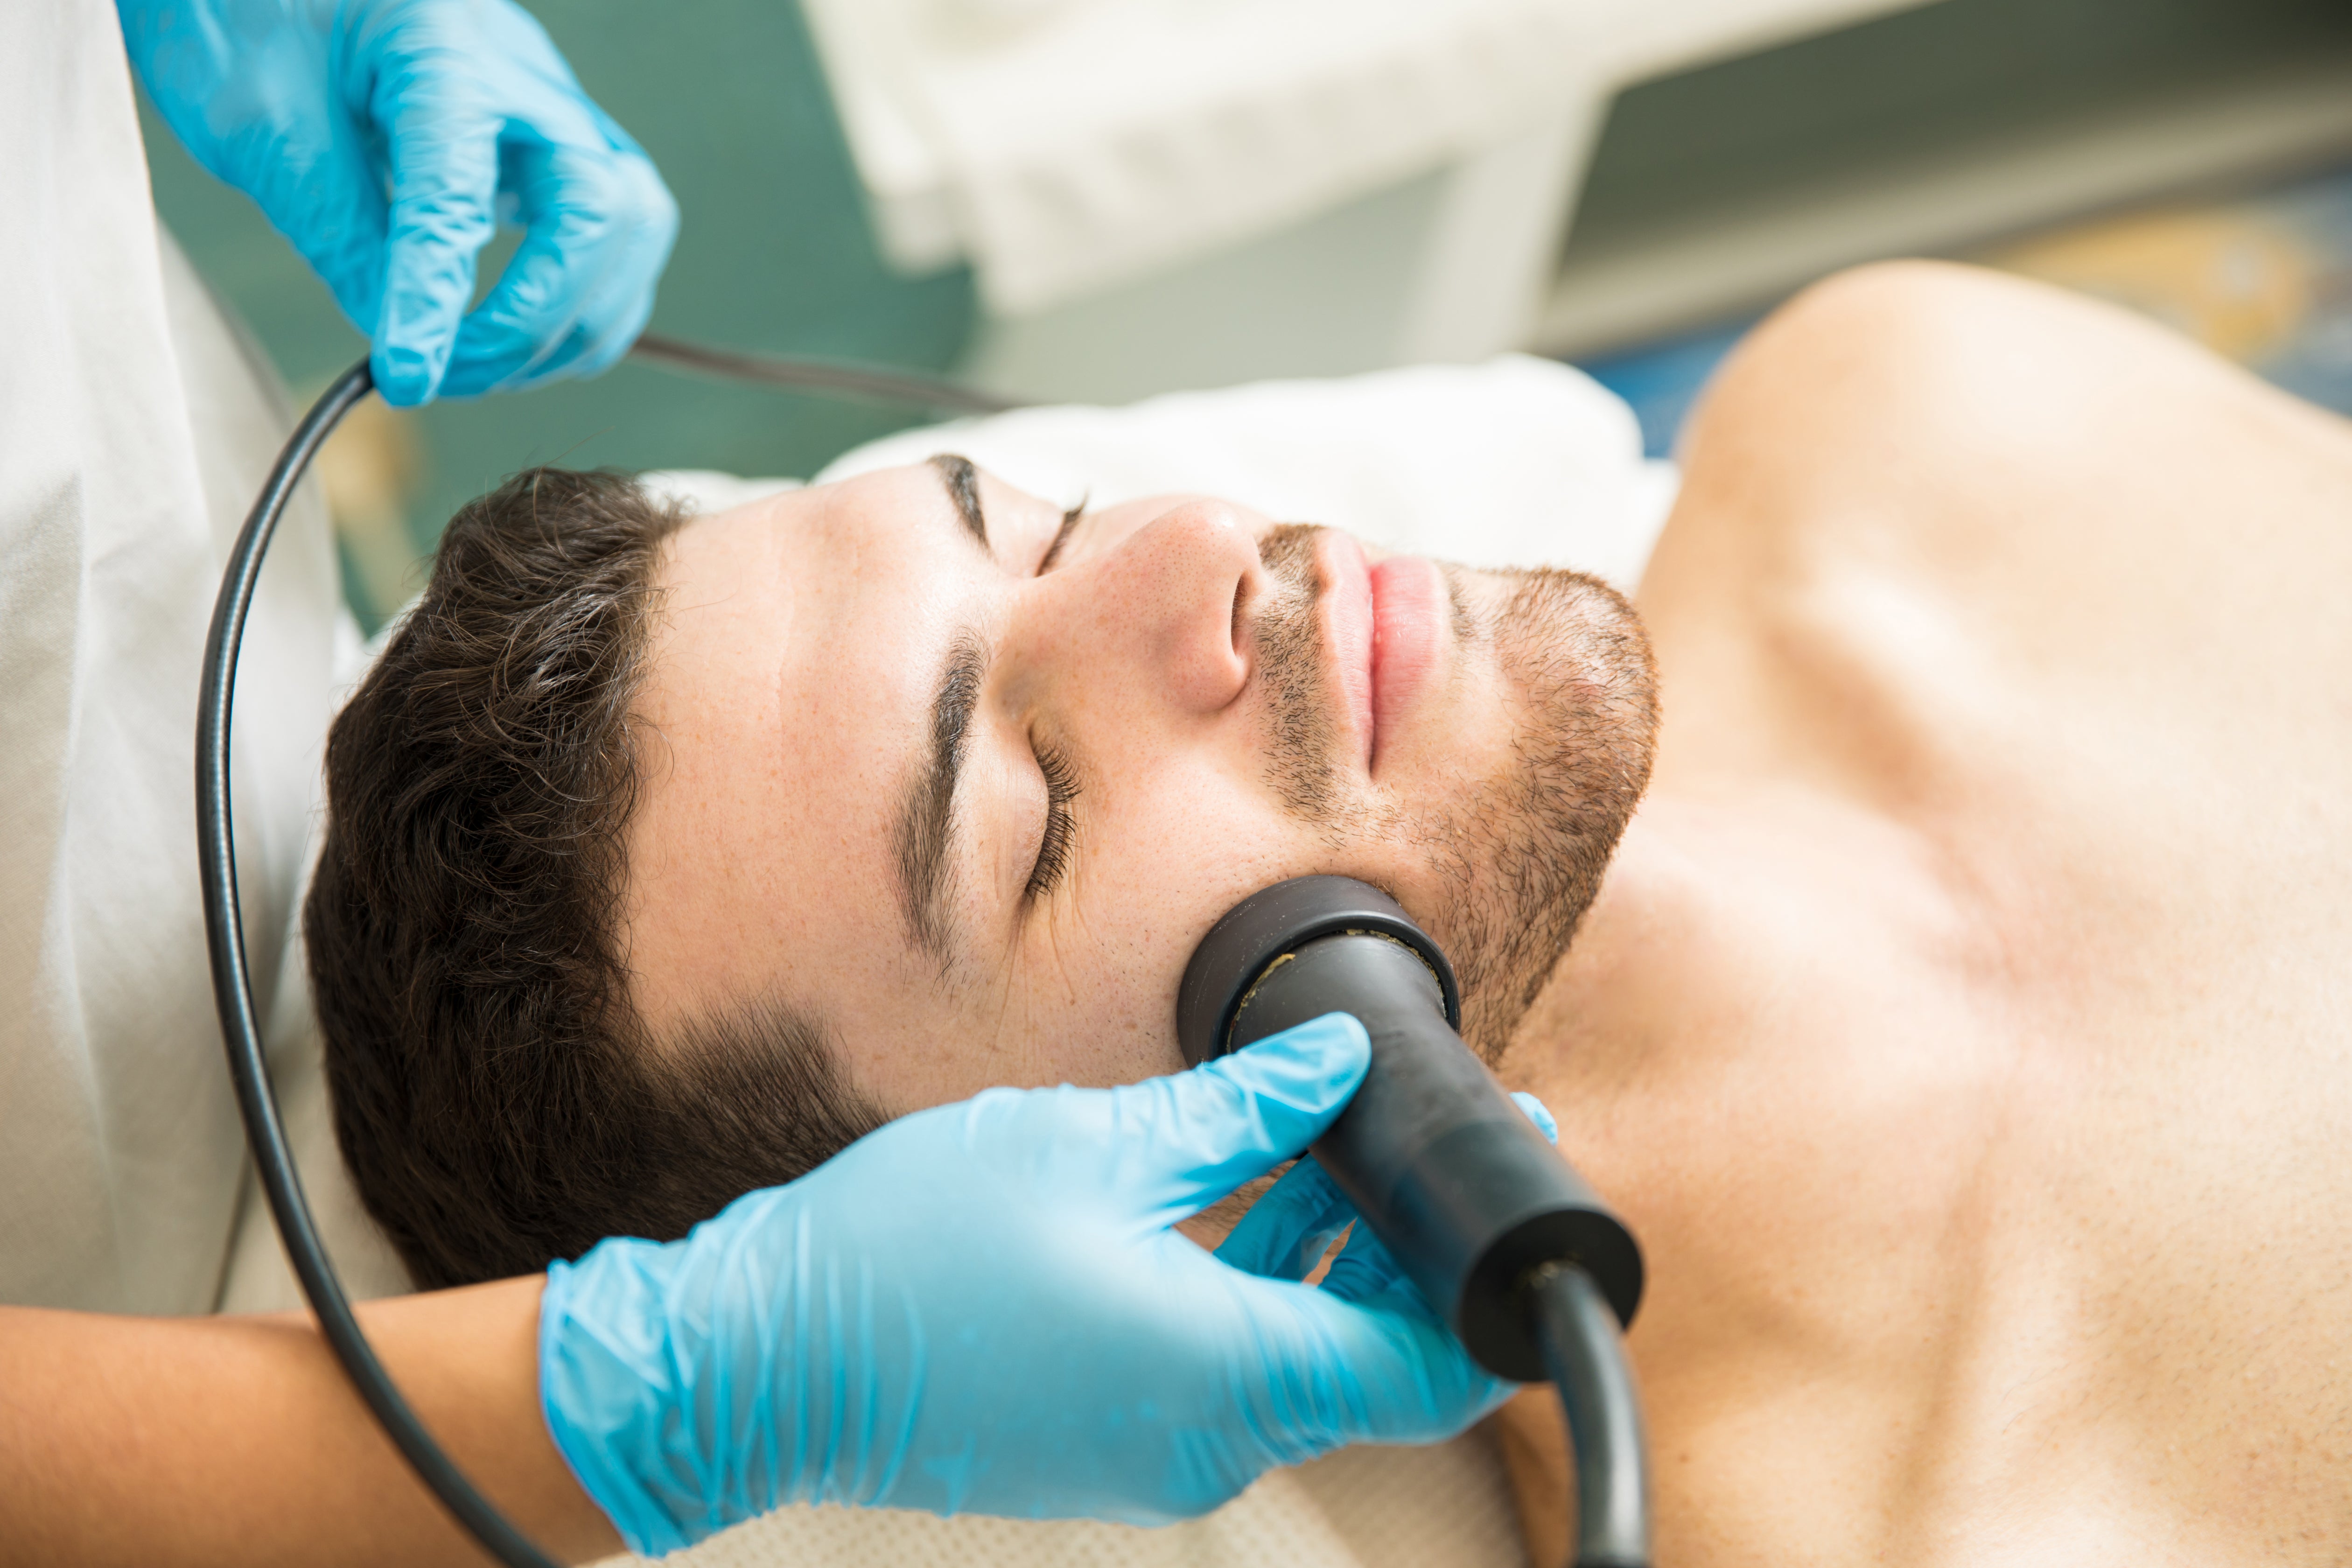
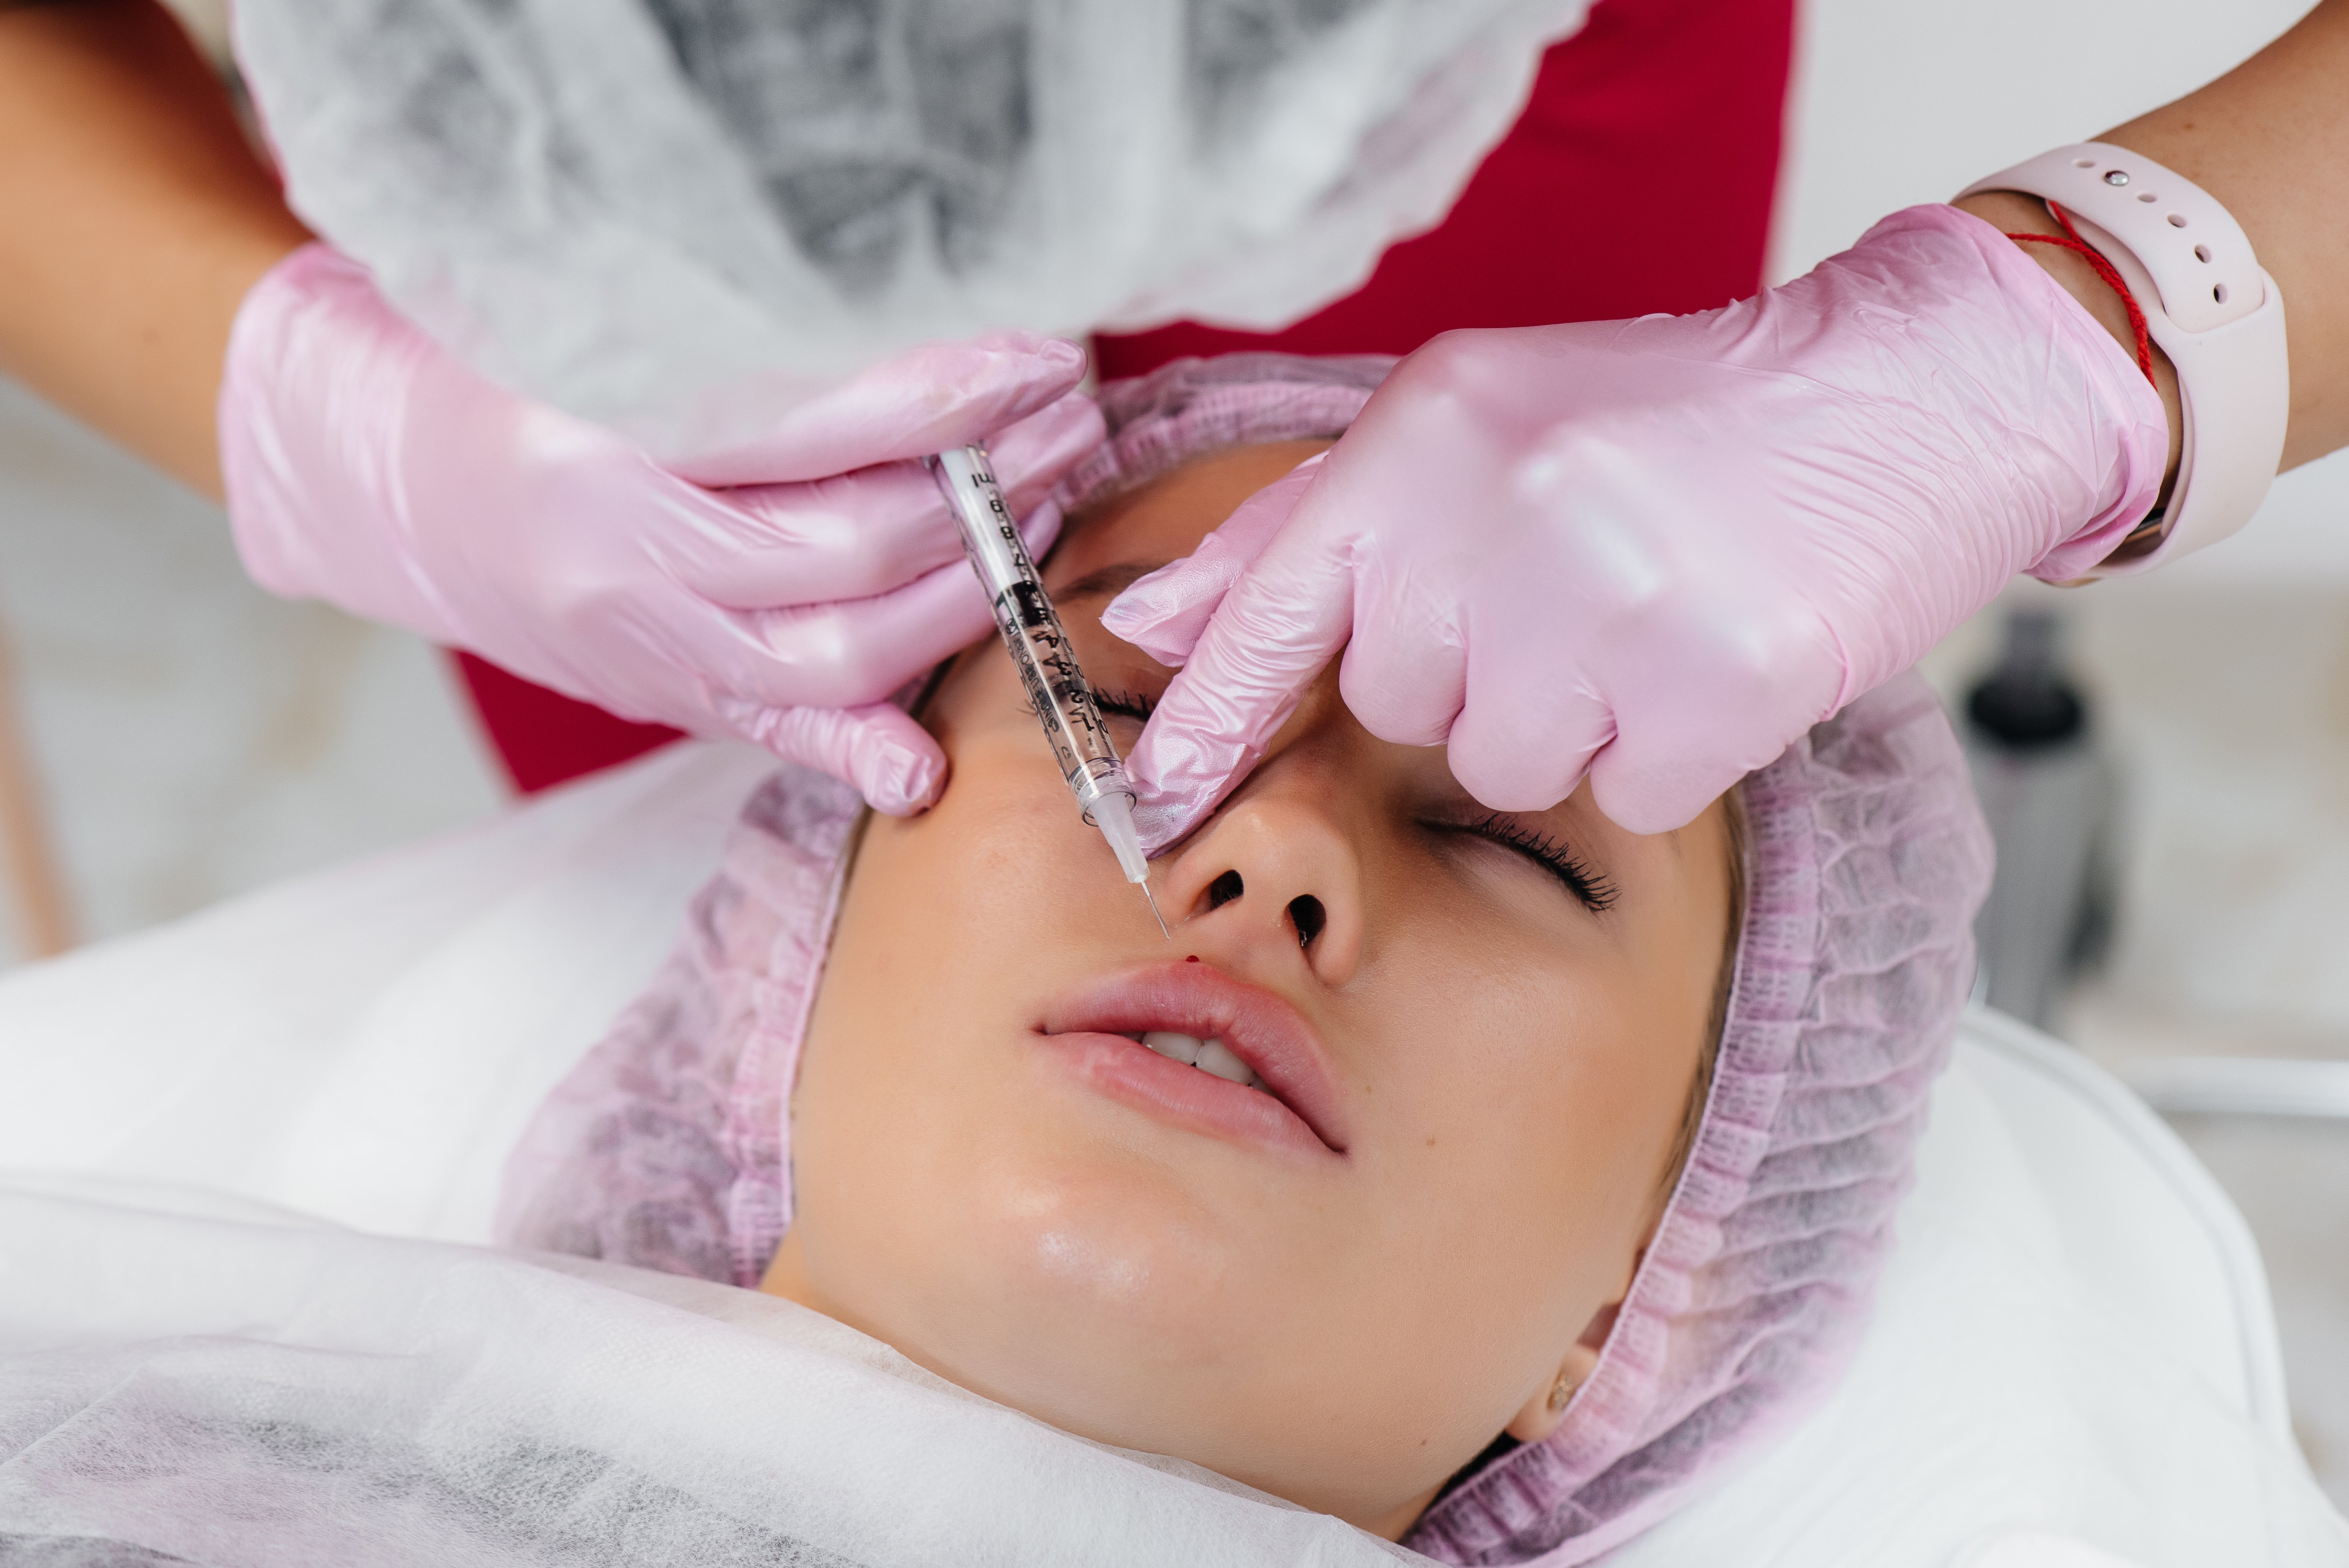
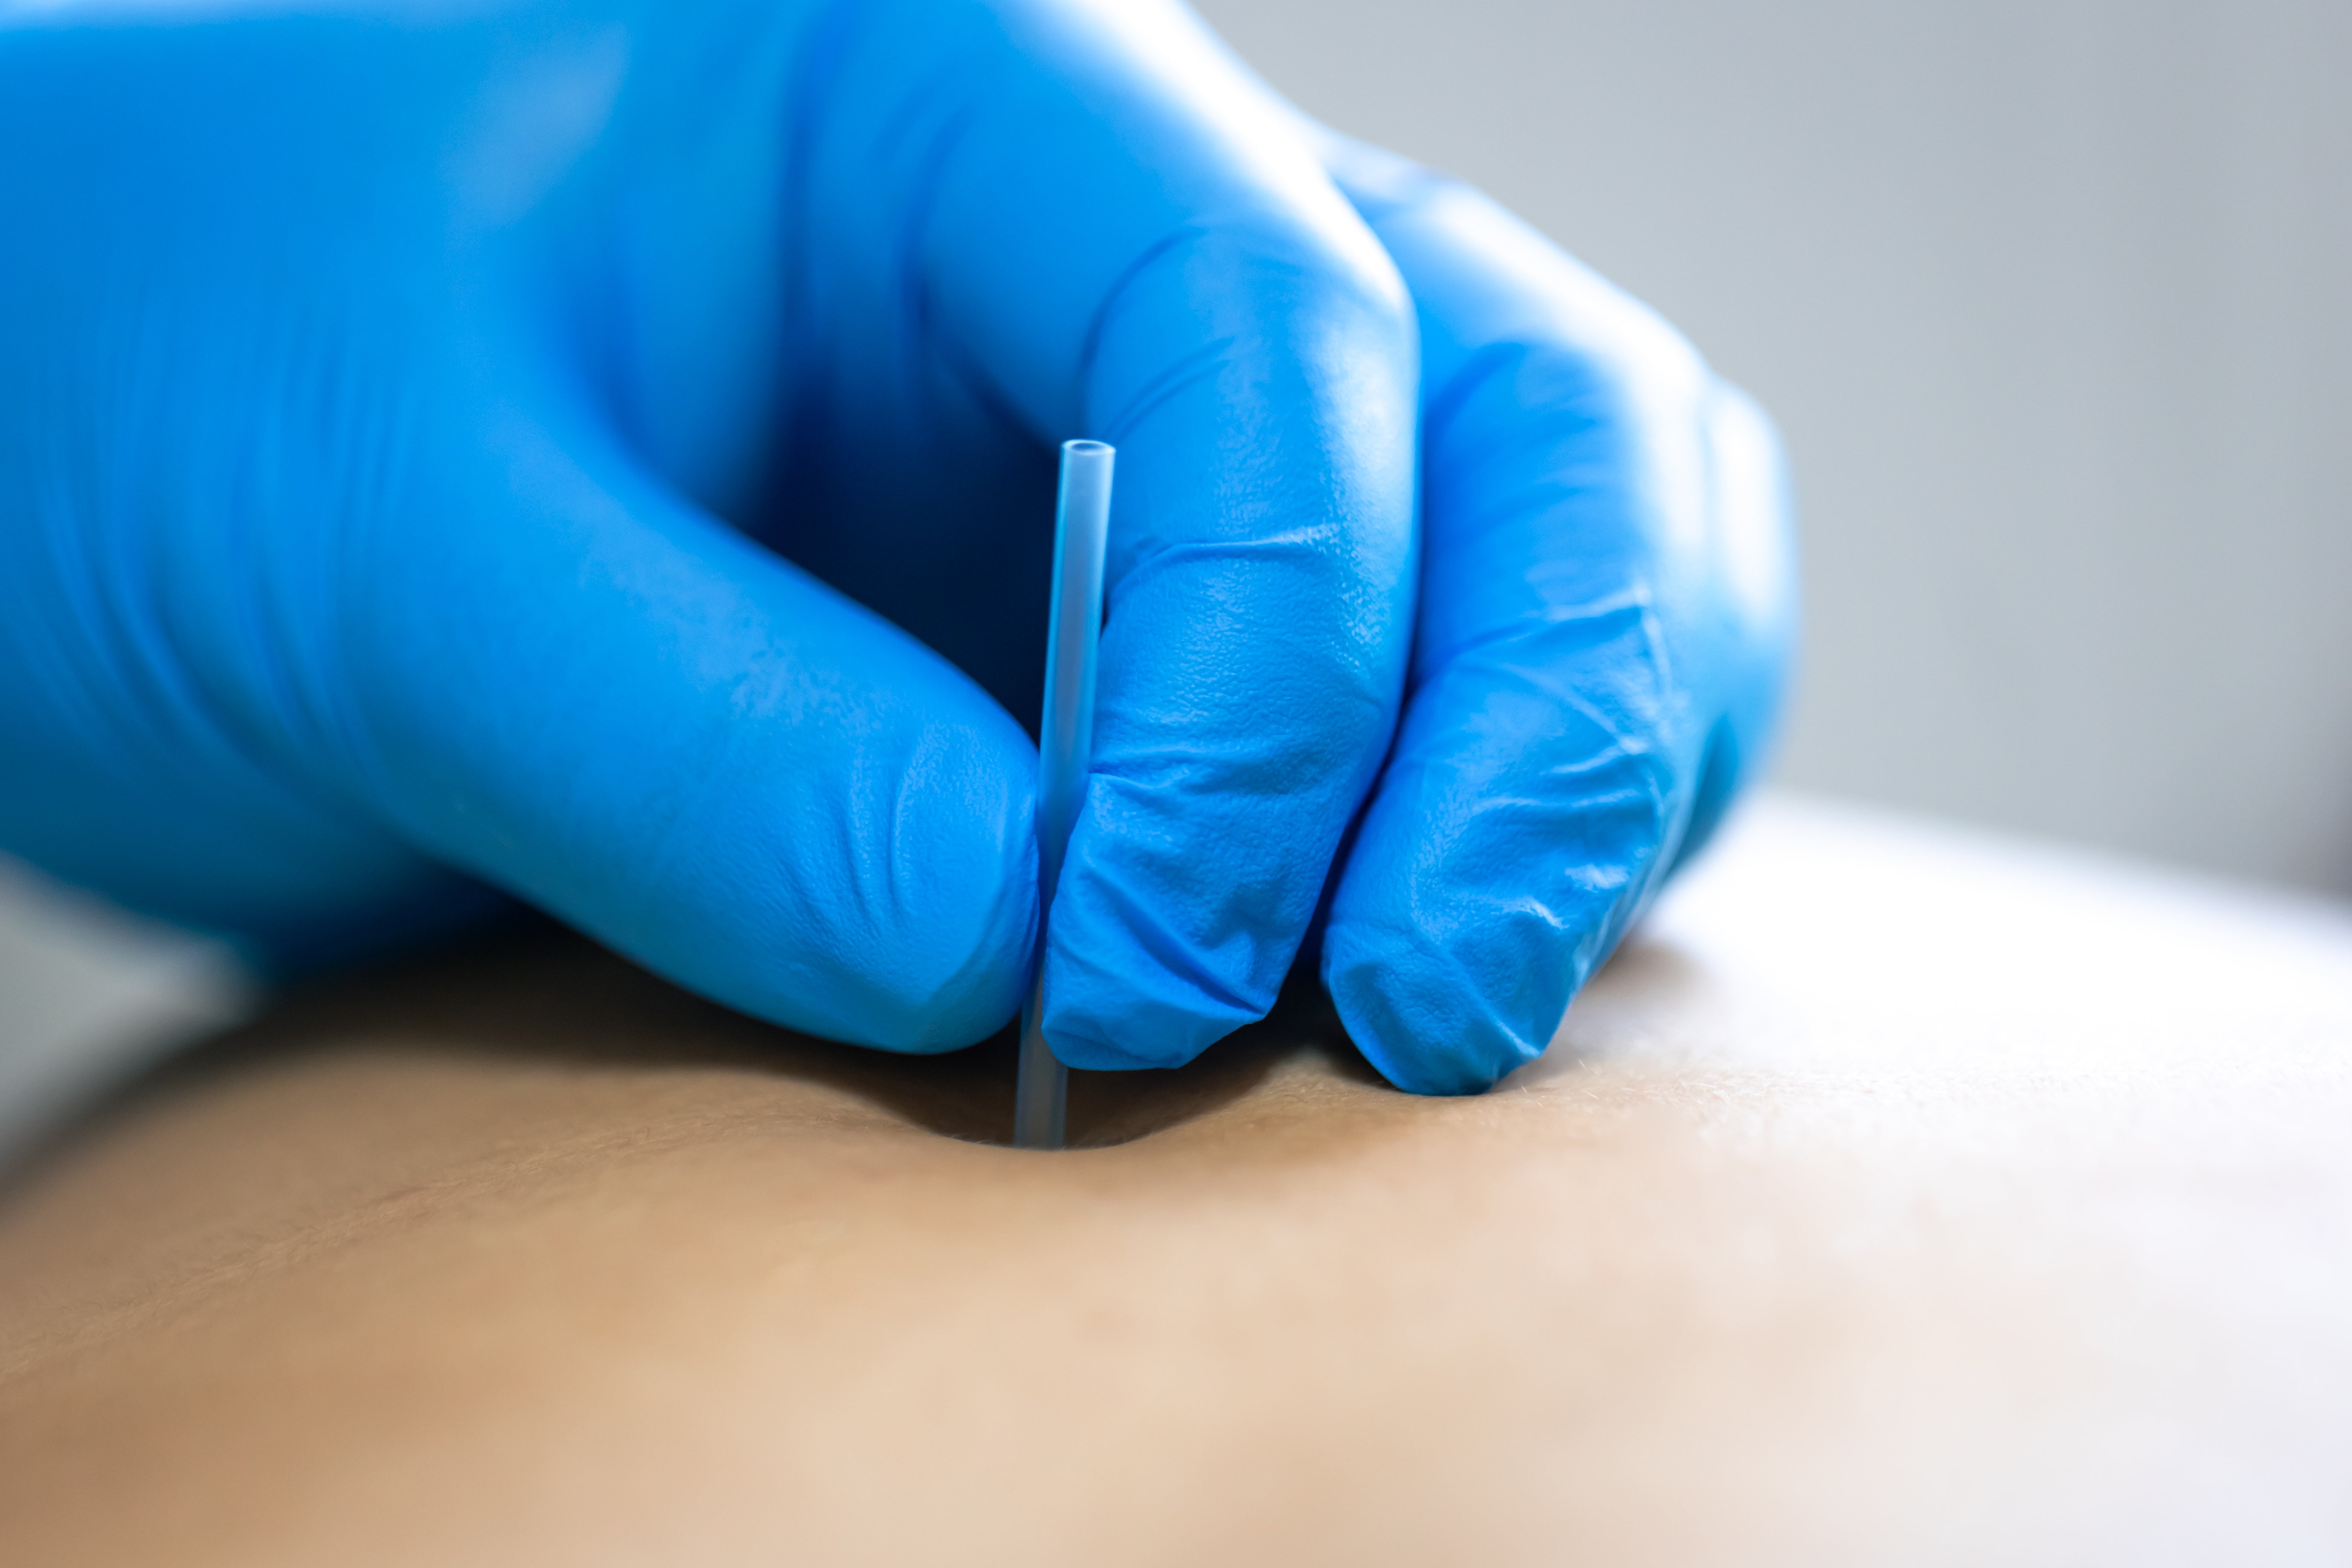
Laser Acne Scar Removal: What to Expect and Results
Updated on: 2026-05-24 Laser acne scar removal is a structured approach to improving the look of acne marks and deeper scars. The best results depend on scar type, skin tone, device choice, and a realistic treatment plan. Pros include targeted energy delivery and gradual texture improvement, while cons include cost, downtime for some sessions, and the need for strict aftercare. This guide explains what to expect, how to prepare, and how to choose a safe, evidence-based path forward. TLDR | Table of Contents | Introduction | Did You Know? | Comparison: Pros & Cons | Buyer’s Checklist | Visual Concept | Final Thoughts & Advice | Visual Concept | Q&A Section | About the Author Laser acne scar removal can improve texture and reduce visible scarring, but outcomes vary by scar type and skin history. A careful evaluation, conservative settings when appropriate, and consistent aftercare are often more important than the device label. Use this guide to compare benefits and trade-offs, verify credentials, and prepare your routine for safer, steadier progress. 1. Introduction 2. Did You Know? 3. Comparison: Pros & Cons 4. Buyer’s Checklist 5. Final Thoughts & Advice 6. Q&A Section 7. About the Author Laser acne scar removal is often discussed as a high-precision option for improving the appearance of acne marks. However, lasting improvement is not only about the laser. It also depends on accurate scar classification, your skin’s baseline behavior, and a conservative, medically supervised treatment plan. In this article, you will learn how laser-based approaches work at a practical level, which factors influence results, and how to make a safe decision that aligns with your goals and routine. Did You Know? “Acne scars” are not one single condition; depressed, raised, and discolored marks each require a different strategy. Skin inflammation history can affect how your skin responds to energy-based treatments, including redness and pigment changes. Good outcomes often come from repeated sessions rather than a single procedure, with progress measured gradually. Sun protection and barrier support can be as important as the device used during treatment. Clinical evaluation should include lighting, palpation, and scar pattern analysis, not only a brief visual check. Scar types shown with simple diagram shapes Comparison: Pros & Cons Pros: Targeted treatment can focus on specific scar characteristics such as texture irregularity or raised tissue. Pros: Many people can see gradual improvement across multiple sessions, which may fit long-term goals. Pros: Treatment parameters can be adjusted based on skin response and scar depth. Cons: Results vary by scar type, severity, and individual healing patterns; no outcome can be guaranteed. Cons: Some approaches may involve temporary redness, swelling, or sensitivity, which affects social plans. Cons: Costs can add up, especially when a plan includes several sessions and follow-up care. Cons: Risk management is critical for darker skin tones or those prone to post-inflammatory pigment changes. Buyer’s Checklist Before choosing laser acne scar removal, treat your decision like a medical-grade project. The goal is not only a procedure, but also a plan that reduces risk and increases the chance of steady improvement. Confirm scar classification: Ask how the clinician will determine whether your concerns are depressed scars, raised scars, or pigmentation-related marks. Verify clinical credentials: Request details about training, experience with acne scarring, and how complications are managed. Discuss device rationale: A responsible provider should explain why a particular wavelength or approach fits your scar type. Set realistic expectations: Ask what improvement looks like for your scar pattern and what would indicate the plan needs adjustment. Review risk factors: Mention any history of keloids, frequent hyperpigmentation, eczema, or recent active acne. Ask about downtime: Understand what you can expect for redness, texture sensitivity, and when makeup or skincare can resume. Request aftercare guidance: A strong plan includes sun protection, gentle cleansing, and barrier support. Plan for skin stability: Consider stabilizing your routine first, so your skin is less reactive during treatment. Evaluate hygiene and protocols: Inquire about skin preparation, eyewear safety, and post-treatment monitoring. Use a consent-based approach: Ensure the provider documents risks, alternatives, and your understanding before any procedure. To support treatment readiness, your daily routine matters. If you cleanse gently and protect skin from ultraviolet exposure, you reduce the chance that irritation will interfere with healing. Consider a mild cleanser such as gentle cleanser to support a stable baseline. For those who need broad-spectrum daily protection, an acne-safe option like daily sunscreen can support post-procedure recovery and help prevent pigment shifts. Understanding how different scars respond Not every scar responds the same way to laser energy. Depressed scars often benefit from approaches that encourage remodeling beneath the surface. Raised scars may require strategies that reduce excessive tissue and vascularity. Discoloration is also distinct; it may improve with targeted treatments, but it can also be strongly influenced by sun exposure and inflammation control. This is why a clinician should start with pattern recognition and then select the least aggressive plan that can still achieve your goals. Final Thoughts & Advice Laser acne scar removal can be a thoughtful option when acne activity is controlled and scar characteristics are clearly assessed. The most reliable path is an evaluation-first approach: identify what you are treating, select parameters that match your skin type, and commit to aftercare that supports healing. If your skin is currently inflamed, it is typically wiser to focus on controlling breakouts first, because active acne can complicate healing and assessment. When you compare clinics, do not rely only on marketing language. Instead, look for transparency about risks, a clear plan for multiple sessions, and a commitment to adjusting treatment if your skin response suggests the need for changes. Also, consider whether your routine supports recovery. Barrier support and sunscreen use can reduce the chance of irritation becoming a secondary problem. If you also use calming, hydration-forward steps, choose them with care. For example, a lightweight option such as facial hydration may help your skin tolerate daily care during the treatment cycle. If you are managing oiliness or congestion that can fuel ongoing acne, consider an appropriate cleanser like oil control wash, used gently and consistently. Timeline symbols for sessions, healing, and sun care How to maintain progress after treatment Aftercare is not a formality. It is a risk-reduction tool. Use sunscreen daily, keep cleansing gentle, and avoid aggressive exfoliation during periods when your skin barrier is still recovering. If you are prone to irritation, introduce changes one at a time and pause active retinoid-like or strong acids if your skin shows persistent sensitivity. A steady routine supports even outcomes and helps your clinician evaluate progress between sessions. Finally, remember that improvements are often gradual. A responsible provider should explain how they will measure changes, such as changes in texture, visibility under varied lighting, and overall skin tone uniformity. If you cannot describe your goals clearly, ask the clinician to help you set measurable expectations based on your specific scar pattern. Q&A Section How many sessions are usually needed for acne scar improvement? Many people require a series rather than a single visit, because tissue remodeling happens gradually. The number of sessions depends on scar depth, the treatment approach selected, your skin response, and whether there are additional concerns such as ongoing acne activity or pigment tendency. Your clinician should provide a plan that includes session spacing, expected progress checkpoints, and criteria for adjusting settings. Is laser acne scar removal suitable for all skin types? Suitability depends on scar type and skin history, especially your tendency toward post-inflammatory pigment changes. A qualified clinician should tailor parameters and may use conservative settings for higher-risk cases. Before treatment, you should disclose prior reactions to procedures, sun sensitivity, and any history of keloids or unusually prolonged redness. A safe decision is based on individualized risk assessment, not a generic device promise. What should I do if my skin becomes more sensitive after treatment? Increased sensitivity can occur during normal healing, but persistent burning, swelling, or unusual discharge requires prompt medical evaluation. In the meantime, prioritize barrier support with gentle cleansing, avoid harsh actives, and follow the aftercare plan provided by your clinician. Strict sun protection is essential because ultraviolet exposure can amplify discoloration. If symptoms escalate, contact your provider instead of continuing routine changes. Can skincare products improve results alongside laser? Skincare can support results by reducing irritation and helping your barrier recover. Products with gentle cleansing and appropriate moisturization can improve tolerance between sessions, and daily sunscreen can help minimize pigment changes. If you incorporate treatment-grade actives, introduce them carefully and only if your clinician advises it for your specific healing stage. About the Author Allodermis is supported by skincare-focused expertise that emphasizes practical routines, evidence-informed decision-making, and consumer education for safer care choices. The author behind this guide brings professional experience in product selection principles and skin health fundamentals, with a focus on clarity and risk awareness. The goal is to help readers approach laser-based options with preparation, realistic expectations, and consistent aftercare. Thank you for reading, and choose an approach that aligns with your skin’s needs. Disclaimer: This article is for educational purposes only and does not provide medical advice, diagnosis, or treatment. Consult a qualified healthcare professional or licensed dermatologist to evaluate your skin, confirm scar type, and determine an appropriate plan for your safety. Individual results vary, and no procedure guarantees specific outcomes.
Learn more
Facial Treatments for Aging: What Actually Works
Updated on: 2026-05-24 Facial treatments for aging can improve the look of skin texture, tone, and firmness. However, results depend on choosing methods that match your skin needs and tolerances. A balanced plan typically combines professional options with a consistent home routine. When you evaluate options carefully, you can reduce common risks such as irritation, uneven pigmentation, and rebound dryness. Table of Contents Introduction How-To Steps Professional Facial Treatments for Aging Home Support for Aging-Focused Facials Sunscreen as the Foundation Visual Guide: Early to Mid Process How to Choose the Right Treatment Plan Visual Guide: Mid to Later Process FAQ Closing Thoughts About the Author Introduction Facial treatments for aging are designed to address visible signs that commonly appear with time, including dullness, loss of definition, uneven tone, and fine lines. Many people begin with facials because they can be structured, guided, and adapted to skin type. Still, not every facial method is ideal for every concern, and not every skin reacts the same way. A thoughtful approach helps you match the treatment style to your goals while protecting your skin barrier. In this guide, you will learn how to evaluate facial treatments for aging in a practical way. You will also see how to pair in-clinic options with supportive home care, including cleansing, hydration, and daily sun protection. The purpose is not to promise instant change. The purpose is to help you build a consistent plan that respects skin biology and long-term outcomes. How-To Steps List your top concerns. Choose up to three: texture, pigmentation, firmness, or hydration. Assess your skin type and sensitivity. Note whether your skin feels tight, looks shiny, or reacts to new products. Identify your triggers. Common examples include harsh cleansing, skipped sunscreen, and over-exfoliation. Select a facial category that targets your concerns. Consider exfoliation for texture, brightening for uneven tone, or firming support through hydration and collagen-supporting routines. Request a patch test when appropriate. This step reduces the chance of irritation from active ingredients. Build a simple home regimen before and after your appointment. Focus on gentle cleansing, targeted hydration, and consistent sunscreen. Track outcomes for several weeks. Use consistent lighting and avoid frequent changes to your routine. Adjust based on tolerance. If skin feels dry or reactive, prioritize barrier support and simplify actives. Professional Facial Treatments for Aging Professional facials vary in technique and intensity. Some emphasize exfoliation and surface renewal, while others focus on hydration, massage, and targeted actives. Many clinics also offer structured protocols that combine steps such as cleansing, preparation, exfoliation, soothing masks, and finishers designed to support barrier recovery. 1) Gentle exfoliation for smoother texture Texture concerns often include roughness, dullness, or the look of enlarged pores. A facial that uses controlled exfoliation can help refine the look of the surface. The best choice depends on skin sensitivity. For reactive skin, you may prefer lower-intensity exfoliation and longer recovery support. For resilient skin, carefully scheduled exfoliation can help skin appear more even. 2) Brightening support for uneven tone Uneven tone can appear as dark spots, post-acne marks, or generalized dullness. Brightening-focused facials typically include steps that help reduce the visual contrast between areas. Consistent sun protection remains essential because pigment problems commonly worsen with ultraviolet exposure. When brightening facials are paired with daily sunscreen, the overall progress often becomes more stable. 3) Hydration-driven firmness support When skin feels dehydrated, it can look less firm and more creased. Facial treatments that emphasize hydration and barrier support can improve the look of plumpness. While hydration is not identical to structural change, well-hydrated skin often appears smoother and more resilient. This is why moisturizing facials and replenishing serums are frequently included in aging-focused plans. 4) Soothing and recovery when skin is sensitive Some aging concerns are paired with compromised comfort, such as stinging, flaking, or redness. In these cases, a facial strategy that prioritizes calming steps may be appropriate. Soothing masks, gentle cleansing, and reduced exfoliation can support recovery. A stable barrier can make later actives more tolerable. Layered skin concept: glow, even tone, calm recovery Home Support for Aging-Focused Facials Home care determines how well your skin maintains the benefits of a facial. A facial can improve the look of skin in the short term, but your daily routine controls long-term consistency. Build your plan around four fundamentals: gentle cleansing, hydration, targeted treatment, and sun protection. Cleanse with low irritation Over-cleansing can strip natural lipids and increase dryness. Choose a gentle cleanser that removes sunscreen and impurities without leaving the skin tight. If you cleanse in the morning, use a small amount and avoid hot water. If you wear heavy sunscreen or makeup, double cleansing may be appropriate, but it should still remain gentle. For a low-irritation approach, consider a gentle cleanser such as Gentle Cleanser. Hydrate and reinforce comfort Hydration is often the most immediate support for facial treatments for aging. Look for moisturizing products that help skin feel flexible and smooth. If your skin is dry, a richer lotion or cream may perform better. If your skin is oily, a lightweight hydrator can reduce tightness without heavy residue. To support a balanced hydration routine, you may explore Hydrating Lotion. Add targeted actives carefully Targeted actives can improve specific concerns such as pigmentation or dullness. Still, facial treatments for aging work best when your home routine and in-clinic steps do not conflict. If your facial includes exfoliation, consider spacing strong home exfoliants so your skin is not overloaded. If you are new to actives, begin slowly and increase frequency only after you confirm tolerance. For brightening-focused support, you may consider Night Brightening Support. Support clarity if acne and aging overlap Some adults experience both uneven tone and acne breakouts. In these situations, a facial plan should address inflammation without aggravating dryness. A consistent routine that includes gentle cleansing and daytime protection can help. If your acne care plan is already established, coordinate your facial timing so you do not irritate skin during peak sensitivity periods. For daytime clarity support, consider SPF 50 Acne UV Gel. Sunscreen as the Foundation Sunscreen is the most important daily step for aging-focused skincare. Even if you choose high-quality facial treatments, ultraviolet exposure can counteract progress by increasing oxidative stress and pigment formation. A consistent sunscreen routine helps protect the benefits of brightening and surface renewal. Many people underuse sunscreen or apply it too late. A simple practice can improve consistency: apply sunscreen as the last step of your morning routine, then reapply if you are outdoors for extended periods. Choose a formula that fits your skin type to support long-term compliance. If you prefer a light texture with strong protection, consider Sunscreen Cream SPF. Visual Guide: Early to Mid Process The early stage of a facial plan is often about creating a clean baseline and supporting comfort. The goal is not to overwhelm the skin. It is to reduce friction, reduce irritation risk, and improve how skin reflects light. In practical terms, this means you should prioritize gentle cleansing, careful hydration, and a measured approach to exfoliation. It also means that your home products should align with your facial schedule. When skin feels stable, subsequent steps such as brightening or texture refinement become easier to tolerate. Clinic-to-home rhythm: cleanse, hydrate, calm, protect How to Choose the Right Treatment Plan Choosing facial treatments for aging is more about fit than about fashion. A suitable plan should match your skin concerns, your lifestyle, and your tolerance level. Use the checklist below to evaluate a clinic or facial service. Evaluate the customization quality Look for a plan that considers your skin type, sensitivity, and current routine. A personalized consultation should identify whether your main concern is texture, uneven tone, dehydration, or loss of definition. It should also address barriers such as frequent irritation or active breakouts. Confirm the ingredient logic Ask how the facial steps are selected. A clear explanation helps you understand whether the routine includes exfoliation, brightening support, and barrier recovery. If your skin is easily irritated, a clinician should be able to scale down intensity and emphasize soothing steps. Review timing and spacing Facials are not a one-time fix. Many people progress best with consistent scheduling and gradual escalation of actives. When you start with strong exfoliation too quickly, skin can become dry and react. A balanced plan often uses spacing that allows the skin barrier to recover. Plan for post-facial behavior The days after a facial matter. Avoid harsh scrubs and reduce additional exfoliation if your facial included resurfacing steps. Keep your routine simple and focus on hydration and sunscreen. If your skin feels sensitive, prioritize calming moisturizers and gentle cleansing. Consider combination strategies Some skin goals require combined approaches. For example, uneven tone may require brightening support plus UV protection. Texture may require exfoliation plus hydration. When these are coordinated, facial treatments for aging can provide more coherent improvements across multiple concerns. Visual Guide: Middle to Later Process As you progress, your routine typically shifts from baseline comfort to targeted refinement. At this stage, you may increase consistency with sunscreen, strengthen hydration, and add carefully chosen actives. Progress is often visible through more uniform tone, fewer rough patches, and improved smoothness. Later-stage planning also emphasizes prevention. This includes maintaining a gentle cleanse, preserving barrier function, and ensuring that brightening steps do not outpace your skin tolerance. Progress map: consistent protection, calm texture, stable tone FAQ What are facial treatments for aging best suited for? Facial treatments for aging are commonly used to improve the visible look of texture, uneven tone, dehydration-related fine lines, and overall radiance. The best match depends on your skin type and priorities, such as brightening, smoothing, or recovery support. How often should I get facials for aging-related concerns? Frequency depends on treatment intensity and your skin tolerance. Many people benefit from scheduled sessions that allow recovery time, along with a stable home routine. A clinician can recommend spacing based on whether your facial includes exfoliation, brightening actives, or barrier-support steps. Can I combine professional facials with home actives? Yes, but the combination should be coordinated. If your facial uses resurfacing methods, you may need to reduce or pause other strong home exfoliants temporarily. When your skin feels comfortable, you can reintroduce actives gradually while maintaining daily sunscreen. What should I do if my skin feels irritated after a facial? Reduce active ingredients and focus on gentle cleansing and barrier-support hydration. Use sunscreen consistently and avoid further exfoliation until discomfort subsides. If irritation is severe or persistent, seek professional guidance. Closing Thoughts Facial treatments for aging can be an effective component of a long-term skincare plan when they are selected with care. Begin by clarifying your primary concerns, choose a treatment approach that matches your skin tolerance, and support the results with gentle cleansing, hydration, and daily sunscreen. With consistent habits and measured adjustments, your skin can look more even, feel more comfortable, and maintain a healthier glow over time. Take the next step by scheduling a consultation and building a routine that supports both your facial sessions and your everyday life. About the Author Section Allodermis is an established skincare brand with a focus on dermatologist-aligned routines and ingredient-focused guidance. Our topic expertise supports aging care foundations such as barrier protection, sun safety, and well-tolerated skincare structure. For additional guidance, review product selections on the brand site and align them with your skin goals. Thank you for choosing evidence-minded skincare planning, and we encourage you to act on a consistent plan rather than seeking quick fixes.
Learn more
Skin Type Analysis: How to Identify Your True Needs
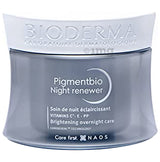
Updated on: 2026-05-23 Skin type analysis helps you choose skincare that fits how your skin behaves day to day. It clarifies whether your skin is oily, dry, combination, or sensitive, and it reveals patterns that products alone cannot explain. When you match routines to your skin’s needs, you reduce guesswork and improve consistency. The result is a simpler regimen, better comfort, and more reliable outcomes over time. 1. What Skin Type Analysis Means 2. Why Skin Type Analysis Matters for Your Routine 3. How-To Guide: Skin Type Analysis in Practice 4. Common Factors That Change Results 5. Turning Results Into a Targeted Routine 6. Common Questions Answered 7. Summary & Next Steps 8. About the Author Skin Type Analysis: A Clear Framework for Better Skincare Skin type analysis is a practical way to observe how your skin produces oil, holds moisture, and reacts to products. Many people assume their skin type is fixed, yet real skin behavior shifts with seasons, sleep, stress, hormones, and cleanser habits. A thoughtful analysis helps you stop using products that fight your skin and start using ingredients that support it. In this guide, skin type analysis focuses on visible signs and consistent patterns. You can use simple at-home observations, then refine the results with patch testing and routine tracking. The goal is not a single label. The goal is a decision tool that guides cleansing, hydration, sun protection, and targeted care. Why Skin Type Analysis Matters for Your Routine Most skincare decisions fail for one reason: the routine does not match the skin’s current needs. When oil production is high, heavy textures can worsen shine and clog the look of pores. When the skin barrier is weakened, even gentle products can feel tight or sting. Skin type analysis reduces this mismatch. There is also a cost and time benefit. A clearer skin profile helps you choose fewer, better-aligned products. It also helps you avoid cycling through multiple cleansers, toners, and serums without a plan. Over time, you improve comfort and tolerance, which supports long-term adherence. Using Observation to Separate Oil From Barrier Issues Oiliness and dryness can appear together. For example, some people have visible shine but also feel roughness or tightness after washing. This often indicates barrier stress rather than true dryness alone. Skin type analysis should therefore include both oil level and hydration comfort, not oil level alone. Split screen of oil sheen and barrier comfort How-To Guide: Skin Type Analysis in Practice This method uses simple steps you can repeat. Use consistent conditions to get reliable results. Choose a day when your skin is not freshly exfoliated, sunburned, or irritated from new products. Step 1: Cleanse and wait for baseline behavior Wash with a gentle cleanser and avoid actives afterward. Wait until your skin returns to its normal feel. Observe how your face looks and feels over the next few hours. Focus on shine, dryness, and sensitivity sensations such as tightness. Step 2: Evaluate oil and shine distribution Look in natural light. Notice where shine appears first. Common patterns include oily in the T-zone, dryness in cheeks, or overall balanced comfort. If shine comes quickly and feels thick, your skin may be oily. If shine is minimal and the skin feels smooth, your skin may be normal. Step 3: Check for dryness signals After a few hours, evaluate texture and comfort. Dry signals include flaking, roughness, and a tight feeling. If your skin feels uncomfortable but still shows some shine, it may be combination with barrier stress. Step 4: Assess sensitivity and reaction speed Consider how your skin reacts to routine changes. If new products regularly cause redness, stinging, or itching, your skin may be sensitive. Track whether the reaction happens quickly or only after repeated use. Step 5: Confirm with a two-week routine test Use a stable, simple regimen and track changes. Record: comfort level, visible shine, and any irritation. If your skin improves with gentle cleansing and consistent hydration, your analysis is likely accurate. If irritation increases, adjust carefully and consider professional guidance. Common Factors That Change Results Skin behavior can vary, so interpret your findings with context. Some variables change oil and sensitivity more than you expect. Season and humidity: Cold weather often increases tightness. Humid weather can increase oil and sweat-related irritation. Water temperature and cleanser strength: Hot water and harsh foaming cleansers can increase dryness and rebound oil. Over-exfoliation: Frequent scrubs and strong acids can damage the barrier and mimic sensitivity. Hormonal shifts: Breakouts and increased oil may occur during hormonal changes. Sun exposure: Sun can worsen visible texture and cause ongoing irritation that influences perceived sensitivity. If your analysis results feel inconsistent, repeat the steps when conditions are stable. Many improvements come from removing the strongest irritants before adding active ingredients. Turning Results Into a Targeted Routine After skin type analysis, build your routine around three priorities: cleansing, hydration and barrier support, and sun protection. Then add targeted care based on concerns such as breakouts, uneven tone, dullness, or redness. 1) Cleansing choices by skin type If you identify oily or combination skin, choose a cleanser that removes excess oil without leaving tightness. For daily use, a gentle cleanser helps maintain comfort and supports a stable barrier. Consider a product such as Gentle Cleansing when you need reliable, non-stripping cleansing. If you identify dry or sensitive skin, prioritize comfort. A gentle, low-foam cleanser often reduces post-wash tightness. If you have acne concerns, cleanse consistently and avoid aggressive cleansing that can intensify dryness. 2) Hydration and barrier support Hydration is not only for dry skin. Many oily and sensitive skin types also need barrier support. Look for lightweight moisturizers with hydrating components and a texture that your skin tolerates. When your skin is sensitive, avoid frequent switching. Consistency helps the barrier recover. For acne-prone skin, consider oil-control support such as Oil Control Foam Wash if it suits your comfort level. For those who want targeted acne care and sun protection in the same routine, use a sunscreen strategy that does not increase greasiness. Layering routine visuals: cleanse, hydrate, protect 3) Sun protection based on comfort and coverage Sun protection is essential regardless of skin type analysis results. The right formula should feel compatible with your skin. If your skin becomes shiny quickly, choose a sunscreen that balances comfort and finish. If your skin stings, you may need a gentler option and careful application. You can also use different products for day and outdoor exposure. For example, Acne UV Gel SPF can be considered for people seeking a lightweight feel. If you prefer proactive daily protection, SPF 50 PA Sunscreen may support consistent wear when comfort is a key factor. 4) Targeted care for common concerns Skin type analysis gives a baseline, but concerns require targeted ingredients. Use one targeted product at a time so you can track cause and effect. Uneven tone and dullness: Consider brightening support using a gentle approach. A product such as Brightening Serum may support a more even look when your skin tolerates it. Moisture and soft hydration: A hydrating lotion like Rich Facial Hydration can help you maintain comfort. Dark spots and visible post-breakout marks: A focused routine using a suitable night renewer can be considered. For example, Night Renewing Care may align with this goal. General antioxidant support: Vitamin C options can be used when tolerated, such as Vitamin C Liposomal Serum. 5) Adjusting when results do not match your label If your skin type analysis suggests oily skin but your face feels tight and looks dull, consider barrier stress rather than changing only cleanser or moisturizer. Start by reducing actives and using a gentler routine for a short period. Then reintroduce targeted products gradually. If your skin type analysis suggests dryness but you still experience breakouts, use a plan that manages both hydration and pore appearance. In such cases, a balance of cleansing and lightweight hydration can help prevent both over-drying and congestion. For any regimen, patch testing is a conservative and responsible step when trying new ingredients. Stop use if irritation persists. Common Questions Answered How often should I repeat skin type analysis? Repeat skin type analysis whenever seasonal changes occur, when you change your cleanser, or when your routine starts causing new discomfort. A practical approach is to re-check after major weather shifts or after two to four weeks of routine adjustments. Can my skin type analysis results change over time? Yes. Skin type analysis results can shift due to hormones, stress, sleep quality, sun exposure, and product tolerance. Barrier condition also changes. A well-designed routine can improve comfort and reduce the effects of sensitivity, which can make skin appear different than before. What is the best first routine if I am not sure about my skin type? Start with a gentle cleanser, a compatible moisturizer, and daily sun protection. Keep the routine stable for two weeks. Once your skin comfort is stable, add one targeted product based on your main concern such as dullness or uneven tone. How do I tell the difference between oily skin and dehydration? Oily skin often shows shine while still feeling comfortable. Dehydration can cause tightness, rough texture, or flaking even when some shine is present. If you notice discomfort soon after cleansing, dehydration and barrier stress may be involved. Summary & Next Steps Skin type analysis is a reliable method for choosing skincare that fits your skin’s behavior rather than relying on assumptions. By observing oil distribution, hydration comfort, and sensitivity patterns, you can build a routine that is simpler and more consistent. Then you can add targeted care once your baseline comfort improves. With stable habits and careful product selection, your skincare decisions become easier and more effective. Next, repeat the analysis under steady conditions, refine your cleanser choice, and select sun protection that you can tolerate daily. If you want to support your routine with consistent daily care, consider reviewing your current cleanser and hydration options and choose formulas that match your observed needs. For readers who want practical guidance on daily cleansing and product compatibility, explore available options on Allodermis and compare textures and finish across routines. About the Author Allodermis is supported by skincare specialists and informed by evidence-based ingredient education. Expertise focuses on helping customers interpret skin behavior, build balanced routines, and maintain daily sun protection with consistent comfort. The team encourages careful observations, conservative patch testing, and gradual upgrades to targeted care. Thank you for reading, and best wishes for a routine that supports your skin with clarity and confidence. Disclaimer: This article is for general educational purposes and does not replace professional medical or dermatological advice. Results vary by individual skin conditions, product tolerance, and environmental factors. If you experience persistent irritation, worsening symptoms, or severe adverse reactions, discontinue use and seek guidance from a qualified healthcare professional.
Learn more
Best Acne Treatment Solutions for Clearer Skin
Updated on: 2026-05-23 Acne often has more than one cause, so a single product rarely solves every issue. The best acne treatment solutions combine gentle cleansing, targeted actives, and smart routines. You can reduce breakouts by avoiding common triggers, using the right strength, and giving treatments enough time to work. This guide explains how to build an evidence-informed routine and how to choose options for different acne types. Summary Common Mistakes to Avoid Pros & Cons Analysis Quick Tips Wrap-Up & Key Insights Q&A Section About the Author Acne Treatment Solutions: A Clear, Routine-Based Approach Choosing acne treatment solutions can feel overwhelming because acne presents in many forms. Some breakouts are caused by clogged pores, others by inflammation, and many involve a mix of oil balance and skin irritation. In this post, you will learn how to select a routine that matches your acne type, how to avoid routine errors that worsen irritation, and how to evaluate treatments with realistic expectations. The goal is not only to reduce visible spots. A strong plan also supports barrier health, improves tolerance, and helps prevent new breakouts. You will also see practical ways to combine cleansing, active ingredients, and daily protection for more consistent results. Common Mistakes to Avoid Many people treat acne like a one-step problem. This often leads to irritation, peeling, and a cycle of worsening inflammation. Acne routines work best when you focus on skin tolerance and a logical order of steps. Over-cleansing or aggressive scrubbing: Frequent washing and rough exfoliation can disrupt the skin barrier and increase sensitivity. Skipping sunscreen: Daily sun protection helps limit dark marks that can linger after acne clears. Using too many strong actives at once: Layering multiple acids or harsh formulas may cause redness and dryness, reducing adherence. Changing products too quickly: Many acne treatments require consistent use before you can judge results. Neglecting moisturizer: Even oily skin benefits from lightweight hydration that supports the skin barrier. Ignoring non-acne triggers: Hair products, friction, and certain makeup habits can contribute to clogged pores for some people. Simple steps diagram: cleanse, treat, moisturize, protect Pros & Cons Analysis Not every acne treatment solution is right for every skin type. The most useful way to choose is to consider your acne pattern, your tolerance level, and your daily habits. Below is an objective pros and cons comparison of common routine categories. 1) Gentle cleansing and barrier support Pros: Helps remove surface oil and residue without stripping. Reduces irritation that can follow stronger actives. Cons: Cleansing alone rarely clears active acne. It mainly improves conditions for other treatments. For daily cleansing, a non-stripping cleanser can support a stable baseline. If you want a gentle option, you may consider: gentle facial cleanser. 2) Oil control and breakout-focused actives Pros: Can reduce clogged pores and support smoother texture when used consistently. Cons: Some formulas can be drying. If used incorrectly, they can trigger redness and rebound sensitivity. If you prefer a daily foam wash style for oil control, you may compare options such as oil control foam wash. 3) Hydration that tolerates acne routines Pros: Improves comfort and consistency. Lightweight hydration can reduce the temptation to stop treatment due to dryness. Cons: Some heavier textures may feel occlusive for certain users, especially during hot and humid seasons. A balanced hydrating layer can make active ingredients easier to maintain. One example of a hydrating lotion option is facial hydrating lotion. 4) Targeted spot and leave-on treatments Pros: Leave-on formulas can deliver actives directly to affected areas. They can be easier to use consistently than complex multi-step routines. Cons: Over-application may increase irritation. Some users may need a gradual start. For acne-related concerns, many people explore products such as proactive serum to support daily skin clarity. 5) Sun protection for acne marks and overall skin health Pros: Helps reduce the risk of dark marks becoming more noticeable. Supports daily consistency. Cons: Some sunscreens can feel heavy or pill under certain moisturizers. Choosing a compatible texture helps. For a face sunscreen with acne-friendly priorities, consider acne UV gel sunscreen or a daily cream option such as shadow sunscreen cream. Routine timeline with gentle ramp-up and sunscreen daily Quick Tips Use these practical steps to design acne treatment solutions that are both effective and sustainable. These are general routine principles that apply across common acne types. Start with a simple base: Choose one gentle cleanser, one moisturizer, and one targeted active. Avoid adding five products at once. Introduce actives slowly: Begin with treatment use a few times per week, then increase frequency as your skin tolerates it. Apply in the correct order: Cleanse, treat, then moisturize. Finish with sunscreen in the morning. Track changes: Note what improves and what irritates. Consistency matters more than rapid switching. Choose sunscreen daily: It supports clearer long-term appearance by limiting the contrast of post-breakout marks. Use the right texture for your skin type: If you are oily, choose lightweight hydration. If you are dry, prioritize barrier-friendly moisture. Be cautious with harsh exfoliation: If you already use targeted actives, avoid frequent scrubs that increase irritation. Support compliance: A routine that fits your schedule is more likely to be followed consistently. Suggested routine framework for different acne patterns Below are non-prescriptive frameworks. They help you decide what to prioritize, not what to buy. For clogged pores and blackheads Prioritize cleansing that removes excess oil. Choose a leave-on active approach that targets pore congestion. Maintain hydration so treatment feels tolerable. For inflamed acne and visible redness Use gentle cleansing and reduce friction. Introduce active ingredients gradually to limit irritation-driven flare-ups. Use sunscreen consistently to prevent darkening of marks. For post-breakout marks and uneven tone Keep a reliable morning sunscreen routine. Support hydration and barrier stability. Use targeted ingredients as part of a long-term plan, not a one-time fix. If you are also focused on brightening and overall clarity, you may explore options such as night renewer or a foaming face wash like foaming face wash. These choices should be evaluated based on your sensitivity and current routine steps. Wrap-Up & Key Insights Acne treatment solutions work best when you treat acne as a skin-system issue rather than a single-product problem. A strong routine balances cleansing, targeted actives, moisturizer support, and daily sun protection. You reduce the risk of irritation by avoiding overuse, introducing changes gradually, and staying consistent long enough to evaluate results. If you want a structured starting point, build your routine around gentle baseline care and one targeted step at a time. Then refine based on how your skin responds, not based on short-term fluctuations. For additional product guidance, browse relevant options on Allodermis and select based on your skin goals and tolerance. Q&A Section How do I choose the right acne treatment solutions for my skin type? Start by identifying your dominant concern: clogged pores, inflamed breakouts, or post-breakout marks. Then select one gentle cleanser, one moisturizer that feels comfortable, and one targeted leave-on active. If your skin is sensitive, introduce the active step slowly and avoid combining multiple strong ingredients at the same time. Is it better to use multiple acne actives together or one at a time? In most cases, starting with one active at a time is more sustainable. Combining several strong treatments can increase redness and dryness, which may lead to inconsistent use. A gradual ramp-up supports skin tolerance and helps you determine which ingredient is most helpful. How long should I wait before judging whether a treatment works? Evaluation should be based on consistent use rather than daily changes. Acne routines often require time for clogged pores to clear and for inflammation to calm. If irritation is severe, adjust frequency and consider simplifying your routine rather than immediately replacing everything. What should I do if my acne worsens after starting a routine? Short-term worsening can occur when skin adapts or when irritation is triggered. Reassess cleansing harshness, reduce active frequency, and confirm that moisturizer and sunscreen are part of your daily routine. If worsening is persistent or severe, consider seeking medical guidance from a qualified clinician. About the Author Allodermis is a skincare-focused organization with expertise in helping people select practical routines for acne-prone and sensitive skin. This post reflects a routine-based approach grounded in skin barrier principles, ingredient compatibility, and daily consistency. The team is committed to clear guidance that supports informed choices, and your next step can be building a simple plan you can follow. Thank you for reading. Disclaimer: This article is for general educational purposes only and does not replace professional medical advice. Acne is a medical condition for some people. If you have severe acne, pain, scarring, or signs of infection, consult a qualified healthcare professional for individualized guidance.
Learn more
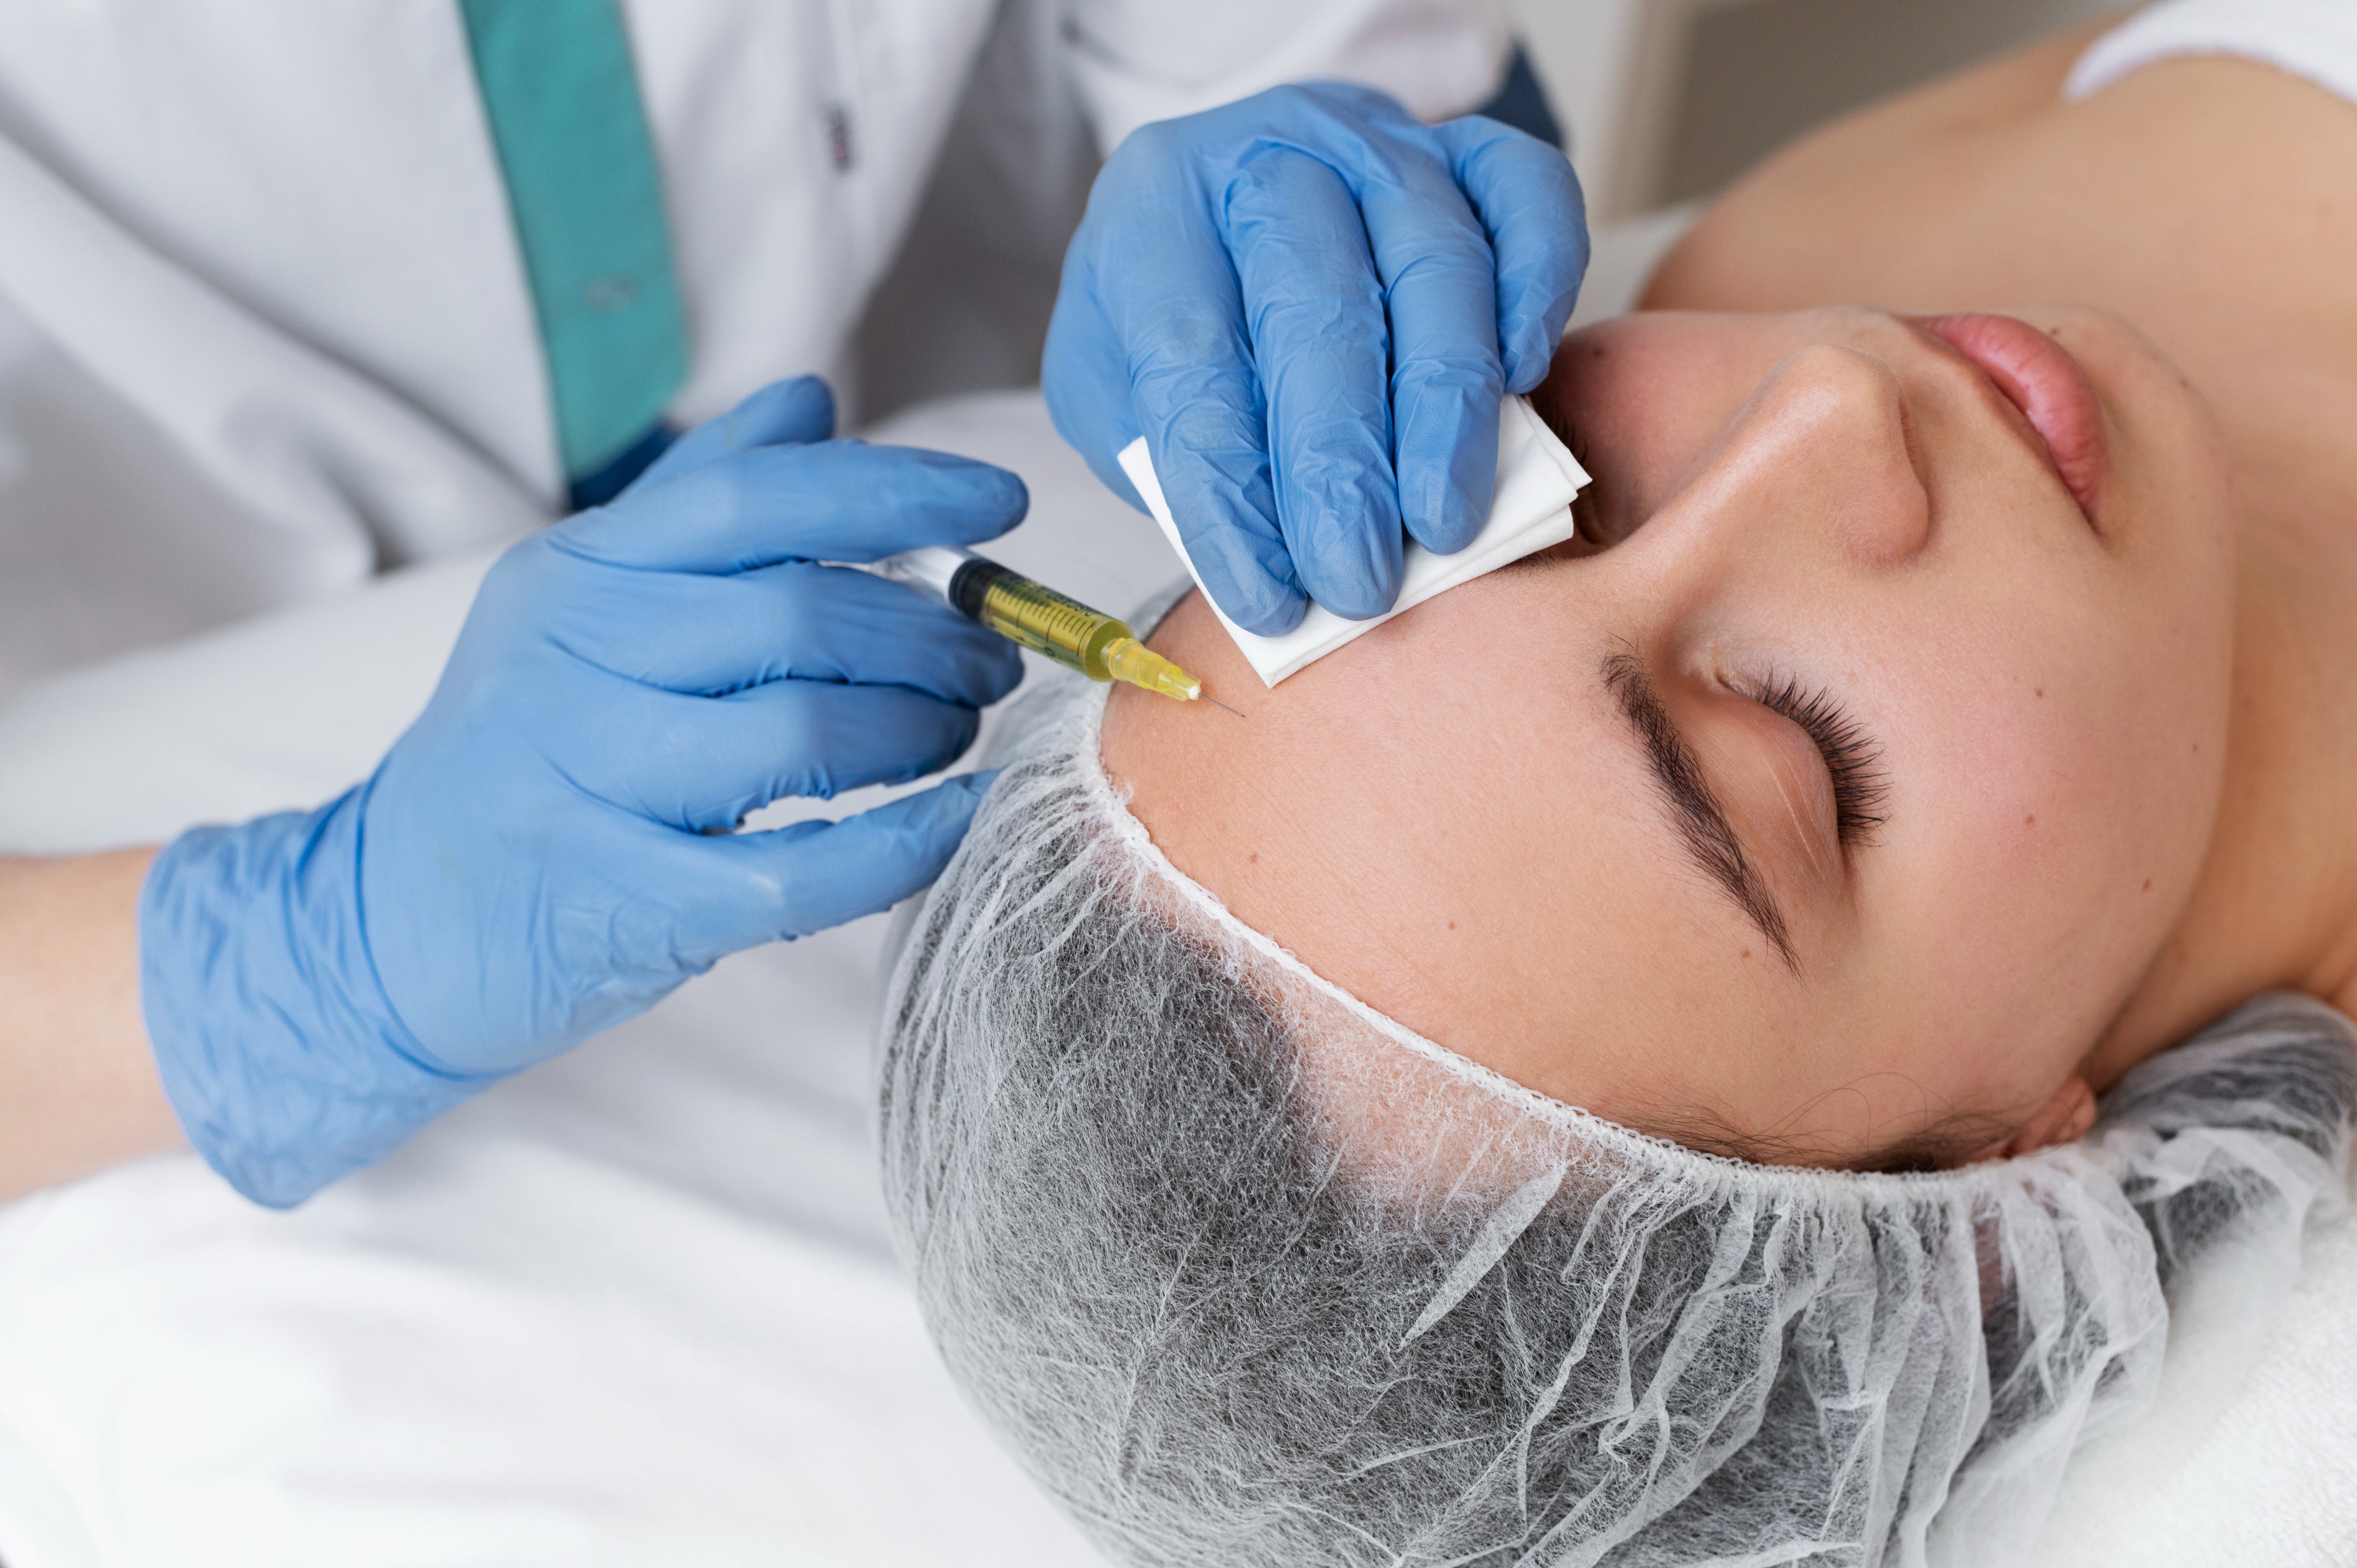
PRP Therapy for Hair Loss: What to Expect and Results
Updated on: 2026-05-22 PRP therapy for hair loss is a clinic-based procedure that uses your own blood components to support hair health. It is often discussed for androgenetic alopecia and thinning hair, especially when patients prefer a non-surgical option. Evidence suggests PRP may improve hair density and thickness in some people, but results vary. A careful evaluation, safe preparation, and realistic expectations are essential for decision-making. Table of Contents TLDR Product Spotlight PRP therapy for hair loss: what it is and how it works Did You Know? Pros & Cons Analysis How to Choose a Provider Visual reference FAQ Section Conclusion & CTA About the Author Section TLDR PRP therapy for hair loss uses platelet-rich plasma derived from your blood to encourage a healthier hair growth environment. Many patients consider it when hair thinning becomes noticeable and they want a supportive, non-surgical approach. Clinical protocols typically involve multiple sessions, with outcomes dependent on hair loss pattern, baseline density, and overall scalp health. If you pursue PRP, pair it with a structured scalp care routine and evidence-based hair loss management guidance from a qualified professional. Product Spotlight Scalp care matters because PRP aims to improve the hair growth microenvironment. Gentle cleansing and skin-friendly hydration can help maintain a healthy scalp barrier between clinical sessions. While PRP is performed in a clinic, day-to-day scalp hygiene and moisturization support comfort and reduce irritation that can interfere with adherence to treatment plans. When selecting scalp-friendly products, consider formulas designed for sensitive skin, non-stripping cleansers, and products that support barrier function. For daily use, a gentle cleanser can help remove oil and debris without over-drying the scalp. For example, you may explore a mild face and scalp compatible cleansing option such as gentle cleanser, which is commonly chosen for minimal irritation and routine use. For hydration or barrier support, some people prefer a lightweight, soothing lotion. You can also consider options like hydrating lotion to support a comfortable skin feel during hair loss management. PRP therapy for hair loss: what it is and how it works PRP therapy for hair loss is a procedure in which concentrated platelets from a patient’s own blood are prepared and then injected into targeted scalp areas. The concept is to deliver growth factors and signaling molecules that may encourage cellular activity in hair follicles. Platelets contain bioactive proteins that can influence tissue repair and inflammation pathways. In a typical clinic workflow, a clinician draws a small amount of blood, processes it to concentrate platelets, and then performs injections along the scalp region where thinning occurs. Treatment plans often include several sessions spaced over time, with later maintenance based on response. The goal is not immediate regrowth, but gradual improvement in hair density, thickness, or overall appearance. Mechanistically, the rationale includes modulating inflammation, supporting follicle signaling, and promoting a more favorable environment for hair cycling. Many specialists emphasize that PRP may be more effective for certain patterns of hair loss than others. For example, androgenetic alopecia is frequently discussed because it involves follicle miniaturization, where signaling support may help slow the trend and improve measurable features in some patients. Scalp health and treatment consistency remain critical. Even the best procedure cannot overcome severe scalp irritation, uncontrolled inflammation, or inconsistent follow-through. For that reason, it is common for clinicians to recommend a supportive at-home regimen that prioritizes gentle cleansing, careful product selection, and avoidance of harsh practices. Scalp map concept with injection focus zones Did You Know? PRP preparation methods can vary by clinic, including concentration approach and activation steps. Some patients experience shedding or temporary changes after treatments, which may be part of hair cycling. PRP is often used alongside other hair loss strategies, such as topical therapies recommended by clinicians. Scalp conditions like seborrheic dermatitis may affect comfort and treatment adherence, so management matters. Pros & Cons Analysis Choosing PRP involves balancing potential benefits with known risks and practical considerations. The list below is designed to support a decision-focused evaluation. Pros Uses the patient’s own blood components, which can reduce concerns about foreign material reactions. Non-surgical approach that does not require cutting or permanent implantation. May improve hair density or thickness in selected individuals, particularly in hair miniaturization patterns. Often paired with topical or lifestyle hair strategies for broader support. Cons Results are not guaranteed and vary across hair loss types, severity, and individual biology. Requires multiple clinic visits, which can increase cost and planning demands. Can cause temporary side effects such as scalp tenderness, redness, bruising, or mild swelling. Long-term maintenance may be recommended, depending on response and progression. How to Choose a Provider A safe and effective PRP experience depends heavily on provider expertise, sterile technique, and protocol transparency. Before booking, request a clear explanation of the preparation method and injection approach. Ask how the clinic addresses patient selection, including evaluation of hair loss type and scalp conditions. It is also important to confirm that the clinic uses appropriate sterile equipment and follows hygienic standards. Inquire about post-procedure care instructions and what to do if side effects occur. A responsible clinic will discuss realistic timelines for potential improvements and will not present outcomes as certain. Consider provider qualification and experience with scalp procedures. A specialist who regularly manages hair thinning cases can better identify whether PRP is a reasonable option or if another approach would be more suitable. In many real-world plans, clinicians combine PRP with evidence-based topical treatments and a gentle scalp routine to support consistency and comfort. Between sessions, a supportive skin routine can reduce irritation. If you also use topical actives, consider limiting overly aggressive cleansing routines. Some people choose gentle formats such as gentle cleanser to avoid excessive dryness. If you have sensitive skin, you may also evaluate whether a calming hydrating approach like hydrating lotion supports tolerance. Growth chart with milestones and scalp wellness icons Visual reference Patients often benefit from a clear mental model: PRP aims to change the scalp environment over time, not overnight. Visual tools can help you track care consistency and manage expectations, such as photos taken under similar lighting and routine scalp notes shared with your clinician. FAQ Section Is PRP therapy for hair loss the same as stem cell treatments? No. PRP therapy uses platelet-rich plasma derived from your blood. Stem cell approaches involve different biological materials and preparation processes. The protocols, expected timelines, and regulatory considerations can differ. You should discuss the specific product type and preparation method with your clinician before beginning any treatment plan. Who is most likely to benefit from PRP injections for thinning hair? Many clinics consider PRP for people with patterned thinning and early-to-moderate hair miniaturization. However, benefit depends on baseline severity, hair loss type, scalp health, and adherence to recommended care. A thorough scalp exam and history help determine whether PRP is a reasonable fit or whether an alternative or combination approach is more appropriate. What side effects should I expect after PRP therapy? Common temporary effects include scalp tenderness, redness, mild swelling, or small bruises at injection sites. These typically resolve within a short period. If you experience unusual pain, signs of infection, or persistent symptoms, you should contact your provider promptly. Following the clinic’s aftercare instructions can help reduce discomfort and support safe healing. How can I support results between sessions? Support includes consistent scalp hygiene with gentle cleansing, avoiding harsh treatments that irritate the scalp, and using clinician-recommended topical therapies when appropriate. If you use hair styling products, choose those that do not increase scalp irritation. If sun exposure affects your scalp, consider sun protection advice from a qualified professional, and use products that suit your skin sensitivity. Conclusion & CTA PRP therapy for hair loss is a structured, clinic-based option designed to support a healthier scalp environment through concentrated platelets. While evidence suggests meaningful improvement for some individuals, outcomes vary by hair loss pattern, severity, and protocol quality. If you are considering PRP, prioritize a qualified provider, realistic expectations, and a gentle scalp care routine that supports tolerance between sessions. If you want to build a supportive daily regimen, explore scalp-friendly options from Allodermis and consider starting with a gentle cleanser such as gentle cleanser. For hydration-focused support, you may also review hydrating lotion. For sun-related scalp comfort strategies, consult appropriate product guidance available on Allodermis and discuss suitability with your clinician. About the Author Section Allodermis is a skincare and dermal care focused brand with topic expertise grounded in careful product selection and practical routine support. The author team contributes professional content on scalp comfort, dermatology informed skincare principles, and consumer-friendly guidance. This article is designed to support informed conversations with qualified healthcare providers. Thank you for reading, and take the next step by consulting a licensed clinician for personalized evaluation. Disclaimer: This article provides general educational information and does not constitute medical advice. Individual results vary. Before starting PRP therapy for hair loss or any related treatment, consult a licensed healthcare professional or qualified dermatologist for an evaluation and a personalized plan.
Learn more
Retinol Gone Wrong at 20: Why Skincare is Not One-Size-Fits-All
Retinol is trending everywhere, but using it without understanding your skin type can lead to irritation, dryness, redness, and long-term barrier damage. This article explains why skincare is not one-size-fits-all, the side effects of retinol misuse in your 20s, and why consulting a dermatologist before experimenting with active ingredients is essential.
Learn more
Skin Rejuvenation Procedures: Guide to Natural-Looking Results
Updated on: 2026-05-22 Skin rejuvenation procedures can improve the look and feel of your skin by targeting common concerns such as dullness, uneven tone, and visible texture. Modern options often combine controlled exfoliation, collagen-supporting techniques, and carefully planned aftercare. The safest results come from matching a treatment plan to your skin type, goals, and tolerance for downtime. This guide explains benefits, selection factors, preparation steps, and practical aftercare for a confident decision. Table of Contents 1. Key Benefits 2. Step-by-Step Guide 3. FAQ Section 4. Summary & Final Thoughts 5. About the Author Section Skin Rejuvenation Procedures: A Practical Guide to Smoother, Clearer-Looking Skin Skin rejuvenation procedures are professional or clinician-guided options designed to refresh the appearance of the skin. People commonly seek these treatments to address dullness, uneven tone, fine lines, and surface roughness. Because results depend on technique, skin compatibility, and aftercare, a structured plan matters as much as the procedure itself. This article provides a clear, evidence-informed overview to support an informed consultation and consistent daily routines. Key Benefits Well-chosen skin rejuvenation procedures can support visible improvement across several skin concerns. Benefits vary by individual and the specific approach, but the overall goals remain consistent. Improved skin texture through controlled surface renewal and gentle resurfacing. More even-looking tone by reducing the appearance of discoloration and uneven pigmentation. Reduced appearance of fine lines as skin quality and structure are supported over time. Enhanced radiance from better cell turnover and improved clarity. Better product responsiveness after treatment because the skin can absorb supportive skincare more effectively. Icon set: texture, tone, glow, and fine lines Step-by-Step Guide Step 1: Define Your Primary Goal and Skin Profile Begin by identifying what you want to change most. Examples include brighter-looking skin, reduced look of pores, fewer age-related lines, or improved clarity after blemishes. Next, assess your skin profile: sensitivity level, history of irritation, typical reaction to new products, and current regimen. This step reduces mismatches between treatment choice and real-world skin behavior. If you have active breakouts, frequent redness, or a history of post-inflammatory marks, discuss timing and treatment sequencing with a qualified professional. Many effective plans combine in-office work with a daily routine that supports barrier health. Step 2: Learn Your Options Without Overpromising Skin rejuvenation procedures generally fall into categories such as resurfacing methods, controlled exfoliation approaches, and collagen-supporting techniques. Each category targets a different layer of the skin and uses a different mechanism. A credible clinic explains expected outcomes in plain language, outlines potential side effects, and provides clear safety criteria. Focus on compatibility and realistic goals rather than maximum intensity. Over-treating can increase irritation and slow recovery, which may reduce overall satisfaction. Step 3: Confirm Safety, Suitability, and Contraindications Suitability is a key factor. A clinician should evaluate skin type, sun exposure patterns, current skincare, and any previous reactions. Your medical history also matters, particularly if you have a tendency toward abnormal scarring, persistent inflammation, or you are using strong acne medications. Safety screening supports better comfort, steadier recovery, and more predictable results. If you are unsure about a procedure’s fit, ask about skin testing, conservative settings, and how they adjust plans when the skin becomes sensitive. Step 4: Prepare Your Skin for Treatment Preparation commonly includes optimizing barrier function and reducing irritation risk. Many clinicians recommend pausing certain strong exfoliants before the procedure while continuing gentle cleansing and moisturization. The exact instructions depend on the chosen method. In day-to-day routines, a consistent cleanser and hydrating moisturizer can help your skin tolerate change. Consider using a gentle cleanser such as gentle cleanser and maintaining hydration with a supportive lotion approach, for example hydrating facial lotion, as recommended by your specialist. Step 5: Choose a Treatment Plan With Clear Aftercare Aftercare is where consistent improvement often becomes visible. Your plan should include: what to apply, how often to apply it, what to avoid, and how long to follow the modified routine. Sun protection is typically central because ultraviolet exposure can worsen uneven tone and prolong recovery. For many people, daily sunscreen is not optional during the healing window. A broad-spectrum option such as daily sunscreen can support consistent protection when used as directed. Your clinician should also provide guidance on when to restart specific actives. Checklist visuals: before, procedure, aftercare, sun shield Step 6: Use Supportive Skin Care That Matches the Recovery Phase Supportive skincare should align with your skin’s current condition. During recovery, prioritize calming ingredients and barrier support. After the initial healing period, you may gradually reintroduce targeted actives, such as ingredients that support brightening or oil balance. For acne-prone or oily skin, a cleanser designed for oil control may help reduce congestion. You may consider oil control foam wash as part of your routine, especially if your skin tolerates it well. For uneven tone and dullness concerns, a clinician may suggest a carefully chosen brightening approach and a compatible serum plan. For example, proactive serum may be discussed as part of a structured regimen, depending on individual sensitivity and the chosen procedure. Always introduce products slowly and stop if irritation occurs. Step 7: Track Outcomes and Adjust the Plan Responsibly Skin improvement is often gradual. Track changes in brightness, clarity, and texture using consistent lighting and a simple schedule. If you notice persistent redness, swelling beyond expectations, or worsening irritation, contact your clinician promptly. A responsible follow-up includes adjusting treatment intensity, spacing sessions appropriately, and tailoring home care. This iterative approach supports better long-term satisfaction and helps avoid unnecessary repeat interventions. Step 8: Maintain Results With Ongoing Habits Even after excellent in-office work, daily habits protect your investment. Sun protection, gentle cleansing, moisturization, and realistic expectations form the foundation of long-term maintenance. If your skincare plan includes exfoliating or brightening actives, use them at a frequency that supports your barrier rather than overwhelming it. Also consider lifestyle factors that influence skin quality. Sleep consistency, adequate hydration, and a balanced diet contribute to overall skin resilience. For people with sensitive skin, minimizing unnecessary product changes can reduce flare-ups and support steady improvement. FAQ Section How do I choose the right skin rejuvenation procedure for my skin? Start with your primary concern, such as dullness, uneven tone, or texture. Then match your choice to your skin sensitivity, downtime tolerance, and recovery needs. A qualified clinician can narrow options by evaluating your skin profile, current regimen, and safety factors. The best plan is one that balances goals with realistic outcomes and a clear aftercare method. What should I avoid before and after treatment? In general, avoid activities that increase irritation or heat exposure during the recovery phase, and follow your clinician’s instructions on pausing strong exfoliants or actives. After treatment, prioritize gentle cleansing, moisturization, and strict sun protection. If you experience unusual discomfort, persistent swelling, or worsening redness, seek professional guidance rather than continuing the usual routine. Will skin rejuvenation procedures work for dark spots and uneven tone? Many skin rejuvenation procedures can help reduce the visible appearance of uneven tone, particularly when paired with consistent sun protection and a carefully chosen skincare regimen. The degree of improvement depends on the cause of discoloration, your skin type, and the procedure selection. A clinician can recommend a plan that considers pigmentation depth, sensitivity, and overall risk. Summary & Final Thoughts Skin rejuvenation procedures can support clearer, smoother-looking skin when they are selected thoughtfully and paired with disciplined aftercare. The most reliable results come from matching a method to your goals, preparing the skin responsibly, and maintaining a supportive daily routine with sun protection and barrier-friendly products. If you are planning your next step, consult a qualified professional to design a plan that reflects your skin profile and comfort level. For product support in a routine that emphasizes gentle care and daily protection, explore options at Allodermis. Disclaimer This article is for general educational purposes and does not replace medical advice, diagnosis, or treatment. Results vary by individual factors and procedure selection. Consult a qualified clinician for guidance tailored to your skin condition and medical history. Any product references are for convenience and do not imply guaranteed outcomes. About the Author Section Author: Allodermis Bio: Allodermis is an established skincare resource with expertise in dermatology-informed routines, ingredient compatibility, and regimen planning. The team emphasizes evidence-based guidance and practical aftercare frameworks designed to support skin comfort and long-term consistency. For personalized recommendations, seek advice from a qualified professional. Visit Allodermis
Learn more