
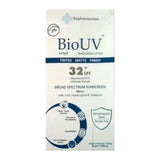
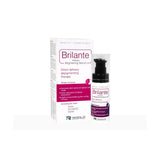
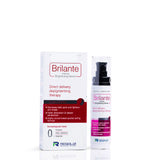






















Skin Acacdemy
Vitiligo Treatments: Options, Costs, and What to Expect
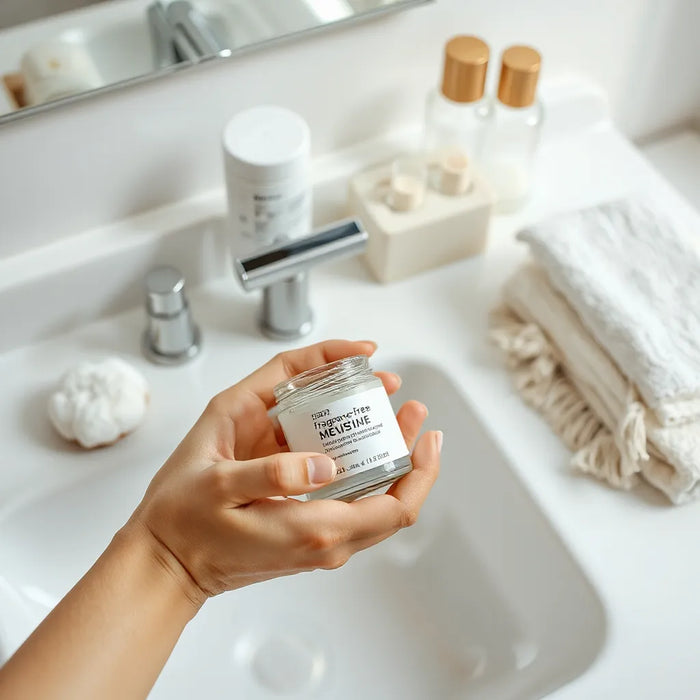
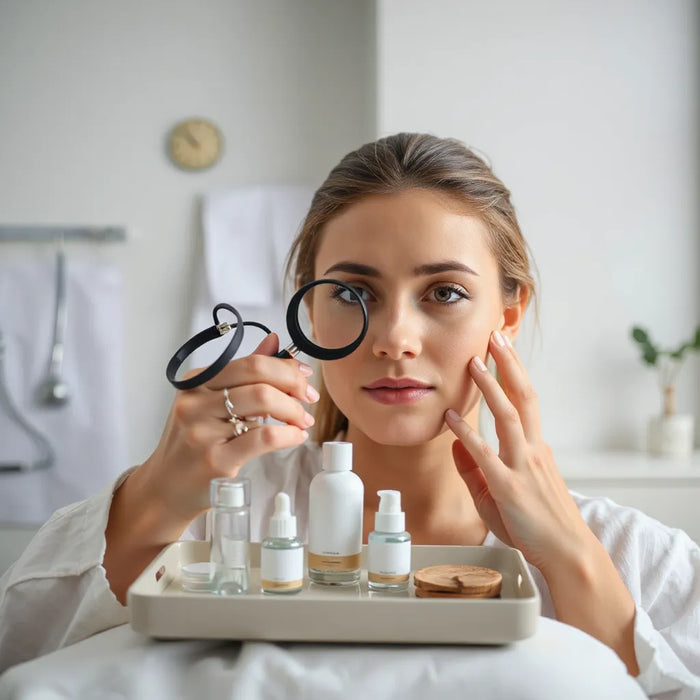
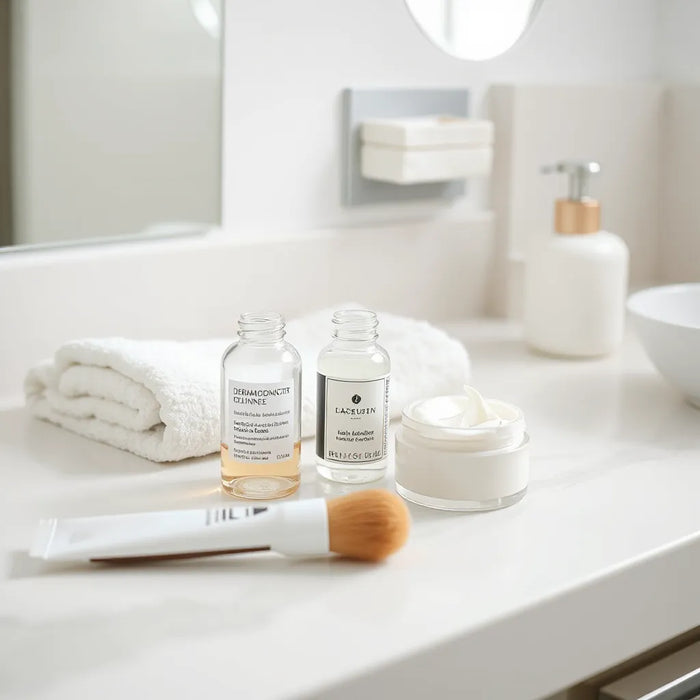
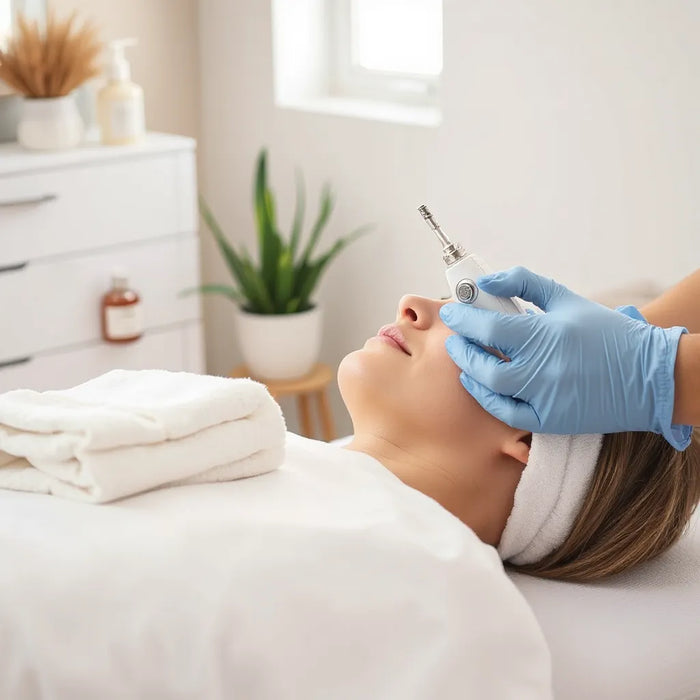
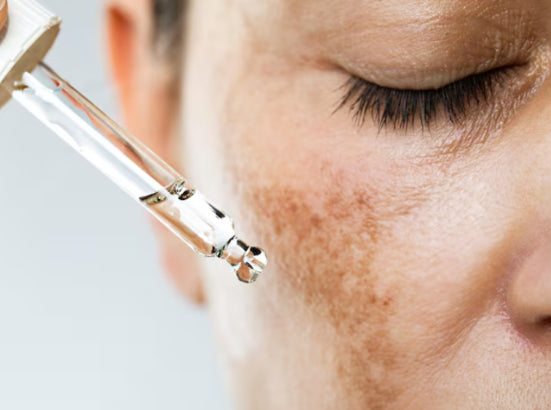
Updated on: 2026-06-03 Vitiligo can affect skin appearance and confidence. Effective management usually requires a long-term plan rather than a single quick fix. This guide explains common myths, evidence-based options, and how to choose a practical routine. You will also find guidance on treatment support, patch testing considerations, and what to discuss with a dermatologist. 1. Myths vs. Facts 2. Personal Experience 3. Understanding Vitiligo and Why Treatments Vary 4. Diagnosis and Personalization of Care 5. Overview of Vitiligo Treatments That Clinicians Commonly Use 6. How to Build a Safe Daily Skin Routine 7. When to Escalate Care and Seek Second Opinions 8. Visual Note 9. Visual Note 10. Final Thoughts & Takeaways Myths vs. Facts People often hear strong opinions about vitiligo treatments. The reality is more nuanced. Below are common statements and the evidence-based perspective clinicians generally follow. Myth: Vitiligo always spreads rapidly. Fact: Many individuals experience stable phases. Some areas can change slowly or remain unchanged for long periods. Myth: Only one treatment works for everyone. Fact: Response depends on lesion location, disease stage, and individual skin biology. Plans are usually personalized. Myth: Sun exposure is always beneficial. Fact: Unprotected sun can worsen skin stress and uneven pigmentation. Photoprotection is a core part of routine care. Myth: Over-the-counter products can fully replace medical care. Fact: Skincare support can improve comfort and barrier health, but medical interventions may be needed for repigmentation goals. Myth: Treatment success is immediate. Fact: Repigmentation and stabilization often require time. A realistic plan includes monitoring and adjustments. Personal Experience When I first learned about vitiligo, I focused on surface appearance. Over time, I learned that the emotional impact can be as significant as the visual change. I also saw how quickly online advice can become contradictory. The most helpful shift was viewing vitiligo treatments as a structured care pathway: protect the skin, reduce triggers, support the barrier, and discuss medical options with a qualified dermatologist. That approach made the process feel less confusing. It also helped set expectations. Instead of searching for a single answer, the focus became consistent follow-through and informed decision-making. Understanding Vitiligo and Why Treatments Vary Vitiligo is a pigment disorder that leads to areas of depigmented skin. It can involve different body locations, and its pattern can evolve. Dermatologists typically consider multiple factors when recommending vitiligo treatments, including whether the condition appears active, the distribution of lesions, and the patient’s history. Two key concepts guide treatment planning: Disease activity: Active vitiligo may need stabilization before repigmentation efforts are expected to hold. Skin and lesion characteristics: Locations such as hands, face, or joints can respond differently due to thickness, friction, and local skin environment. Because these variables differ across people, clinicians usually avoid “one-size-fits-all” thinking. The goal is to select therapies that match the stage and the practical lifestyle needs of the patient. Skin map highlights disease activity and lesion areas Diagnosis and Personalization of Care Before choosing any vitiligo treatments, diagnosis matters. Dermatologists often use a visual exam and may use a light-based evaluation to better understand lesion borders and activity. Accurate assessment helps differentiate vitiligo from other causes of depigmentation. Personalization goes beyond diagnosis. A practical plan also accounts for: Medication history: Prior therapies and response can influence next steps. Skin sensitivity: Some individuals require a slower introduction of topical products to reduce irritation risk. Lifestyle and access: Certain therapies may require clinic visits or scheduled sessions. Barrier care needs: Dryness and irritation can worsen the look and feel of depigmented areas. If you are unsure about your diagnosis, it is reasonable to request a second opinion from an experienced dermatologist. Clarity reduces wasted effort and supports safer decisions. Overview of Vitiligo Treatments That Clinicians Commonly Use Modern care for vitiligo is typically multi-step. Many plans include stabilization, repigmentation efforts, and long-term photoprotection. The best strategy depends on how active the condition appears and where lesions are located. 1) Topical anti-inflammatory therapies Topical medications can help calm immune-driven processes in some cases. Clinicians may prescribe topical options that target inflammation. Topical care also allows gradual integration into daily routines, which can improve tolerability. 2) Phototherapy options Light-based therapies are commonly used in clinical settings. They may support repigmentation by affecting local immune activity and pigment pathways. Phototherapy schedules vary, and consistent attendance is often important for meaningful assessment. Because light exposure has risks, phototherapy should be guided by a clinician rather than replaced with unmonitored tanning practices. 3) Targeted systemic therapies for specific cases Some individuals with more extensive disease or particular patterns may require systemic treatment under close medical supervision. These choices are made after evaluating benefits, risks, and overall health factors. 4) Procedural approaches for stable lesions For stable vitiligo that is not actively changing, procedure-based approaches may be considered. These options generally aim to restore pigment in select areas. Suitability depends on lesion stability and patient-specific factors. 5) Supportive management: photoprotection and barrier health Although supportive care may not be the primary driver of repigmentation, it is essential for comfort and appearance. Depigmented skin is more vulnerable to sun-related contrast and irritation. Consistent sun protection and gentle cleansing can reduce flare discomfort and improve daily wearability. For example, a routine that includes a soothing cleanser and appropriate sun protection can help maintain skin comfort while you pursue medical steps. Consider browsing dermatologist-friendly product categories such as: Gentle cleanser support High protection daily SPF options Sunscreen cream for consistent coverage Layered skincare routine symbols show protection and barrier care How to Build a Safe Daily Skin Routine A well-structured routine supports treatment outcomes by improving tolerance and reducing irritation. While vitiligo treatments may be the main medical focus, daily skincare can meaningfully affect comfort and appearance. Step 1: Use a gentle cleansing routine Harsh cleansing can increase dryness and discomfort. Choose a mild cleanser and keep water temperature moderate. Cleanse once daily for most people, or as needed based on skin type and daily activity. If you are looking for a gentle option, you may consider Cetaphil gentle cleanser support as a baseline approach for sensitive skin routines. Step 2: Moisturize to support the skin barrier Depigmented areas can feel more noticeable and may be prone to dryness. Moisturizing helps maintain comfort, reduces friction, and can support better tolerance to topical therapies prescribed by a dermatologist. Look for moisturizers that emphasize barrier-friendly ingredients and avoid strong fragrances if your skin is reactive. Step 3: Prioritize photoprotection every day Sun exposure can worsen contrast between depigmented and pigmented skin. Daily sunscreen application and protective clothing can reduce uneven appearance and help prevent irritation. You can explore options such as SPF cream for daily protection or sunscreen cream coverage, then pair them with hats or shade when possible. Step 4: Introduce new products carefully When starting or switching skincare, introduce one new item at a time. This helps you identify irritation sources. If a dermatologist prescribes a topical therapy, follow the exact directions and use moisturizers as advised to reduce dryness. If your routine includes brightening or pigment-focused serums, use them cautiously. Depigmented skin may respond differently than other areas, and over-layering can increase irritation risk. Step 5: Manage triggers that can affect skin comfort Some people report that stress, friction, or skin irritation can influence disease perception. While evidence for specific triggers varies, practical trigger awareness is still valuable. Reduce rubbing from clothing, avoid aggressive exfoliation, and keep nails and grooming tools gentle near affected areas. When to Escalate Care and Seek Second Opinions Vitiligo treatments are often adjusted over time. It is normal to reassess after a period of consistent use, because response can vary. Escalation does not mean failure; it can mean optimization. Consider discussing next steps with a dermatologist if: New depigmented patches appear despite consistent routine support. Existing lesions show a clear pattern of expansion. You experience frequent irritation from topical products or need a better tolerance strategy. You want to explore phototherapy, procedural options, or a more comprehensive plan. When planning adjustments, ask practical questions: What stage is my disease in? Which treatment goal is most realistic for my case, stabilization or repigmentation or both? How will we track progress, and when will we reconsider the plan? Documenting photos in consistent lighting can support tracking. If you do so, focus on safe handling and privacy. Final Thoughts & Takeaways Vitiligo treatments require a patient, evidence-guided approach. The most effective plans usually combine medical strategies with daily supportive care. Myths often create unrealistic expectations, but personalized care helps set a workable pathway. Key insights to keep at the center of your plan include: Diagnosis and lesion assessment guide what therapy is appropriate. Treatment selection depends on disease activity, location, and tolerance. Daily photoprotection and gentle skincare support comfort and appearance. Adjustments and escalation may be part of a normal, structured care process. With consistent care and informed decision-making, many people are able to manage symptoms and improve day-to-day confidence. The priority is a plan that is safe, realistic, and monitored by qualified professionals. Visual Note Skin map highlights disease activity and lesion areas Visual Note Layered skincare routine symbols show protection and barrier care Q&A Section What are the main categories of vitiligo treatments? Common categories include topical anti-inflammatory therapies, phototherapy, systemic treatments for selected cases, and procedures that target stable lesions. Supportive care such as daily photoprotection and barrier-friendly skincare is also an important part of many plans. How long should I expect to see progress? Progress timelines vary widely based on lesion location, disease activity, and the therapies used. Many people find that meaningful assessment requires consistent follow-up and patience, with periodic reviews to adjust the plan when needed. Can skincare products replace medical vitiligo treatments? Skincare can support comfort, reduce irritation, and improve appearance, but it typically does not replace clinician-guided vitiligo treatments. A combined approach is often more effective than relying on cosmetic-only strategies. What should I discuss with my dermatologist before starting a plan? Discuss your diagnosis, whether the disease appears active or stable, the primary goal of treatment for your case, and how progress will be tracked. Also ask about tolerability, how to handle irritation, and which routine elements are essential for photoprotection and barrier support. About the Author Section About the Author Allodermis is a skincare-focused organization dedicated to helping customers make informed choices through practical education and dermatologist-aligned guidance. The author team has expertise in dermatology-focused content strategy, ingredient literacy, and evidence-informed routine planning. This article is designed to support safe decision-making and structured conversations with qualified clinicians. Thank you for reading, and we encourage you to seek professional medical advice for personalized care. Disclaimer: This article is for informational purposes only and does not provide medical advice, diagnosis, or treatment. Vitiligo is a medical condition, and care decisions should be made with a qualified healthcare professional who can evaluate your specific situation. Do not start, stop, or change any medical therapy without professional guidance.
Learn moreOily Skin Routines: The Simple Daily Plan That Works
Updated on: 2026-06-03 Oily skin routines are not about stripping the skin. They are about balancing oil production while keeping the skin barrier calm. A well-structured routine can reduce the look of shine, limit clogged pores, and support smoother texture. The key is consistency: gentle cleansing, targeted actives, and the right lightweight moisturization and sunscreen. This guide outlines common mistakes, a practical buyer checklist, and evidence-aligned answers to frequent questions. Updated Date and Value Summary Oily skin routines focus on balance, not harsh stripping. Gentle cleansing and barrier-friendly hydration reduce pore congestion risk. Targeted actives and consistent sun protection help manage breakouts and shine. A checklist approach makes it easier to choose compatible steps. Common Mistakes Buyer’s Checklist FAQ Section Wrap-Up & Final Thoughts Q&A Section About the Author Common Mistakes Many routines fail because they target oil aggressively instead of improving skin function. Oily skin can look shiny and feel tight, but the problem often starts with imbalance rather than lack of moisture. When you correct the fundamentals, your skin typically tolerates actives better and maintains a calmer surface. Over-cleansing: Washing too often or using harsh foaming cleansers can increase rebound oiliness and irritation. Skipping moisturizer: Lightweight, non-greasy hydration supports the barrier and can reduce the urge to over-dry. Layering too many strong actives: Using multiple exfoliants or high-strength formulas at the same time can worsen sensitivity. Inconsistent sun protection: Sun exposure can aggravate visible marks and uneven texture, even when breakouts improve. Ignoring compatibility: Some ingredients do not suit every skin response. The goal is a routine that your skin can repeat daily. If you want a stable foundation, begin with a cleanser designed for daily use and a sunscreen that feels comfortable during wear. For a gentle baseline, consider a cleanser like Cetaphil Gentle Cleanser. If your skin tends toward congestion, choose formulas that cleanse without leaving a squeaky feel. Buyer’s Checklist Before you build oily skin routines, define your primary goals. Your routine should address your top concern first, then add steps that support long-term clarity. Use the checklist below to match products to your needs, while keeping the number of steps manageable. 1) Choose a gentle cleanser for daily use A cleanser should remove surface oil and impurities without causing dryness. Look for mild surfactants and a formula that rinses clean. If you prefer a more controlled oil feel, you can select an oil-control cleanser, but avoid frequent overuse. A reliable option to consider is Cetaphil Pro Oil Control Foam Wash. 2) Add lightweight hydration Moisturizer is often the missing link in oil balancing. For oily skin, hydration should be lightweight and fast-absorbing. This step supports the barrier so that actives do not trigger excessive irritation. If you need a hydrating lotion, review Cipla Excela Rich Facial Hydrating Lotion to evaluate how it feels on your skin during routine testing. 3) Use targeted actives based on skin needs Actives help with clogged pores, texture, and the look of post-breakout marks. Select one active as your main focus for several weeks, then assess tolerance. Common categories include: Exfoliating acids: Help refine texture and reduce the appearance of congestion. Niacinamide: Supports visible oil balance and barrier comfort. Retinoid alternatives: May support smoother skin texture with gradual use. Spot-focused formulas: Can be used to target specific areas. For a niacinamide-forward approach, you may review Nia Shine Brightening Serum. For acne and oil control support, always introduce actives slowly and watch how your skin responds. 4) Select a sunscreen you will actually wear Sunscreen is essential in any oily skin routines, because it protects against irritation and helps prevent marks from lingering. Choose a sunscreen finish that matches your preferences: gel-like, fluid, or lightweight cream. If you want an option designed for daily wear, review IPCA Acne UV Gel SPF 50. For a different texture direction, you can also consider Fixderma Shadow Sunscreen Cream. 5) Include one “repair” option when skin feels stressed When your skin barrier is stressed, it often reacts with increased oiliness and sensitivity. A repair-focused product, used intermittently, can support comfort. This step is especially helpful when you begin new actives. Choose a formula that feels soothing and does not trigger additional dryness. FAQ Section How often should I cleanse oily skin? Most people benefit from cleansing twice daily. If you sweat heavily, an additional gentle cleanse or a quick rinse can help. The goal is to remove excess oil and impurities without stripping the barrier. Should I avoid moisturizer if my skin is oily? No. Lightweight moisturizers can reduce the appearance of dryness and help stabilize oil balance. When the barrier is supported, skin often becomes less reactive to actives and daily environmental stress. What is the simplest routine for oily skin? A practical baseline is cleanse, moisturize, treat if needed, and protect with sunscreen in the morning. At night, cleanse, moisturize, and use one targeted active slowly. Keep the routine stable for several weeks before making changes. Can oily skin routines help with clogged pores? Yes, when you use gentle cleansing and compatible actives. Look for formulas that support exfoliation and consistent pore care. Avoid over-scrubbing, and focus on steady, repeatable steps. Wrap-Up & Final Thoughts Oily skin routines succeed when they respect the skin barrier and maintain a consistent rhythm. Focus on a gentle cleanser, lightweight hydration, carefully selected actives, and daily sunscreen. Avoid frequent over-cleansing, rushing into multiple strong treatments, and skipping protective steps. If you want an actionable start, use the buyer checklist to assemble a routine that matches your sensitivity level and long-term comfort. If you are building or refining your routine, explore product options that align with your preferences for cleansing, hydration, and sun protection on Allodermis. Choose fewer steps first, then iterate based on how your skin responds. Q&A Section What active ingredient strategy works best for oily skin? Choose one primary active category for several weeks, then evaluate results and tolerance. For many people, starting with a gentle approach and building gradually reduces the risk of irritation that can worsen oiliness. Consistency and correct timing are more important than using many actives at once. How do I prevent shine without making my skin feel dry? Preventing excess shine usually requires balance. Use a cleanser that removes surface oil without over-drying. Pair it with a lightweight moisturizer to maintain comfort. In the daytime, a non-greasy sunscreen can support a smoother finish and reduce the perception of oiliness during wear. Why does my skin feel oily right after washing? This can happen when the cleanser is too stripping or when the skin barrier is stressed. Harsh cleansing can trigger rebound oiliness. If this occurs, reduce cleansing frequency slightly and choose a gentler cleanser with a comfortable, non-tight finish. Is a spot treatment enough for oily skin concerns? Spot treatments can help targeted areas, but they usually do not replace a full routine. Oily skin routines work best when they include daily cleansing, barrier-friendly hydration, and sun protection. If clogged pores or texture persist broadly, consider adding one compatible active step for overall support. About the Author Allodermis is supported by topic expertise in skincare routines for oily and combination skin. The author team focuses on ingredient compatibility, daily compliance, and evidence-aligned care strategies. This guidance is intended to help readers make informed routine choices with confidence. For personalized needs, consider professional dermatology advice. Disclaimer: This article is for general educational purposes and does not provide medical advice. Individual skin needs vary. If you have persistent irritation, worsening breakouts, or significant skin conditions, consult a qualified healthcare professional before changing your routine.
Learn moreSensitive Skin Products: What to Look For
Updated on: 2026-06-02 Choosing the right sensitive skin products can reduce discomfort and improve day-to-day skin comfort. The best approach is to focus on gentle cleansing, careful moisturization, and smart ingredient selection. This guide explains how to read labels, build a routine, and introduce new items safely. You will also find practical troubleshooting tips for common sensitivity triggers. 1. Essential Tips 2. Detailed Step-by-Step Process 3. Summary & Takeaway 4. Q&A Section 5. About the Author How to Choose Sensitive Skin Products Without Guesswork Sensitive skin products are designed for skin that reacts easily to changes, friction, and harsh ingredients. If your skin stings, feels tight, or turns red after cleansing or moisturizing, a more careful routine can help you maintain comfort. The goal is not to eliminate every trigger at once, but to reduce irritation risk while keeping your barrier supported. Start with the basics: gentle cleansing, consistent hydration, and sunscreen that feels comfortable. Then refine your product choices using clear label-reading rules. This systematic method helps you avoid random trial-and-error and supports smoother integration into your routine. Prefer fragrance-free options when you notice stinging or redness. Look for cleanser and moisturizer formulas that support the skin barrier. Choose sunscreen textures you can tolerate daily, not only on low-sensitivity days. Introduce one new product at a time and give your skin a fair test window. Patch test behind the ear or on the inner forearm before full-face use. Track triggers such as shaving, hot showers, rough towels, and over-exfoliation. Keep routines simple; multiple active ingredients at once increase risk. Replace products that cause repeated burning, itching, or swelling. Detailed Step-by-Step Process to Build a Comfortable Routine Building a sensitive-skin routine requires structure. Follow these steps to reduce irritation, improve consistency, and make product selection more predictable. Use this framework whether you are starting fresh or revising an existing routine. Step 1: Assess your current irritation pattern Before changing products, identify when irritation happens. Common patterns include stinging during cleansing, dryness after washing, or redness after sun exposure. Note whether reactions occur immediately or after repeated daily use. This observation guides which category needs the most attention: cleanser, moisturizer, or sunscreen. Step 2: Choose a gentle cleanser first A sensitive-skin routine usually begins with a cleanser that removes oil and impurities without stripping. Seek a mild, non-drying formula and avoid frequent cleansing throughout the day. If you experience tightness after washing, your cleanser may be too harsh or your water temperature may be too hot. If you want a dependable baseline cleanser, consider options such as gentle facial cleanser for non-stripping washing. Another option is oil control foam wash if you also need light oil management. Select the cleanser that matches your skin comfort level, not only your skin type. Step 3: Add a barrier-supporting moisturizer Moisturizers reduce water loss and help minimize the sensation of dryness-related irritation. For sensitive skin products, the most important factor is comfort. A suitable moisturizer should spread easily, absorb without burning, and leave skin feeling calm rather than coated or sticky. If you prefer a richer texture, evaluate a moisturizing cream option. If you want a hydrating approach suited for everyday use, consider hydrating lotion. Select based on how your skin feels after application, not on theoretical claims. Step 4: Use sunscreen in a sensitivity-aware way Sunscreen is essential for daily skin health, yet sensitivity can make it challenging. Choose a sunscreen that offers comfortable wear, does not sting on contact, and suits your skin’s needs. Reactions can also be linked to application technique or rubbing after application. Start by applying sunscreen to dry skin and avoiding heavy rubbing. If you need a broad daily option, consider SPF lotion-style sunscreen for consistent protection. For texture preference, a cream or gel option may feel different on sensitive skin. If acne-prone or oilier skin is involved, you can also explore UV gel SPF to match your tolerance. Step 5: Introduce treatments only after comfort is stable Once cleansing, moisturizing, and sunscreen feel stable, you can add targeted products carefully. Treatments such as brightening serums or acne-focused formulas can improve uneven tone or breakouts. However, they also increase the chance of irritation if introduced too soon or used too often. Use one treatment category at a time and evaluate results for comfort. If you are balancing sensitivity with pigmentation concerns, a brightening serum such as brightening serum can be considered after your routine feels calm. If your goal includes proactive anti-aging support, you may consider proactive serum support, applied with restraint at first. Step 6: Adjust your exfoliation and active ingredient frequency Exfoliation is a common sensitivity trigger. If you use exfoliating acids or retinoid-style products, reduce frequency and avoid stacking multiple actives. You can keep skin calm by using treatments on alternate days or using a single active at a time. When irritation occurs, pause active products until the skin returns to baseline comfort. For gentle correction or targeted soothing, consider products that are designed to be compatible with sensitive routines. For example, for texture-focused brightening you can assess a rich cream for supportive hydration as part of barrier care, rather than relying on exfoliation to do all the work. Step 7: Pay attention to application habits Sensitive skin products perform better when applied correctly. Use clean hands, apply moisturizer with gentle pressure, and avoid aggressive rubbing. Pat skin dry after cleansing. Use a soft towel and avoid hot water that can worsen dryness. These small behavior adjustments often improve tolerance more than frequent product swaps. Step 8: Use a simple rotation strategy for recurring triggers If your skin reacts during specific seasons or under certain conditions, you can rotate products based on comfort. Keep your cleanser and moisturizer consistent, and only change one variable at a time. This allows you to identify which formula or texture causes changes in redness or itching. If you are using an exfoliating or brightening cleanser, consider using it less often and pairing it with strong moisturizer support. If you are exploring pigmentation-focused routines, you may research gentle wash options such as foaming face wash for pigment support and keep the rest of your routine minimal. Step 9: Troubleshoot common sensitivity signals Sensitivity can look similar across different causes. Use these troubleshooting guidelines to decide what to adjust. Stinging during cleansing: Switch to a milder cleanser, reduce cleansing frequency, and avoid hot water. Tightness after washing: Increase moisturizing consistency and ensure moisturizer is applied within minutes of cleansing. Redness after sunscreen: Try a different texture, confirm you apply without rubbing, and check whether the sunscreen is being layered with too many actives. Rash-like bumps after treatments: Pause the newest product and reintroduce slowly one variable at a time. Dry, flaky patches: Reduce exfoliation, increase hydration support, and ensure the moisturizer is sufficient. Step 10: Build an evidence-based ingredient filter Although every skin system is unique, you can reduce risk by using a predictable ingredient filter. Many people with sensitive skin respond best to formulas that avoid unnecessary fragrance and keep the ingredient list straightforward. It is also helpful to look for balanced hydration and barrier-supporting components. When comparing sensitive skin products, evaluate tolerability signals such as whether the formula contains known irritants or strong fragrance. If you have a history of reactions, prioritize fragrance-free and simplified routines. If you use any additional topical treatments, use them sparingly and avoid multiple new products on the same day. Summary & Takeaway Sensitive skin products work best when your routine is consistent and your selection process is structured. Begin with a gentle cleanser, add a barrier-supporting moisturizer, and choose sunscreen with a texture you can tolerate daily. Introduce treatments one at a time after comfort is stable, and adjust exfoliation and active frequency if sensitivity appears. Most importantly, focus on skin comfort and tolerance. When you treat sensitivity as a system rather than a single product problem, you create a routine that is easier to maintain and more likely to support long-term skin balance. Q&A Section What are the most important signs that sensitive skin products are not suitable for me? The strongest indicators are burning, persistent stinging, itching that increases over time, swelling, or repeated redness after consistent use. If symptoms appear the same day and continue with continued application, stop the product and simplify your routine until comfort returns. How should I introduce new sensitive skin products to reduce the risk of irritation? Introduce only one new item at a time. Perform a patch test behind the ear or on the inner forearm, then use the product on a small area of the face for several days. If comfort remains stable, you can expand to full-face use while maintaining your core routine of gentle cleansing, moisturizing, and sunscreen. Can I use brightening or acne-targeted treatments with sensitive skin? Yes, but it requires deliberate pacing. Treatment products can be compatible when your barrier is stable and when you avoid stacking multiple actives. Start with a lower frequency and monitor comfort closely. If irritation occurs, pause treatments and rebuild stability before reintroducing them. Is sunscreen still necessary when my skin is easily irritated? Daily sunscreen remains important, because sun exposure can worsen redness and increase overall reactivity. The key is to choose a sunscreen that your skin tolerates and to apply it gently without rubbing. If a sunscreen causes stinging repeatedly, switch to a different texture or formula rather than abandoning sun protection entirely. About the Author Allodermis is a skincare-focused team with expertise in formulation guidance, routine design, and comfort-first product selection for sensitive skin products. We emphasize evidence-informed choices and practical label reading so customers can build dependable routines. The approach is rooted in real-world tolerance and barrier support. Thank you for reading and for prioritizing skin comfort. Disclaimer: This article is for informational purposes only and does not provide medical advice. Individual skin conditions vary, and results depend on many factors. If irritation is severe, persistent, or accompanied by swelling, discontinue use and consult a qualified healthcare professional.
Learn moreHydrating Facial Lotions: How to Choose the Right One
Hydrating facial lotions are a practical step for improving comfort, softness, and the look of skin across seasons. A well-formulated lotion helps skin hold water, supports a healthier skin barrier, and reduces the feeling of tightness after cleansing. In this guide, you will learn what to look for, how to apply hydrating facial lotions correctly, and how to match a lotion to your skin type. You will also find answers to common questions, plus a clear routine you can follow with confidence. Updated on: 2026-06-02 1. Buyer’s Checklist 2. Step-by-Step Guide 3. FAQ 4. Closing Thoughts & CTA 5. About the Author Buyer’s Checklist Choosing hydrating facial lotions becomes easier when you evaluate ingredients and fit. Use the checklist below to refine your selection and avoid mismatches that lead to irritation or poor layering. Look for humectants: Ingredients such as glycerin, hyaluronic acid, panthenol, or betaine attract and retain water in the skin. Support the skin barrier: Ceramides, cholesterol, and fatty acids can help reduce dryness-related sensitivity. Choose emollients for softness: Squalane, shea derivatives, or plant oils help smooth texture and improve comfort. Check for soothing agents: Allantoin, centella, oat-derived ingredients, or niacinamide can calm visible redness or reactive skin. Mind your fragrance and alcohol level: If you have easily irritated skin, prefer fragrance-free or low-irritant formulas. Match the texture to your routine: A lighter lotion works under sunscreen and makeup; a richer cream-like lotion suits nighttime. Verify compatibility with your cleanser: If your cleanser feels tight after washing, a more barrier-supporting lotion may be needed. Assess your climate and season: Cooler, drier weather usually requires stronger water-binding and emollient support. If you are selecting a cleanser as well, a gentle, non-stripping wash can improve how well your hydrating facial lotion performs. Consider pairing your routine with a gentle cleanser such as Cetaphil Gentle Cleanser for a smoother transition from cleansing to hydration. Step-by-Step Guide A consistent application method is essential for achieving the expected benefits of hydrating facial lotions. Follow this structured approach to maximize moisture retention and layering compatibility. Cleanse with care: Wash with a gentle facial cleanser. Pat the skin dry without rubbing, leaving a slight level of residual moisture to support hydration. Apply to damp or freshly dry skin: For many formulations, applying on lightly damp skin improves spreadability and water-binding performance. Use the right amount: Spread a thin, even layer across the face and neck. Use a light touch around the eye area and adjust to your comfort. Focus on dryness zones: Pay attention to cheeks, along the jawline, and areas that feel tight after cleansing. Let it absorb: Wait briefly before applying sunscreen or makeup. This reduces pilling and helps the lotion settle. Layer strategically: If you use serums, apply them first. Then apply your hydrating lotion as the moisture seal. In some routines, a lotion can also act as the base layer for active products. Keep the routine stable: Skin responds to consistent hydration over time. Avoid frequent changes unless you notice irritation, burning, or breakouts that feel linked to a specific product. For readers who want to build a complete hydration routine, it can help to coordinate the texture and goals of each step. For example, a rich, facial hydration product can work well after a targeted wash. If you prefer a classic hydration option, explore Cipla Excela Rich Facial Hydrating Lotion for a straightforward approach to comfort and softness. How to Choose by Skin Type Hydration should feel supportive, not heavy. The best hydrating facial lotion for you depends on how your skin behaves through the day. Dry skin: Prioritize barrier support and richer emollients. Choose a more cushiony texture and apply in the morning and at night. Oily or acne-prone skin: Select a lightweight lotion that absorbs quickly. Focus on humectants and soothing agents rather than heavy oils. Combination skin: Use a balanced lotion that covers the whole face, then concentrate slightly more on dry areas. Sensitive skin: Favor gentle formulas with minimal potential irritants. Perform a patch test on a small area before full use. Morning vs. Night Application Hydrating facial lotions are versatile because they can fit into both daytime and nighttime routines. In the morning, hydration prepares skin for sunscreen and makeup. In the evening, hydration supports overnight recovery and comfort. Daytime routine guidance: Use a hydrating facial lotion as your comfort layer. Apply sunscreen as the final step for daytime protection. If you experience shininess, use a thinner layer and reassess the texture next time. Night routine guidance: Apply a slightly more generous amount where dryness is most noticeable. Allow absorption before bed to reduce residue transfer. If you use acne care or brightening products, layer them first, then add hydration. For those who want to build a full morning routine, sunscreen selection should align with your skin needs. If you want a daily SPF option, consider I Shield Sunscreen Cream SPF 50 PA. A compatible hydration layer can also support smoother sunscreen application. FAQ How often should I use hydrating facial lotions? Most people benefit from using a facial lotion at least once daily. If your skin feels tight, flaky, or reactive, applying twice daily, such as morning and night, is often more comfortable. The goal is consistent hydration without over-layering that leads to heaviness. Can hydrating facial lotions be used with other skincare products? Yes. Hydrating facial lotions usually integrate well with cleansers, serums, and sunscreen. In a typical routine, apply water-based or treatment serums first, then apply the lotion to seal in moisture. If you notice pilling, reduce the amount of lotion and allow brief absorption time. What ingredients indicate a lotion is likely to be well-hydrating? Look for humectants such as glycerin and hyaluronic acid, plus barrier-supporting components like ceramides or fatty acid blends. Soothing agents like panthenol and allantoin can improve comfort, especially on sensitive or dryness-prone skin. Reading the full ingredient list helps you understand how a formula balances water-binding and skin comfort. Why does my face feel dry again soon after applying lotion? Several factors can contribute to dryness returning. A cleanser that removes too much natural oil can cause tightness. Also, using a lotion that lacks emollients or barrier support may not reduce moisture loss. Climate changes and frequent washing can also affect hydration needs, so adjusting texture and application amount can help. Closing Thoughts & CTA Hydrating facial lotions are a practical way to support comfort, softness, and the look of well-cared-for skin. When you choose a formula that includes humectants and barrier-supporting ingredients, you can create a routine that fits your skin type and daily habits. Select a texture that layers cleanly with your sunscreen and any serums you already use. If you want a simple next step, review your current cleanser and lotion match, then consider a targeted hydration option such as Cipla Excela Rich Facial Hydrating Lotion. For readers who prefer a lightweight approach, explore additional hydration-focused items on the site and choose based on your skin comfort goals. Disclaimer: This article is for educational purposes only and does not replace professional medical advice. Individual skin reactions can vary. If you experience persistent irritation, consult a qualified healthcare professional or dermatologist. About the Author Section Allodermis contributes to skin-focused education with a practical, ingredient-aware approach. The team behind these guides emphasizes hydration, barrier support, and routine compatibility for different skin types. Expertise highlights include ingredient analysis, skincare layering strategy, and selection guidance for everyday use. For personalized assistance, consider reaching out to a qualified professional before making significant changes to your skincare routine.
Learn moreAnti-Aging Skincare Routine: Steps That Really Help
Updated on: 2026-06-01 Anti-aging skincare is not a single product or one-time solution. It is a routine that supports skin barrier health, hydration, and consistent protection. The most effective approaches focus on gentle cleansing, targeted active ingredients, and daily sun protection. When you combine evidence-based care with realistic expectations, you can improve the look of fine lines and uneven tone over time. Quick Recap Table of Contents Anti-Aging Skincare Essentials How to Build an Anti-Aging Skincare Routine Common Questions Answered Summary & Next Steps About the Author Quick Recap Anti-aging skincare works best when you use a structured routine and prioritize daily UV defense. Start with a cleanser that does not overstrip. Then add hydrators and carefully selected actives for texture, firmness, and visible signs of aging. Review your routine periodically to match your skin’s current needs. Anti-Aging Skincare Essentials Anti-aging skincare remains a relevant topic because skin changes gradually and visible signs often reflect long-term exposure and daily stressors. These include ultraviolet radiation, environmental dryness, friction, and oxidative stress. The goal is not to “erase” time, but to support skin that looks more even, smoother, and resilient. Effective routines generally share a few fundamentals. First, they protect the skin barrier to reduce dryness and sensitivity. Second, they include hydration to improve comfort and the look of fine lines. Third, they use proven categories of active ingredients that address texture and uneven tone. Finally, they use consistent sun protection because UV exposure is one of the most influential drivers of premature aging. 1) Barrier health is the foundation A strong barrier helps skin retain moisture and respond better to active ingredients. For many people, early frustration comes from using harsh cleansers or over-exfoliating. A barrier-friendly approach supports smoother makeup application, fewer rough patches, and better tolerance of targeted formulas. Look for gentle cleansing and non-stripping hydration. When skin feels tight after washing, it often signals that the cleanser or frequency is not aligned with your skin. In a routine built for anti-aging, comfort matters because it supports consistency. 2) Hydration improves the look of fine lines Fine lines can become more visible when skin is dehydrated. Even when you use actives, hydration helps maintain a supple appearance. Hydration also supports skin elasticity and can reduce the look of crepey texture. For hydration, focus on moisturizers that support long-lasting comfort. If you experience dryness after cleansing, consider a moisturizer that can be used daily and, when needed, a lightweight serum for additional water-binding effects. 3) Daily sun protection drives real results Daily sun protection is central to any anti-aging plan. UV exposure contributes to photoaging, uneven pigmentation, and rough texture. Even on cloudy days, ultraviolet rays can reach the skin. A consistent sunscreen routine is not just an addition; it is the core behavior that reduces new damage. Choose a formula appropriate for your skin type and apply it reliably as the last step of your morning routine. How to Build an Anti-Aging Skincare Routine A practical routine should be simple enough to maintain and flexible enough to adapt. Below is an evidence-informed step-by-step guide that supports anti-aging skincare without relying on extreme or overly complex regimens. Step 1: Cleanse gently Use a gentle cleanser suited to your skin type. Morning cleansing can be minimal; evening cleansing is more important because it removes sunscreen, impurities, and pollutant residue. Avoid very hot water and cleansing that leaves skin feeling dry. If you need a reference point, consider starting with a gentle facial cleanser such as Cetaphil Gentle Cleanser for a non-stripping approach. Step 2: Add targeted actives Actives should match your primary goal. Many people focus on visible lines, uneven tone, dullness, and loss of firmness. For day and night, rotate or combine actives carefully so the skin can tolerate the routine. For hydration and smooth texture: include a daily hydrating lotion or serum layer. For brightening and uneven tone: consider gentle brightening categories such as vitamin C derivatives or pigmentation-targeted actives. For proactive treatment: some serums are designed for daily use that supports a smoother look over time. As examples for guidance on formulation styles, you may explore hydrating lotion options for moisture support, and daily serum concepts aimed at visible tone and texture improvements. Product selection should always be based on your skin sensitivity and ingredient tolerance. Step 3: Moisturize consistently Moisturizers help lock in hydration and reduce the appearance of dryness-related texture. A good moisturizer can also improve how skin handles actives by supporting barrier function. If you have oily skin, you still need moisture. Choose lightweight formats that do not feel greasy and can be applied consistently. If you have dry or sensitive skin, choose a richer texture that reduces tightness. Step 4: Apply sunscreen every morning Sunscreen is the most important step for long-term visible improvement. Apply it every morning as the last step of your skincare routine. Use enough product to cover the face and extend to the neck where appropriate. For oily or acne-prone skin, a non-comedogenic feel is often preferred. You may find suitable options on acne-focused UV gel listings. For daily coverage, another approach is to use broad protection formulas such as sunscreen cream options. Step 5: Plan a night routine and adjust frequency At night, you can focus on replenishment and active support. Start with your core steps, then adjust the frequency of stronger actives if your skin becomes reactive. For many people, gradual introduction prevents irritation. For example, brightening and antioxidant support can be layered in a night routine, while other active categories can be used less frequently if needed. The key is to observe your skin response and keep the routine sustainable. Step 6: Exfoliate only as needed Exfoliation can improve surface texture, but overuse can damage the barrier and worsen sensitivity. Choose a mild frequency and stop if you notice redness, burning, or increased flaking. If you already use strong active ingredients, keep exfoliation minimal. A gentle brightening or mild exfoliation plan can complement hydration and sunscreen. Always allow recovery time after stronger treatments. Common Questions Answered When should I start anti-aging skincare? You can begin once you notice early changes such as dryness, uneven tone, or the first appearance of fine lines. Many people start in their early adulthood because prevention is easier than correction. The best approach is to build a routine that supports barrier health and UV protection first, then add actives that fit your skin goals. How long does it take to see results from anti-aging skincare? Visible improvements depend on your baseline skin condition, the consistency of sun protection, and how your skin responds to actives. Instead of focusing on short timelines, evaluate your routine over multiple skincare cycles. If irritation occurs, the timeline will be longer because the priority shifts to restoring comfort and barrier function. Can I use every active in one routine? Using too many actives at once often increases the risk of redness, dryness, and reduced tolerance. A more reliable strategy is to select one primary active goal at a time, introduce new ingredients gradually, and adjust frequency based on your skin’s response. Consistency with cleanser, moisturizer, and sunscreen typically provides the baseline structure for all other improvements. What if I wear makeup and need sunscreen daily? You can still maintain daily UV defense by applying sunscreen as the first step under makeup and reapplying when necessary using methods that suit your routine. Choose a formula that works with your skin type and does not cause pilling. If you need additional coverage during the day, consider products that are designed for reapplication comfort. Summary & Next Steps Anti-aging skincare is most effective when it is systematic and consistent. Begin with gentle cleansing to protect the skin barrier, add hydration to improve comfort and the look of fine lines, and prioritize daily sunscreen to reduce new UV damage. When you select actives, match them to your primary concerns and introduce them gradually to support skin tolerance. Next steps should focus on routine design and evaluation. Choose a cleanser, moisturizer, and sunscreen that you can use every day. Then add one targeted active category aligned with your goals, and adjust frequency based on how your skin responds. If you would like guidance on ingredient-friendly options, review the curated product pages on Allodermis and select formulas that align with your skin profile. Disclaimer: This article is for educational purposes only and does not provide medical advice. Individual results vary based on skin type, lifestyle, and consistency of use. If you have a skin condition, sensitivity, or ongoing treatment, consult a qualified healthcare professional before changing your skincare routine. About the Author Allodermis is dedicated to evidence-informed skincare guidance with a focus on formulation quality and practical routines. The author team includes professionals with experience in dermatology-adjacent education, ingredient research, and consumer skincare support. This expertise helps translate skincare concepts into clear, actionable steps. For readers who want a structured routine, Allodermis aims to make anti-aging skincare decisions more confident and consistent.
Learn moreKeratosis Pilaris: What It Really Is and How to Manage Those Tiny Bumps
Keratosis Pilaris (KP) is a common, non-contagious skin condition resulting from keratin buildup that clogs hair follicles, creating small, rough bumps often found on the upper arms, thighs, and cheeks. Unlike acne, KP is often linked to genetics and dry skin, and should not be treated with harsh scrubbing or drying cleansers, which can increase redness. Although there is no permanent cure, KP can be significantly improved with consistent management, which includes gentle chemical exfoliation, moisturizers containing ingredients like urea or lactic acid, and maintaining short, lukewarm showers. For stubborn or widespread cases, consulting a dermatologist is recommended for advanced options such as chemical peels or laser therapy.
Learn moreSkin Rejuvenation Procedures: Complete Guide and Tips
Updated on: 2026-06-01 Skin rejuvenation procedures can improve the look of texture, tone, and glow when they are matched to your skin needs. The most effective plan usually combines the right in-clinic treatment with consistent daily care. Myths about instant results often lead people to choose options that do not fit their concerns. This guide explains how to evaluate common skin rejuvenation choices, what to expect, and how to build a safe routine that supports long-term results. 1. Myths vs. Facts 2. Personal Experience 3. How to Choose the Right Skin Rejuvenation Procedures 4. What to Expect Before, During, and After 5. Aftercare That Supports Rejuvenation 6. Building an Evidence-Informed Routine 7. Final Thoughts & Takeaways 8. Q&A 9. About the Author Myths vs. Facts Myth: Skin rejuvenation procedures always deliver dramatic change in a single visit. Fact: Many rejuvenation outcomes build gradually as skin cycles progress and inflammation settles. Myth: One treatment type fits every skin concern. Fact: Treatment selection depends on goals such as fine lines, uneven tone, acne scarring, or visible pores. Myth: Stronger energy or deeper treatment is automatically better. Fact: The safest approach is appropriate intensity with careful patient screening and risk mitigation. Myth: Aftercare matters only after the procedure ends. Fact: Daily protection and barrier support often influence how well the skin tolerates treatments. Myth: At-home skincare can replace professional treatment for all concerns. Fact: At-home products can support results, but certain issues may require in-clinic modalities. Personal Experience I have observed that the biggest shift happens when people stop chasing one “magic” option and start treating skin as a system. In consultations, many clients arrive focused on a single word such as “brightening” or “tightening.” After a careful assessment of texture, sensitivity, and day-to-day habits, their plans become more grounded. When the routine includes sun protection, gentle cleansing, and targeted actives, the skin often looks calmer and more even over time. That experience reinforced a simple principle: skin rejuvenation procedures are most successful when they are paired with consistent, realistic care. How to Choose the Right Skin Rejuvenation Procedures Choosing skin rejuvenation procedures begins with clear goals. Ask what you want to improve: fine lines, uneven tone, dullness, enlarged pores, acne marks, or overall texture. Then assess skin behavior such as sensitivity, dryness, oiliness, and how your skin reacts to active ingredients. This creates a practical direction for discussion with a qualified clinician. 1) Align the procedure with your primary concern Different modalities address different targets. Some options are designed to improve surface texture and promote a smoother appearance. Others focus on color irregularities. If you select based on marketing rather than goals, you may invest in a procedure that does not match the underlying issue. 2) Consider your skin tolerance and barrier status A healthy skin barrier reduces irritation and supports recovery. If your skin is frequently reactive, you may need a short preparation phase that emphasizes gentle cleansing, moisturizing, and sun protection. This does not mean you cannot pursue rejuvenation. It means you may need a more supportive plan first. 3) Evaluate downtime, comfort, and timing Many people choose around major events, but a better approach is to choose based on recovery needs and your routine flexibility. Even when downtime is limited, your skin may require extra care afterward. Planning reduces stress and helps you follow aftercare guidance. 4) Ask about risk management and screening Reputable providers screen for conditions that can affect safety and outcomes. These include a history of abnormal scarring, active skin infections, and other factors that influence healing. You should also discuss patch testing for topical regimens if you plan to use stronger actives before or after procedures. 5) Build a plan that includes supportive skincare Professional treatments work best when you keep the rest of the routine stable. Consistent sunscreen use, gentle cleansing, and barrier support create a foundation. Targeted serums can support pigmentation control and texture goals when used responsibly. If you want to strengthen your baseline routine, consider a gentle cleanser such as Cetaphil Gentle Cleanser for daily use. Pairing a stable cleanse with a moisturizer and broad-spectrum sun protection often helps many skin types maintain comfort while pursuing rejuvenation goals. What to Expect Before, During, and After Understanding the workflow of skin rejuvenation procedures can help you feel prepared. While exact steps vary by provider and modality, most evidence-informed experiences share common themes: pre-procedure evaluation, an appropriate treatment plan, and structured aftercare. Before the procedure A qualified assessment usually reviews your history, current skincare, and visible concerns. Providers may ask about recent product changes, sensitivity, and sun exposure. In many plans, clinicians recommend minimizing new or harsh products shortly before treatment to reduce irritation risks. During the procedure During treatment, the clinician manages comfort and applies the chosen modality with care. Clear communication is important. You should feel able to ask questions about sensations, expected appearance changes, and protective steps. Professional standards often include hygiene protocols and post-treatment instructions. After the procedure Aftercare commonly includes barrier-friendly care, sun avoidance strategies when appropriate, and temporary simplification of the routine. Many people notice changes such as improved tone or texture over time, but the most realistic goal is progress rather than perfection. Skin may appear different during healing phases, and consistent care helps it stabilize. For sun protection support, many dermatology-aligned routines include a reliable daily SPF. If you use a targeted product, choose it carefully based on your skin type. For example, IPCA Acne UV Gel SPF 50 is an option designed for acne-prone routines, which can be relevant when planning around rejuvenation outcomes. Aftercare That Supports Rejuvenation Aftercare is not a formality. It is a key part of how skin responds to treatment. Your primary responsibilities are protecting from ultraviolet exposure, maintaining hydration, and using gentle products that reduce irritation. Prioritize sun protection Ultraviolet exposure can worsen uneven tone and slow recovery. A broad-spectrum sunscreen helps protect your skin from daily environmental stress. In addition, consider physical shade strategies such as hats and avoiding prolonged peak sun when practical. Consistency matters more than occasional heavy application. Support the barrier with moisturizing care Moisture reduces discomfort and helps skin tolerate routine changes. Look for formulas that are compatible with sensitive skin. If your skin is dry, a simple moisturizer can prevent tightness and visible flaking that may interfere with comfortable healing. When planning actives, use a conservative approach. If you are unsure whether a serum is suitable after treatment, follow the provider guidance. A slow reintroduction often reduces the chance of irritation. Use targeted ingredients with care Some clients benefit from pigmentation support and soothing actives after rejuvenation. However, tolerance should guide selection. Ingredients such as vitamin C, niacinamide, and gentle exfoliation agents can support tone and brightness for many people, but overuse can create redness and dryness. For example, Dermatica AZE Proactive Serum may be considered in routines that require proactive skin management. Integrating any active after a procedure should be done with care and ideally with clinician-approved timing. Avoid unnecessary irritation For a period after treatment, avoid aggressive scrubs and harsh cleansing strategies. Do not layer multiple strong actives at once. If irritation increases, pause additional actives and focus on basic barrier support until the skin stabilizes. Building an Evidence-Informed Routine A practical routine is one that you can maintain. Many people fail because their routine becomes inconsistent, overly complex, or full of products that conflict with each other. Build your skin support plan in layers: cleanse gently, moisturize, protect with sunscreen, and then add targeted treatment steps based on your concerns. Step 1: Cleanse gently Use a gentle cleanser to remove daily debris without stripping your skin. Over-cleansing can increase dryness and sensitivity. For daily use, consider Cetaphil PRO Oil Control Foam Wash if you experience excess oil. If your skin is not oily, gentler options may be more comfortable. Step 2: Treat with targeted support Targeted serums can support tone and texture goals. Vitamin C products are commonly used for brightness and antioxidant support, while other formulas support smoother skin appearance and overall radiance. If pigmentation is a key concern, options such as Sesderma C-Vit Liposomal Serum can be considered as part of a well-tolerated regimen. Always introduce actives gradually and stop if irritation occurs. Step 3: Moisturize to reduce friction Moisturizers help support comfort and reduce the risk of micro-irritation. When your skin feels stable, you may tolerate targeted ingredients more easily. If you are exploring brightening-oriented moisturizers, consider Melaglow Rich Cream as an option within a broader plan. Compatibility depends on skin type and sensitivity, so patch testing and slow integration are prudent. Step 4: Protect every day Daily SPF is essential. Rejuvenation work often aims to improve clarity and tone. Without sun protection, progress can be limited and new unevenness can appear. Choose a sunscreen that you can apply consistently and comfortably. For individuals who prefer a brightening sunscreen approach, Fixderma Shadow Sunscreen Cream can be considered as part of a daily protective routine. Select the formula that matches your skin preference and tolerability. Step 5: Track outcomes with realistic expectations Skin changes can be subtle at first. A consistent routine makes it easier to notice improvements in texture, clarity, and comfort. Instead of comparing yourself to others, track your own progress using clear photos in consistent lighting. This helps you understand what is working and what needs adjustment. Final Thoughts & Takeaways Skin rejuvenation procedures can be a powerful option when they are chosen for the correct concern and paired with consistent aftercare. The best outcomes typically come from a plan that prioritizes barrier health, sun protection, and responsible reintroduction of targeted ingredients. Avoid quick-fix thinking, because skin improvement often reflects gradual healing and steady support. If you approach rejuvenation as a long-term skin strategy rather than a one-time event, your results are more likely to feel stable and natural. Q&A Section What are the most common skin rejuvenation procedure goals? People usually seek improved texture, smoother skin appearance, more even tone, and a refreshed glow. Some aim to reduce the look of fine lines, while others want support for acne marks or overall radiance. A clinician can help align the modality selection with your primary concern and skin tolerance. How soon can I expect visible results from skin rejuvenation procedures? Visible changes often develop over time as the skin settles and rebuilds. The exact timing depends on the procedure type, your skin response, and how consistently you follow aftercare. Instead of expecting immediate perfection, focus on gradual progress and provide your skin with stable daily support. Can I use skincare actives after a rejuvenation procedure? In many cases, actives can support results, but timing and tolerance are critical. After treatment, your clinician may recommend simplifying the routine first, then reintroducing specific ingredients slowly. If irritation occurs, reduce frequency and prioritize barrier support until the skin stabilizes. How do I know if a procedure is appropriate for my skin type? Appropriateness depends on more than skin type. It also depends on your sensitivity level, current barrier status, history of reactions, and the exact concern you want to address. A qualified provider will assess these factors and propose a plan that manages risk while supporting your goals. About the Author Allodermis is represented by a team of skincare and content specialists focused on evidence-aligned education and practical routine design. The author brings expertise in dermatology-inspired skincare frameworks, barrier care principles, and ingredient-informed guidance for daily use. This content is intended to help readers make informed decisions about skin rejuvenation procedures with a focus on safety and realistic outcomes. Thank you for reading, and you are encouraged to consult a qualified professional for personalized guidance. Disclaimer: This article is for educational purposes only and does not provide medical advice. Individual results vary, and procedures and skincare regimens should be discussed with a qualified healthcare professional or licensed clinician. If you have a skin condition, allergies, or a history of adverse reactions, seek personalized guidance before making decisions about skin rejuvenation procedures.
Learn moreAcne Scar Therapies: Options for Clearer, Smoother Skin
Acne scar therapies aim to improve texture, tone, and the depth of marks left after acne. The best plan depends on scar type, skin sensitivity, and how consistently you protect your skin from sun. A combination approach is often more effective than relying on a single method. With realistic expectations and a structured routine, many people can reduce the visible impact of acne scarring over time. Updated on: 2026-05-31 1. Introduction 2. Did You Know? 3. Comparison: Pros & Cons 4. Acne Scar Therapies by Scar Type 5. Skin Care Foundations That Support Scar Improvement 6. Buyer’s Checklist 7. Final Thoughts & Advice 8. Q&A Section 9. About the Author Introduction Acne scarring can feel frustrating because it is often harder to treat than active breakouts. Acne scar therapies focus on remodeling damaged skin and improving the look of marks that persist after inflammation has settled. The value of this guide is practical: it helps you match treatment choices to scar patterns, build a supportive skincare routine, and understand common trade-offs. You will also learn how to evaluate options with clearer expectations and safer decision-making. Before you choose a path, it helps to know that “acne scars” is not a single problem. Some scars are raised. Others are indented. Many are a mix of both. This matters because the best approach for one skin pattern may underperform on another. Did You Know? Not all post-acne marks are true scars; some are temporary discoloration that fades with consistent care. Inflammation and collagen disruption during acne can lead to texture changes that require targeted remodeling. Sun exposure can worsen the appearance of old marks by increasing pigment activity in healing skin. Raised scars and indented scars respond differently, which is why scar type determines treatment selection. A supportive regimen can improve results by improving barrier health and reducing irritation that slows progress. Comparison: Pros & Cons Chemical exfoliation (gentle acids): Pros: Can reduce dullness and support smoother texture; Cons: May irritate sensitive skin if overused. Topical scar-focused actives: Pros: Convenient and gradual; Cons: Results can be subtle and require consistency. Microneedling: Pros: Can stimulate collagen for texture improvement; Cons: Needs correct technique and downtime varies by person. Laser and light-based options: Pros: Can target pigment and texture; Cons: Often requires professional assessment and careful aftercare. Subcision and surgical approaches: Pros: Can address specific indented structures; Cons: Typically more involved and best for certain scar patterns. Acne Scar Therapies by Scar Type Matching therapies to scar type is one of the most effective ways to reduce wasted effort. Below is a practical framework for decision-making. 1) Indented scars (atrophic scars) Indented scars are often linked to disrupted collagen support beneath the skin surface. Acne scar therapies that stimulate deeper remodeling are commonly considered. Microneedling and select laser modalities can help improve texture. Subcision is sometimes used when tethering creates a visible “pull” in the skin. 2) Raised scars (hypertrophic or keloid-like scars) Raised scarring involves an overproduction of collagen during healing. Treatments may focus on flattening texture and calming inflammation. Options can include medical approaches and careful topical support depending on your skin response. Because raised scars can remain active for long periods, early evaluation is valuable. 3) Post-acne discoloration Many people notice brown or red marks after acne. These are often pigment changes or lingering redness rather than permanent structural scars. In these cases, acne scar therapies may include brightening-focused ingredients plus diligent daily sun protection. When redness or discoloration fades, the overall skin surface often appears more even even without dramatic texture work. Skin Care Foundations That Support Scar Improvement Even when you plan professional treatments, daily skincare sets the stage for better outcomes. A strong foundation reduces irritation, supports healing, and limits pigment darkening. The following elements are widely relevant for scar recovery routines. Daily sun protection Consistent sunscreen use is essential. Ultraviolet exposure can intensify pigment and prolong the look of old marks. Look for broad-spectrum coverage with stable protection. If you are using exfoliating or resurfacing treatments, sunscreen becomes even more important to prevent new discoloration. If you are searching for a routine-aligned option, consider an acne-friendly approach such as acne UV gel SPF 50 or a lightweight daily sunscreen like SPF 50 PA sunscreen. Barrier-supporting cleansing Gentle cleansing helps remove oil and residue without stripping the skin barrier. Over-cleansing can worsen sensitivity, which can delay the benefits of scar work. Choose a cleanser that feels comfortable and use it consistently. You may prefer a gentle option such as gentle cleanser to support a stable routine. Targeted exfoliation and pigment support For discoloration and rough texture, mild exfoliation can help. Chemical exfoliants like lactic acid, glycolic acid, or salicylic acid may support smoother appearance when used at a pace your skin tolerates. If you are new to actives, start gradually. If irritation appears, reduce frequency and prioritize barrier recovery. When aiming to support a brighter tone, some people pair exfoliation with a hydrating approach using products like rich facial hydration lotion to maintain comfort during active use. Hydration and soothing Hydration does not erase scars by itself, but it supports the skin’s readiness for treatment. Well-hydrated skin is less reactive, which can make it easier to maintain a steady regimen. A lotion or moisturizer that suits your skin type can reduce dryness that otherwise triggers rebound redness. Buyer’s Checklist This checklist is designed to help you choose acne scar therapies in a way that is realistic, safe, and consistent. Confirm your scar category: Identify whether your main issue is texture, raised scars, or discoloration. Take note of which problem is most visible. Assess your skin sensitivity: If you have a history of irritation, prioritize gentle routines and avoid stacking too many strong actives at once. Choose a compatible cleanser: Use a non-stripping cleanser so your routine remains stable between active treatments. Use daily sun protection: Make sunscreen a non-negotiable step to prevent pigment recurrence. Plan for consistency: Many scar improvements are gradual. Select a regimen you can follow without frequent changes. Start with conservative frequency: Introduce exfoliation or scar-supporting actives slowly to reduce irritation risk. Evaluate ingredient fit: Look for soothing and hydrating support if your skin feels reactive. Set expectations based on scar depth: Indented scars usually need texture remodeling, while discoloration may fade more readily. Know when to seek professional guidance: If scars are deep, raised, or worsening, an in-person assessment can improve decision quality. Final Thoughts & Advice Acne scar therapies can be effective, but success depends on correct matching of treatment strategy to scar pattern and skin needs. Indented scars often require collagen remodeling approaches, while post-acne discoloration can improve with consistent pigment-support and daily sun protection. Raised scars may need specialized care and should not be treated with a one-size-fits-all mindset. For long-term improvement, focus on repeatable fundamentals: gentle cleansing, daily broad-spectrum protection, and a steady routine that your skin can tolerate. Consider building your regimen around barrier comfort so that active steps do not lead to ongoing irritation. If your results plateau or your scars appear severe, consult a qualified dermatologist to refine your plan. CTA: If you want to standardize your daily routine around sun protection and gentle skincare support, explore options on Allodermis and select products that align with your sensitivity and scar goals. Q&A Section How do I know whether I have scars or discoloration after acne? Scar tissue usually changes texture. Indented scars feel like small depressions. Raised scars look thicker and more prominent. Discoloration primarily changes color, such as red or brown patches, without a clear texture shift. Many people have both, so it is useful to note which aspect is more noticeable in your mirror under natural light. Are acne scar therapies effective for all skin tones? Therapy selection can be adapted for different skin tones. The key is choosing methods that respect pigment sensitivity and using daily sun protection. Some strategies that support even tone may require more cautious pacing if your skin tends to hyperpigment. A careful routine and, when needed, professional assessment can help tailor the approach. What is the most common mistake people make when treating acne scars? The most common mistake is using too many strong steps at once. Over-exfoliation and irritation can worsen redness, disrupt the barrier, and extend the visible impact of marks. Another frequent error is inconsistent sun protection. Consistency across cleansing, moisturizing, and sunscreen often determines whether improvement looks steady rather than erratic. When should I consider professional treatment for scar texture? Consider professional guidance if scars are deep, widespread, or clearly worsening, or if home-based routines do not improve texture after consistent use. Many in-office therapies focus on remodeling or targeted resurfacing. A qualified clinician can confirm scar type and propose a plan that aligns with your skin response and goals. About the Author Allodermis Allodermis is a skincare-focused contributor with expertise in ingredient education, routine planning, and evidence-informed beauty guidance. The team supports readers with practical frameworks for safer selection of acne scar therapies and supportive everyday care. Thank you for reading, and take the next step toward a more consistent, skin-friendly routine. Disclaimer: This article is for educational purposes only and does not provide medical advice, diagnosis, or treatment. Individual results vary, and you should consult a qualified healthcare professional or dermatologist for guidance tailored to your skin condition. If you experience burning, severe irritation, or worsening symptoms, discontinue use and seek professional evaluation.
Learn moreWhat to Expect From Dermatologist Consultations
Dermatologist consultations are a practical way to understand skin concerns and build a safe, targeted routine. In this guide, you will learn what to expect, how to prepare, and how professional guidance can reduce guesswork. You will also find clear answers to common questions and evidence-based myths. By the end, you will have a structured plan for discussing symptoms, choosing next steps, and tracking results over time. Updated on: 2026-05-31 Dermatologist consultations help translate skin symptoms into a clear care plan. You can review triggers, evaluate product habits, and discuss options that match your skin type and goals. Preparation improves communication and helps clinicians assess patterns more accurately. When you leave with a plan, your routine becomes more consistent and easier to evaluate. 1. What are dermatologist consultations? 2. Product Spotlight 3. Myths vs. Facts 4. How to prepare for your visit 5. How to interpret treatment and routine changes 6. Frequently Asked Questions 7. Final Recommendations 8. Q&A Section 9. About the Author What are dermatologist consultations? Dermatologist consultations are appointments with a licensed skin specialist who evaluates skin, hair, and sometimes nail conditions. The goal is to identify likely causes, assess severity, and recommend a plan that fits your lifestyle and sensitivities. A consultation also supports safer product use because skin concerns are often more complex than they appear on the surface. During an evaluation, the clinician typically reviews your history, examines the affected areas, and asks targeted questions. These questions may include when symptoms began, what changed before symptoms started, and what products you use daily. Many clinicians also discuss environmental factors such as sun exposure, friction, humidity, and stress-related skin reactivity. Dermatologist consultations can be especially useful when you have persistent issues, unclear triggers, or multiple products that have not produced consistent improvement. They also help you rule out conditions that resemble common acne, irritation, or eczema. Product Spotlight A clinician-guided routine often includes gentle, consistent base products and carefully chosen actives. While a dermatologist can prescribe medications when needed, everyday skincare frequently starts with barrier-supporting cleansing and hydration. In many routines, an appropriate cleanser reduces excess oil and debris without stripping the skin, while a lightweight moisturizer helps maintain comfort between active treatments. For those who want a practical approach that aligns with professional recommendations, consider starting with a gentle cleanser. For example, you can explore a daily option such as Cetaphil Gentle Cleanser to support a calmer baseline. If you have oil-control goals, you can compare with Cetaphil Pro Oil Control Foam Wash and evaluate how your skin responds. A dermatologist can help you choose the right fit based on your texture, sensitivity, and climate. When skin is prone to breakouts or visible congestion, clinicians may also advise targeted formulas that address multiple pathways, such as inflammation and clogged pores. For sun protection, which is a common requirement across many dermatologic plans, a broad-spectrum sunscreen with consistent daily use often plays a central role. You may find an example option at IPCA Acne UV Gel SPF 50, which can be useful for acne-prone users when selected appropriately. Myths vs. Facts Myth: “A dermatologist consultation is only for severe skin disease.” Fact: Many people seek dermatologist consultations for persistent irritation, slow-to-improve acne, uneven texture, or concerns about dark marks. Early, accurate guidance can prevent unnecessary trial and error. Myth: “If a product is popular, it will work for any skin type.” Fact: Skin conditions depend on barrier status, sensitivity, and underlying causes. A clinician often considers how your skin reacts to ingredients, how you layer products, and how you respond over time. Myth: “You should change products every few days to see results.” Fact: Many skincare adjustments require consistent use to assess response. Frequent changes can confuse cause-and-effect and increase irritation risk, which is why a structured plan matters. Myth: “Professional advice replaces sunscreen and basic care.” Fact: Sunscreen and gentle baseline care are common foundations. Dermatologists often emphasize consistency because sun exposure and barrier disruption can undermine improvement from treatments. How to prepare for your visit Preparation helps dermatologist consultations run more smoothly and supports better decision-making. Start by documenting your concern in neutral terms. Include the main issue, when it began, and how it has changed. If you can, note the locations and whether symptoms spread, improve, or flare with time. Next, gather product details. Clinicians often ask about cleansers, moisturizers, serums, spot treatments, exfoliants, and sunscreens. Bring packaging or write down ingredient and brand names, along with how often you use each item. If you recently changed a routine, mention the exact timing. This information can clarify whether symptoms relate to irritation, product layering, or a trigger. Also consider your medical context. Share any known allergies, chronic conditions, or ongoing medications. If you have tried previous treatments, describe what improved symptoms and what made them worse. Dermatologists can interpret past outcomes and adjust next steps accordingly. Finally, prepare questions. People often focus on “what should I use,” but dermatologist consultations also benefit from questions about “how to use it” and “how to track progress.” Ask how to introduce new products safely, what to expect from gradual changes, and when to schedule follow-up if progress is slow. If you want a practical discussion about brightening or uneven tone, clinicians may evaluate whether your marks are related to inflammation, sun exposure, or recurring irritation. In such cases, they might recommend structured options. For example, you can review daytime and nighttime needs, and explore product categories that align with guidance such as Bioderma Pigmentbio Night Renewer for nighttime support, as appropriate. How to interpret treatment and routine changes One reason dermatologist consultations are valuable is that they provide a framework for evaluating what works. Dermatologic plans often include a baseline routine and one or two targeted adjustments. When you change multiple items at once, it becomes harder to know which change caused improvement or irritation. A clear plan reduces confusion and protects the skin barrier. To interpret progress, focus on patterns rather than daily fluctuations. Many conditions have cycles related to weather, sleep, stress, friction, and hormonal changes. A dermatologist will often discuss realistic timelines for improvement and emphasize that steady use matters. At the same time, it is important to monitor adverse reactions. If you experience burning, swelling, severe dryness, or worsening rash, stop the suspected product and contact your clinician. Safe skincare is not about pushing through discomfort. When active ingredients are included, layering strategy becomes more important. Dermatologists may recommend introducing one active at a time, using a consistent schedule, and prioritizing moisturizer and sunscreen. For people concerned about acne, barrier sensitivity, or sun-related marks, clinician-guided steps can reduce the risk of over-exfoliation. For sun management, sunscreen is not merely a finishing step. It is often a key part of a comprehensive plan, especially when pigmentation concerns exist. If you want a product example for daytime coverage, consider reviewing Fixderma Shadow Sunscreen Cream with your clinician’s advice, particularly if you have sensitive skin and need consistent daily protection. Frequently Asked Questions 1) How often should I schedule follow-up after dermatology advice? Follow-up frequency depends on the condition and the plan. Many routine skincare improvements are assessed after several weeks, while new or changing symptoms may require earlier review. Your dermatologist will set a realistic follow-up schedule based on severity. 2) What should I bring to my appointment? Bring a list of current skincare products, any prior treatments, and details about when symptoms began. If possible, bring photos from earlier stages and packaging to support accurate identification. 3) Can dermatologist consultations help with acne scars and dark marks? Yes. A clinician can distinguish between active inflammation and residual pigmentation, then recommend an appropriate combination of barrier support, sun protection, and targeted actives or procedures when indicated. 4) Will I need prescriptions every time? Not necessarily. Many dermatology plans start with routine optimization and ingredient selection. Prescriptions are used when necessary for specific conditions. Final Recommendations To get the best results from dermatologist consultations, approach your appointment as a planning session, not only an answer session. Document your symptoms and routine, ask specific questions about product use and monitoring, and request a clear baseline plan that you can follow consistently. Choose changes that are practical and measurable. Keep cleansing gentle, moisturize appropriately, and use sunscreen daily when your clinician recommends it. If you add actives, introduce them one at a time so that you can identify what supports improvement and what increases sensitivity. After the consultation, create a simple tracking method. Note improvements in texture, redness, oiliness, flaking, or irritation. Also note any setbacks, including timing and triggers. This information helps your dermatologist refine the plan at follow-up. If you want to explore a well-structured routine, you can review category options on Allodermis and select products that match your skin needs. However, product choice should remain aligned with professional guidance and your personal tolerance. Q&A Section What is the difference between a skincare consultation and dermatologist consultations? Skincare consults often focus on product selection and general routines. Dermatologist consultations evaluate medical and dermatologic causes, examine skin closely, and can recommend prescription treatment or procedural care when needed. Dermatology visits are also more appropriate when symptoms persist, worsen, or resemble a condition beyond simple irritation. How can I explain my skin concern clearly during a dermatologist consultation? Describe what you notice in simple terms: appearance, location, and changes over time. Mention triggers such as new products, sun exposure, friction, shaving, or heat. Include what you have already tried and how your skin responded. This structure helps the clinician connect symptoms with probable causes. What should I do if my skin gets worse after starting a new routine? Stop the most recently introduced product or active ingredient and return to a gentle baseline. If worsening includes severe burning, swelling, or rapidly spreading rash, seek urgent clinical guidance. In most routine cases, barrier disruption and irritation can be reduced by simplifying the regimen and reintroducing actives more slowly after expert review. Can dermatologist consultations help with sensitive skin and recurring flares? Yes. Dermatologists often assess barrier integrity, identify irritant patterns, and recommend a stable routine that limits triggers. They may also advise how to adjust frequency, product types, and hydration support so that your skin can recover between flares. How do I know whether a product is suitable after my appointment? Use the appointment plan as the reference point. If your clinician recommended a product category, verify that the product fits your routine schedule and does not conflict with other actives. Introduce changes gradually and monitor comfort for several weeks. If your skin becomes painful, very red, or intensely itchy, discuss alternatives with your dermatologist. About the Author Section Allodermis is known for supporting evidence-informed skincare decisions with practical product guidance. This article was written by a content specialist with expertise in dermatology-adjacent education, skincare routine planning, and clarity-focused consumer communication. The aim is to help readers approach dermatologist consultations with confidence and structure. Thank you for reading, and for taking thoughtful steps toward healthier skin. Disclaimer: This article is for informational purposes only and does not replace medical advice, diagnosis, or treatment. Always consult a licensed dermatologist or qualified healthcare professional for guidance tailored to your condition. Product suitability varies by skin type and tolerance, and individual results may differ.
Learn more