


Skin Acacdemy

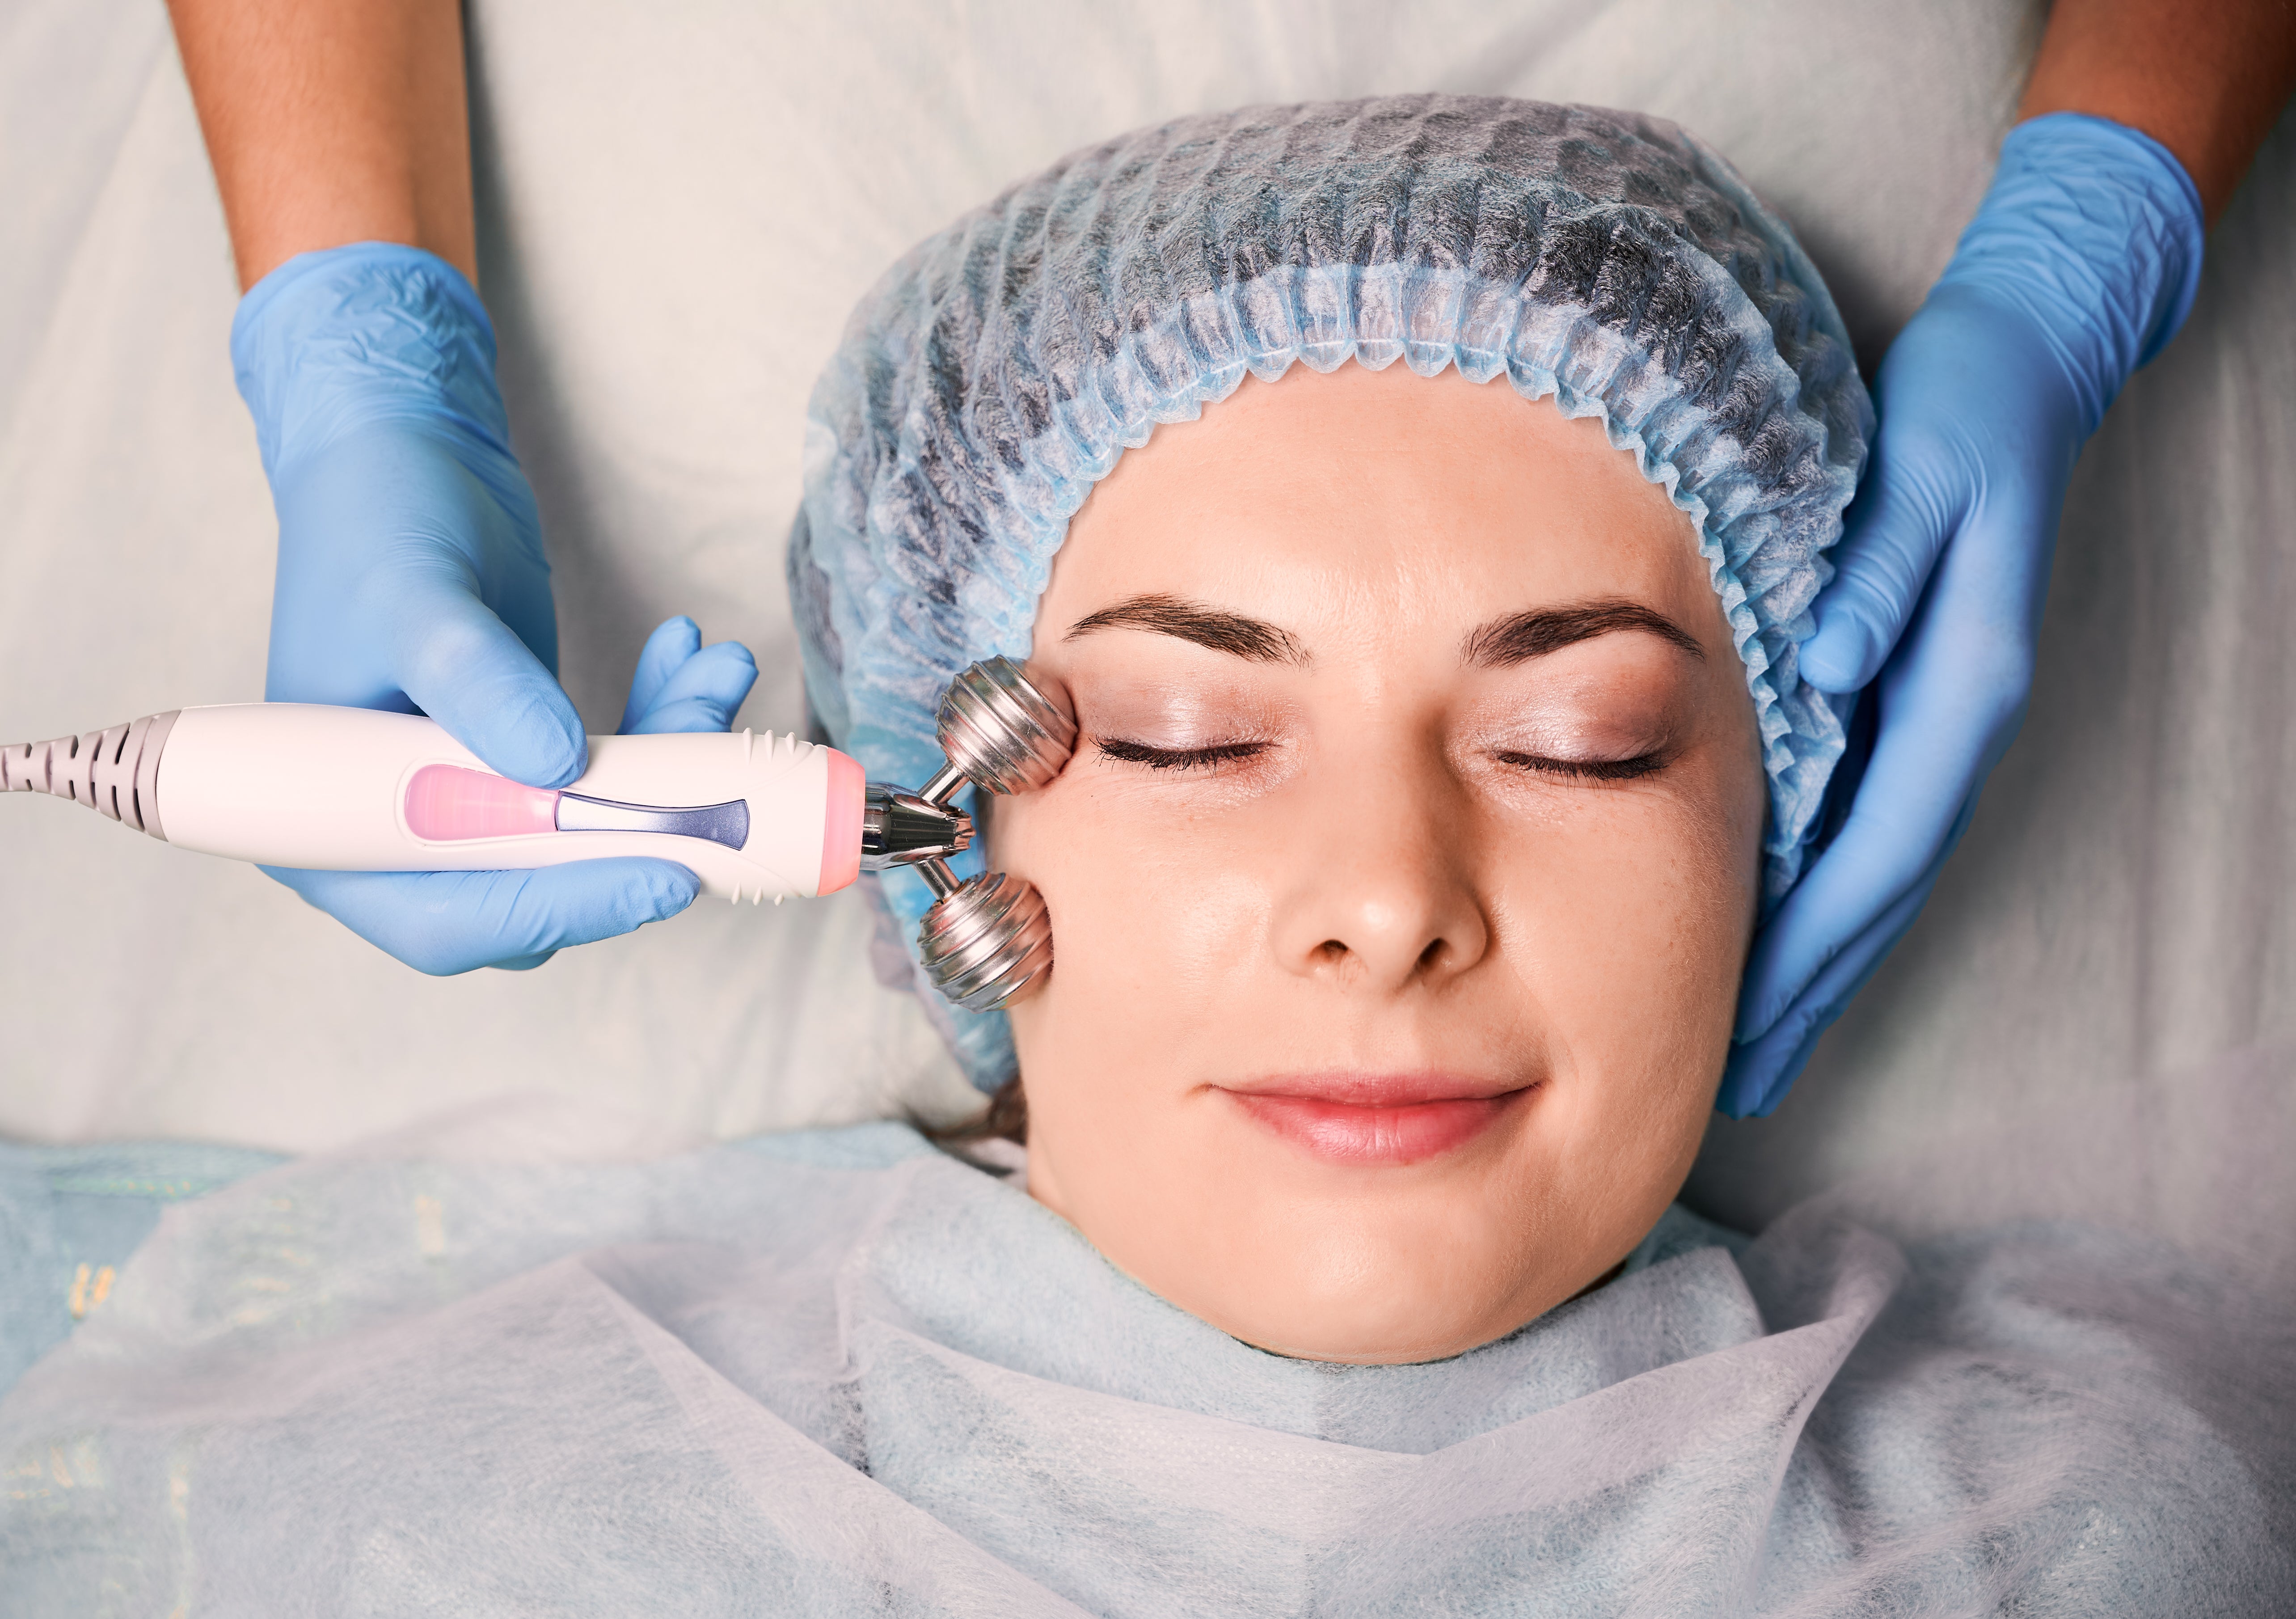
Facial Rejuvenation Treatments: What to Expect and Results
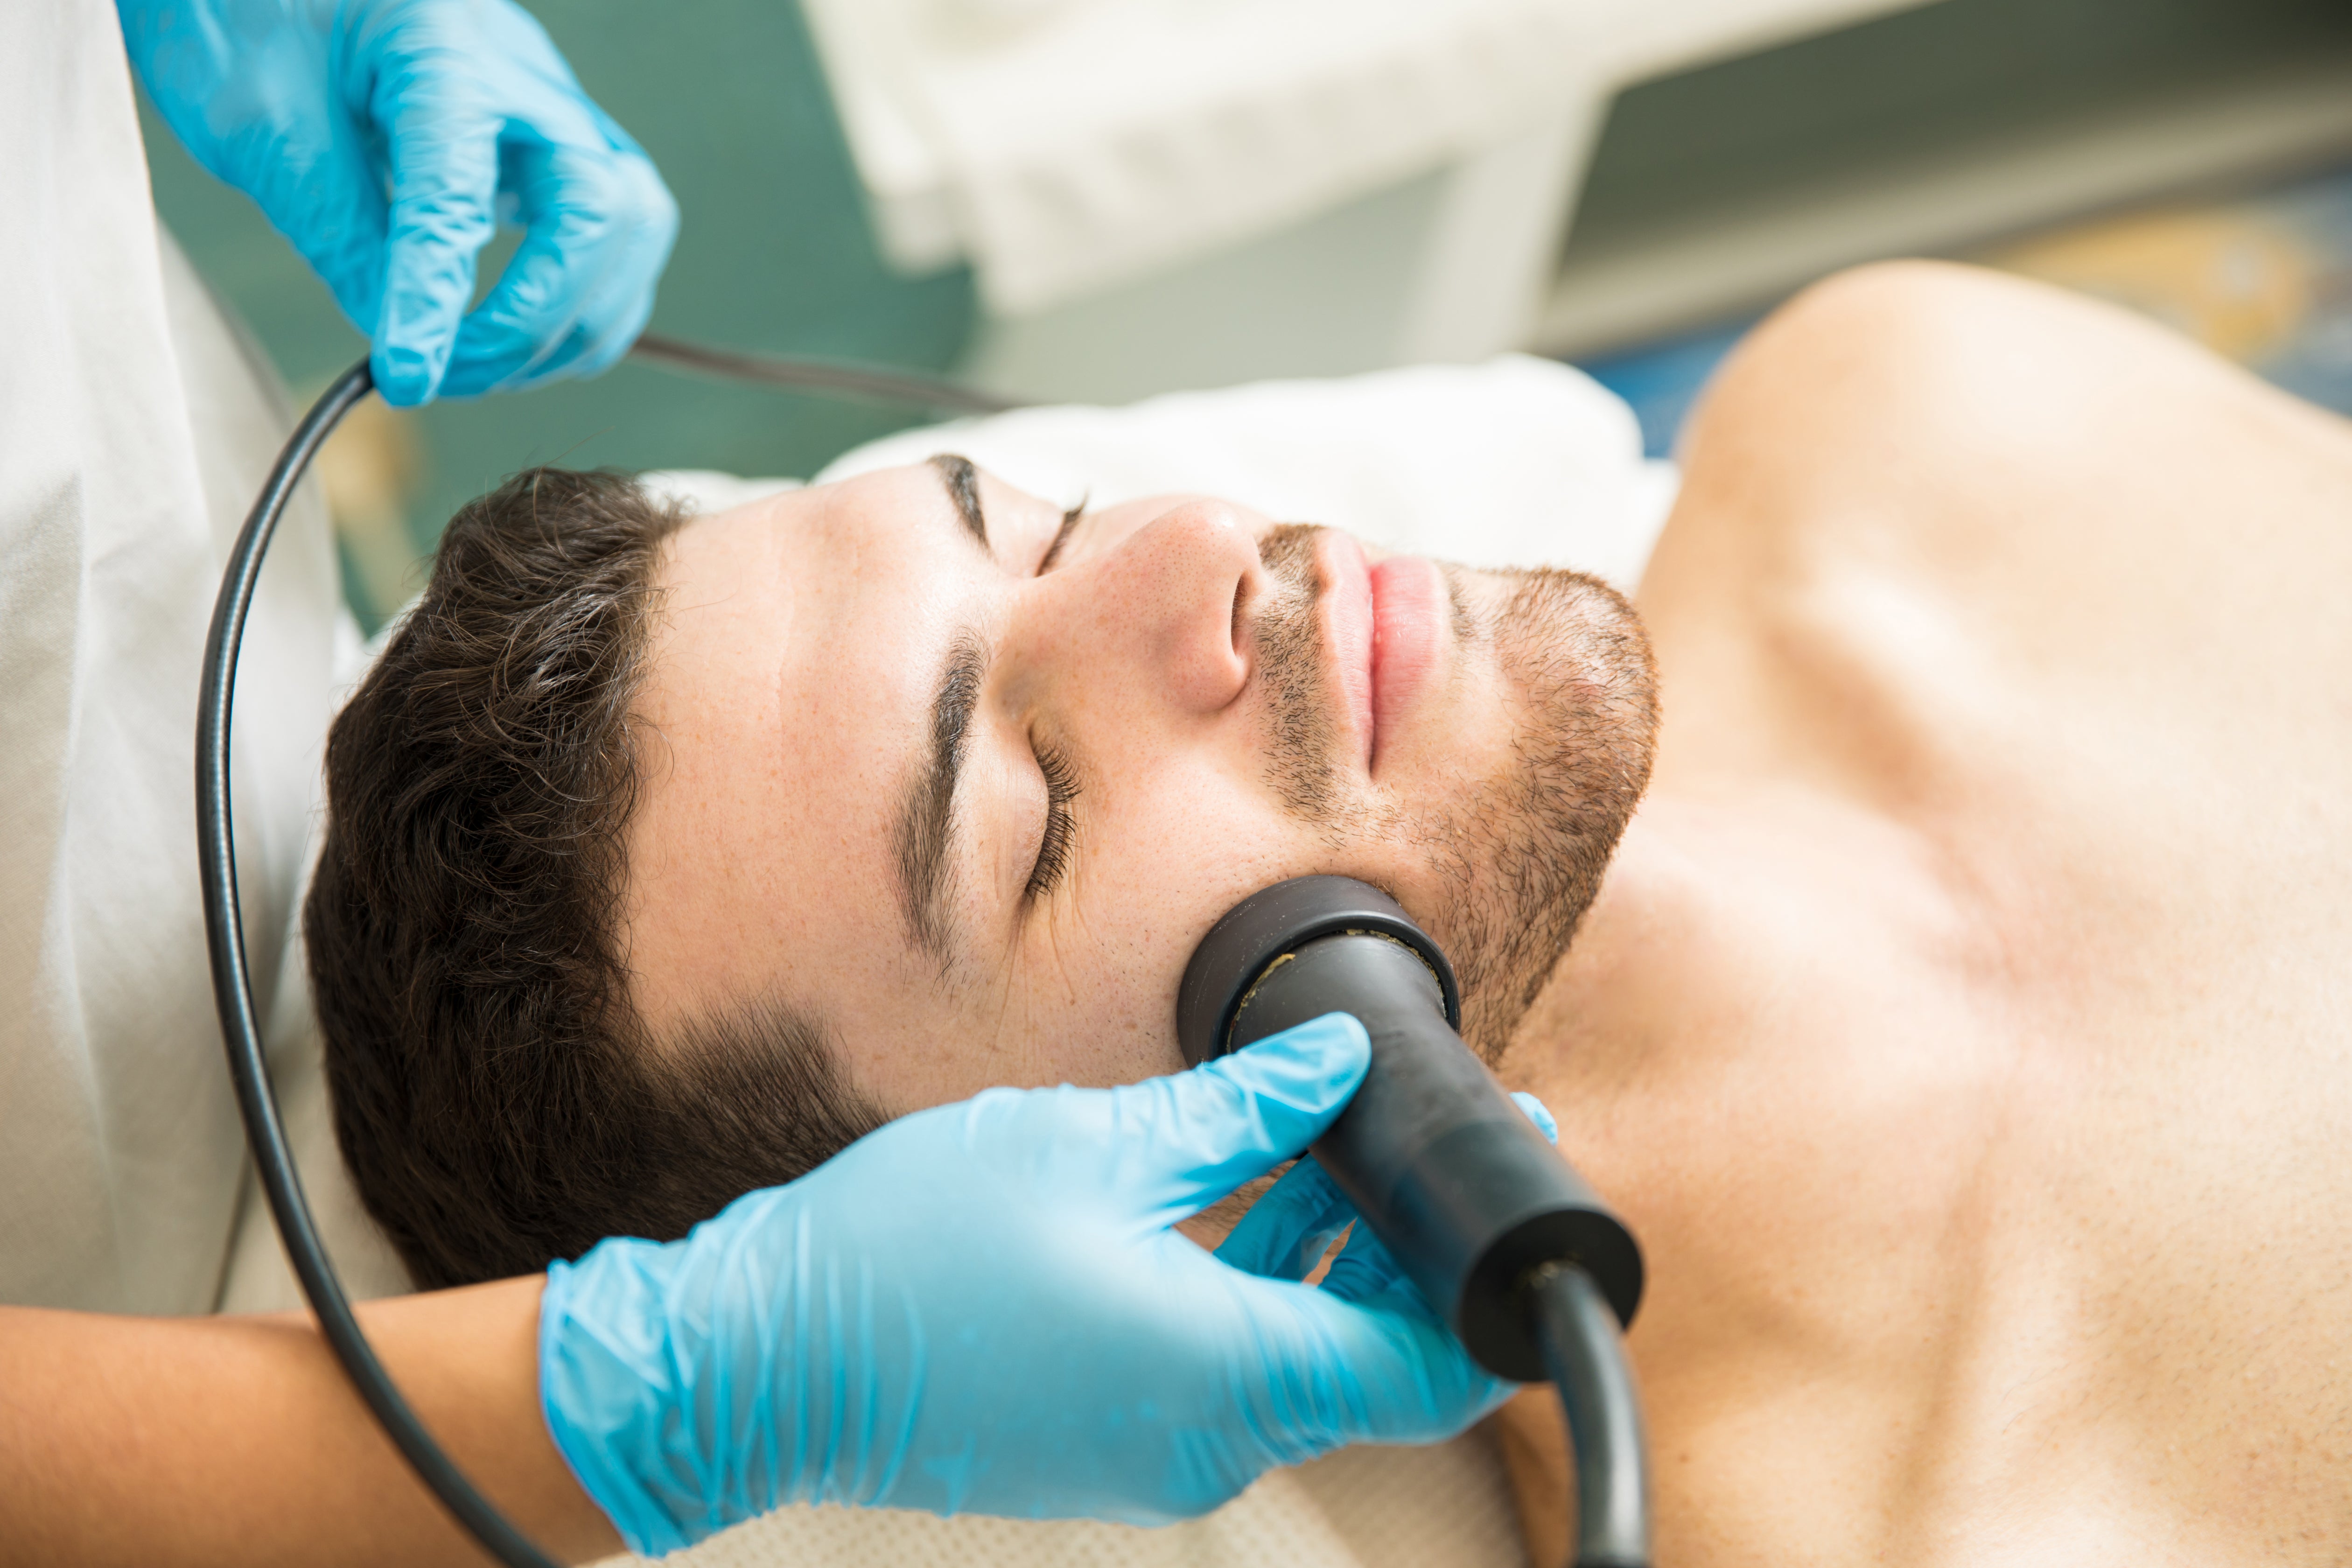
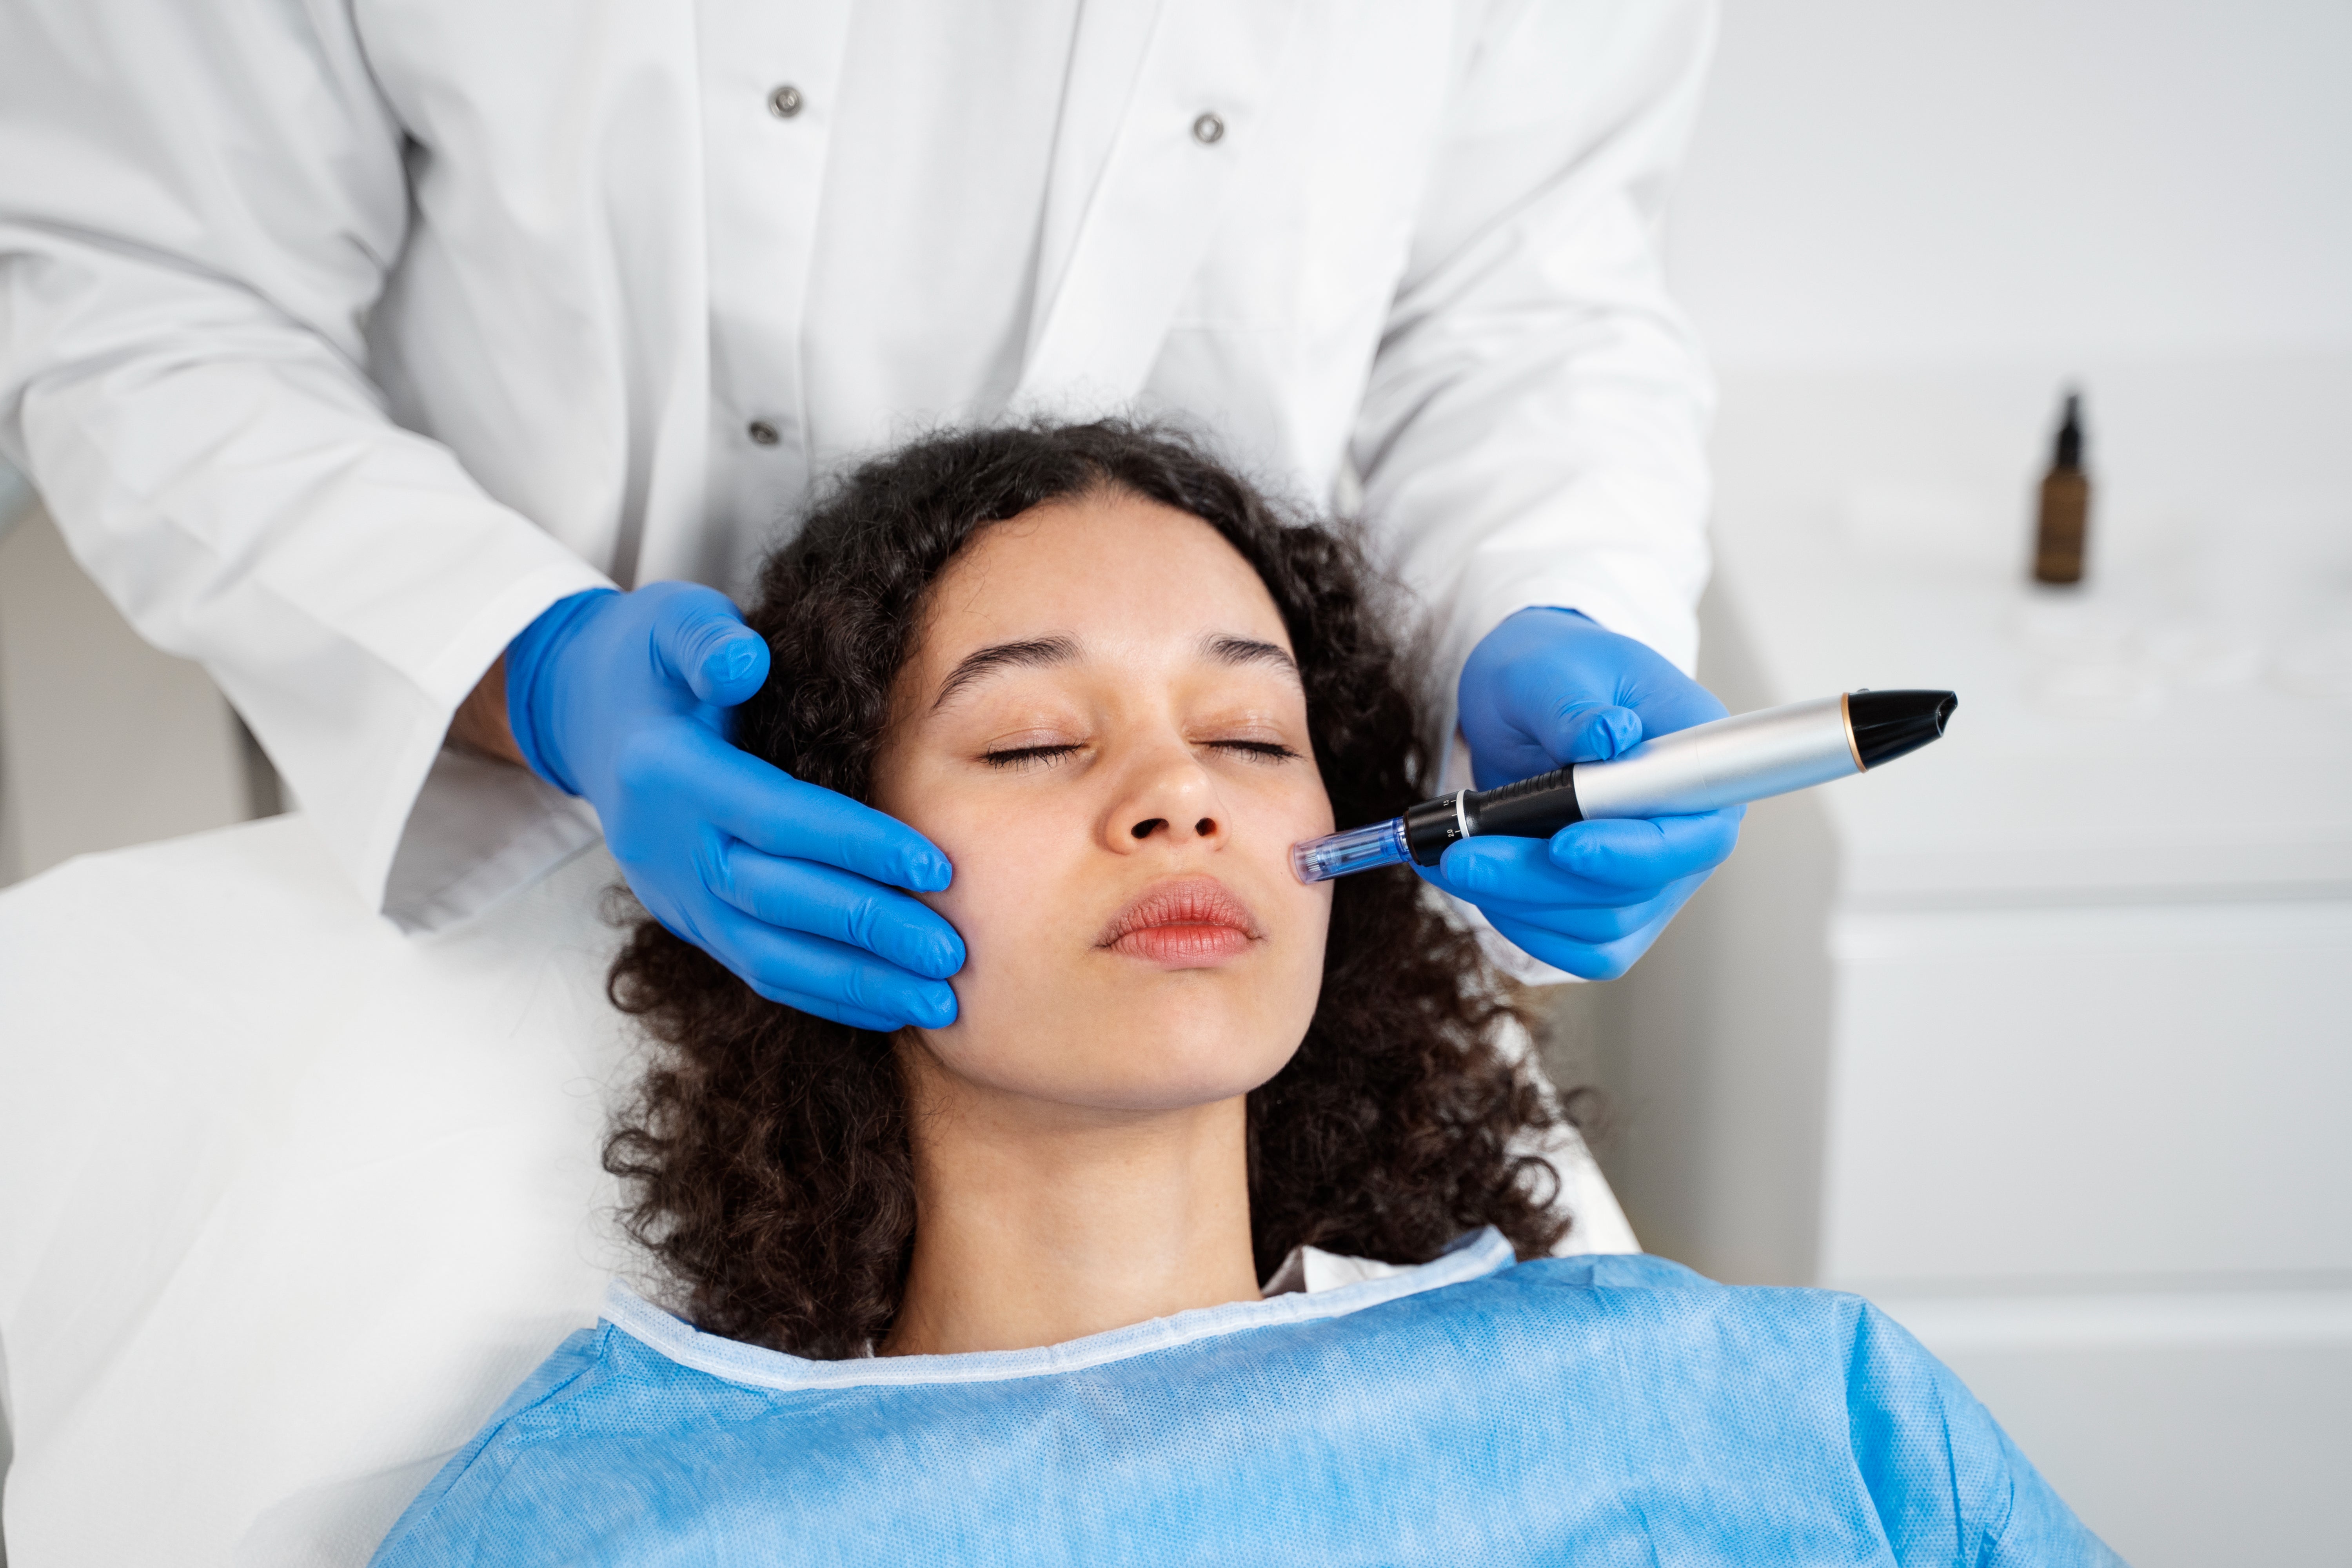
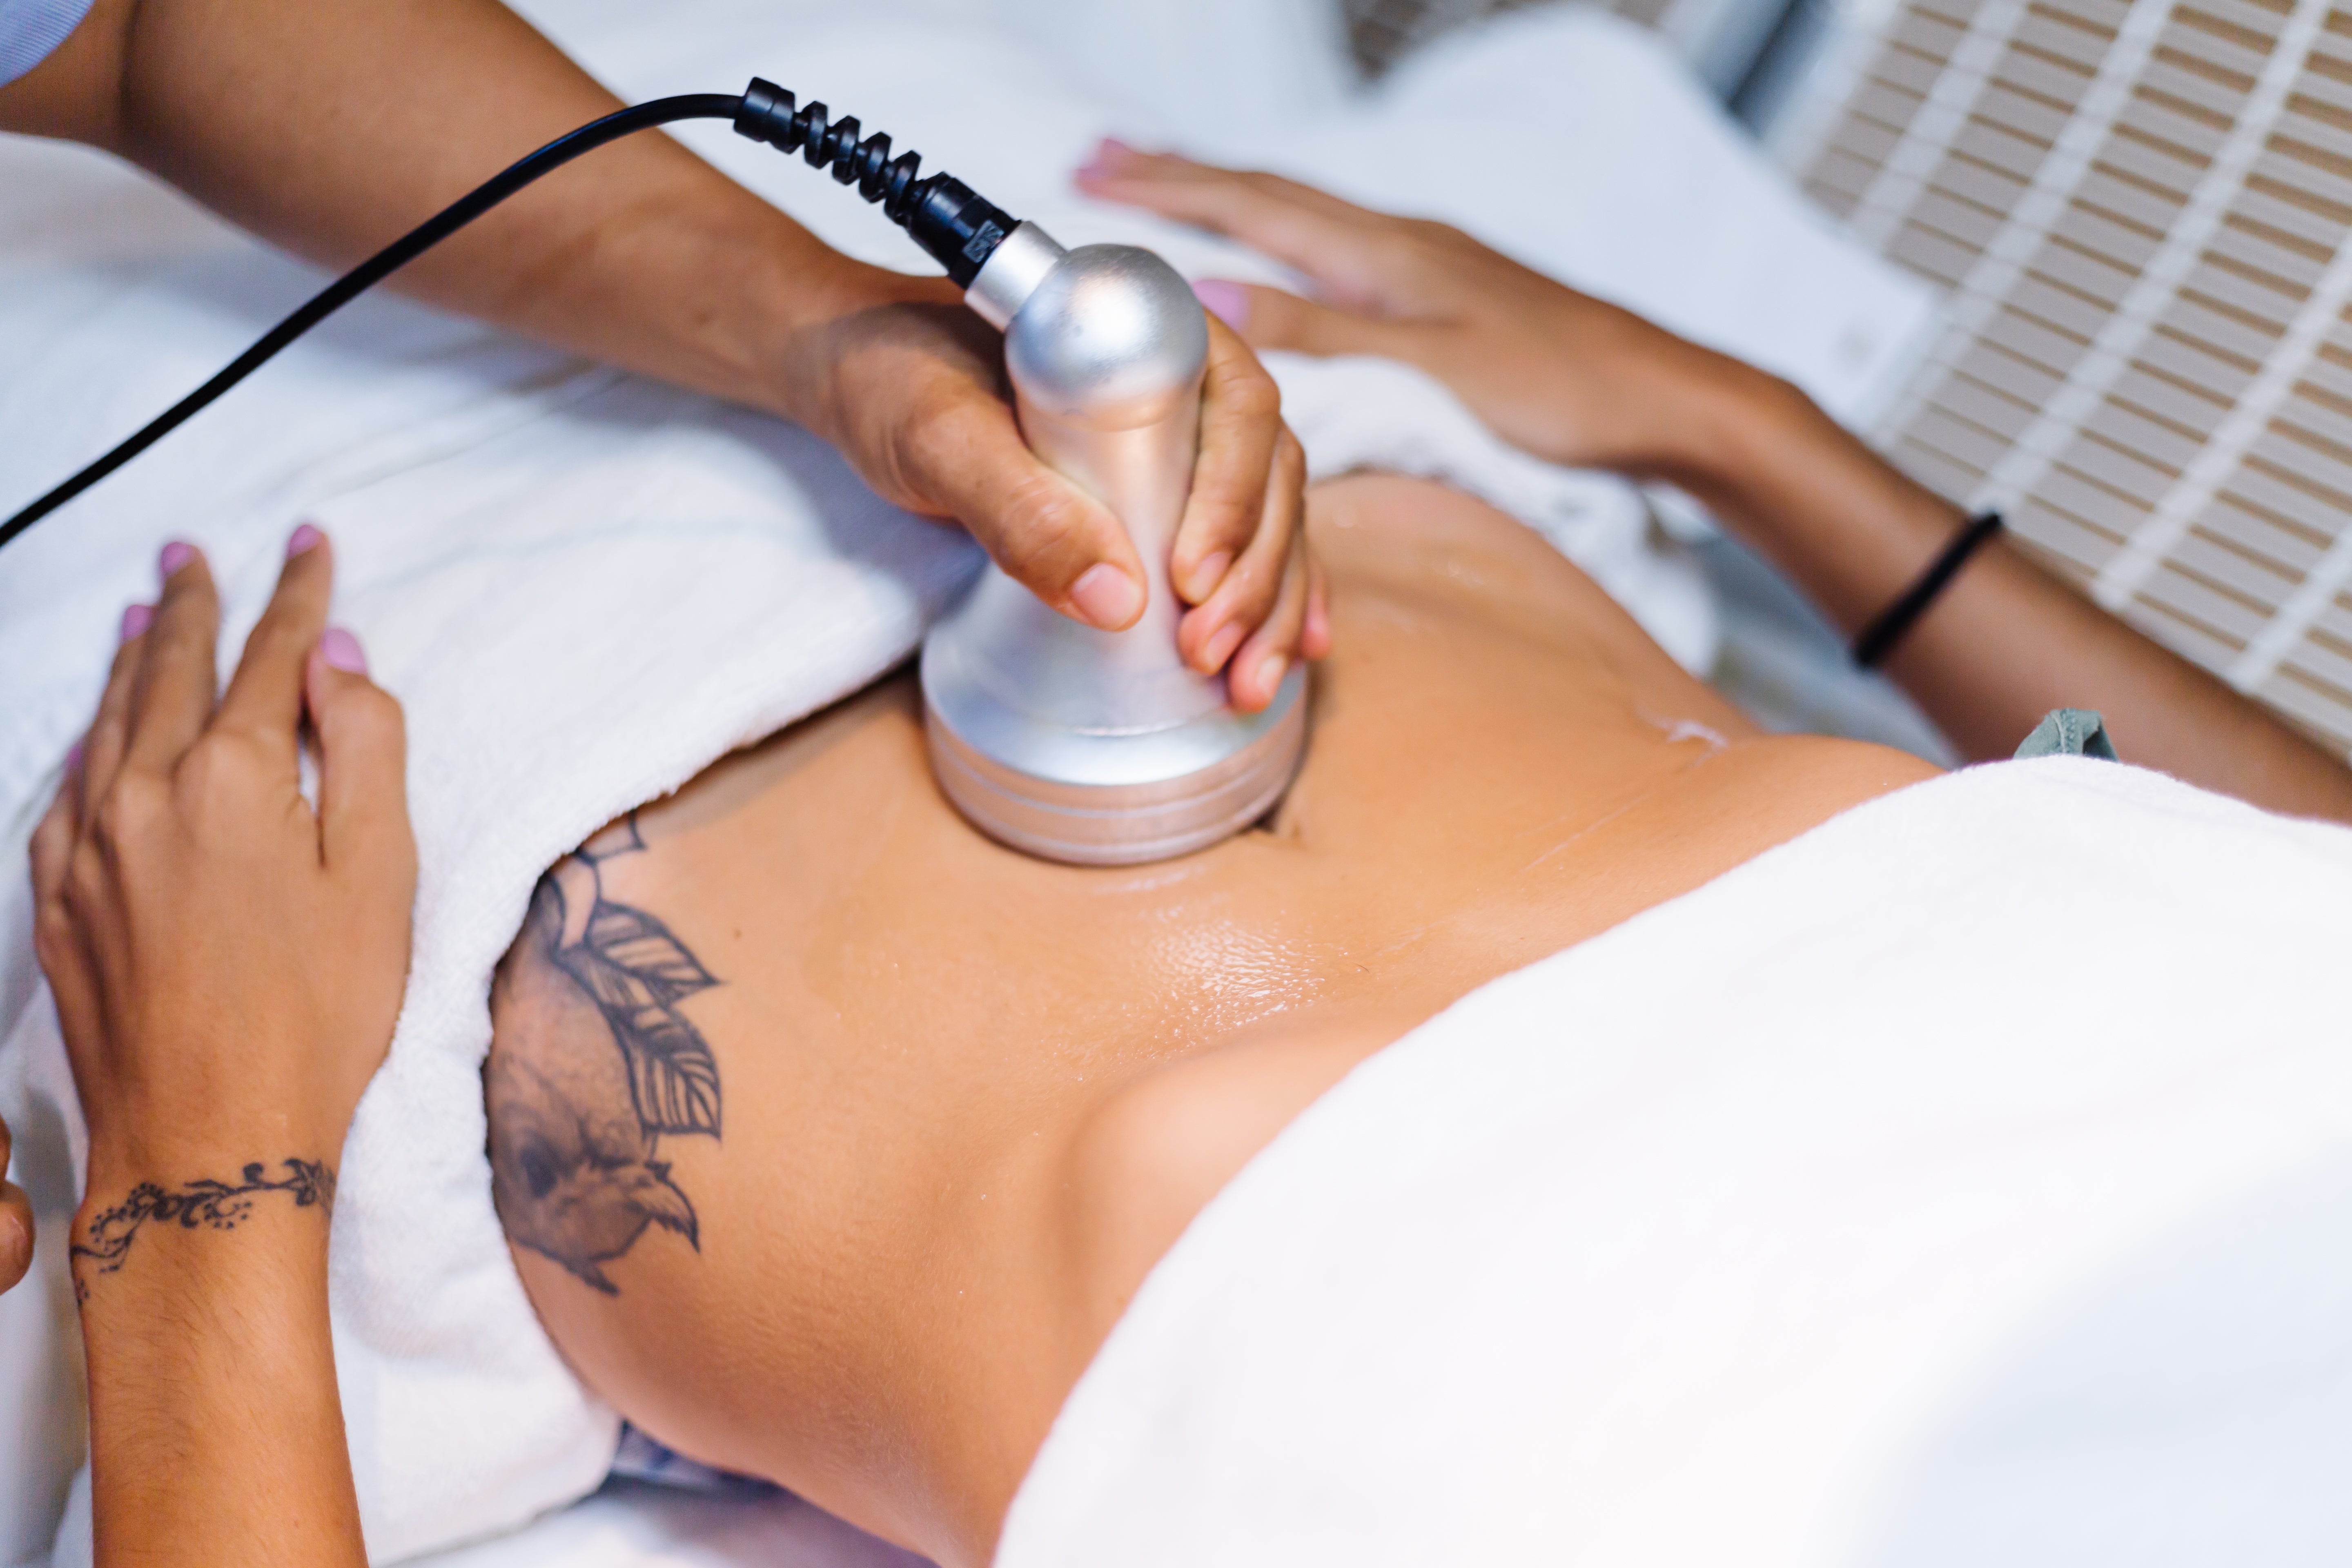
Updated on: 2026-06-15 Facial rejuvenation treatments can address multiple skin concerns at once, including dullness, uneven texture, and loss of firmness. The right plan depends on your skin goals, sensitivity level, and baseline routine. A realistic approach also includes daily fundamentals such as cleansing, hydration, and sun protection. This guide explains common myths, outlines what to expect, and offers a practical decision framework for choosing safer, more effective options. Table of Contents 1. Myths vs. Facts 2. Personal Experience 3. How to Choose Facial Rejuvenation Treatments 4. What to Expect From a Rejuvenation Plan 5. Skin Preparation and Daily Support 6. Aftercare for Smoother Results 7. Final Thoughts & Takeaways Myths vs. Facts Facial rejuvenation treatments are often discussed with exaggeration. The best outcomes usually come from evidence-based planning, consistent daily care, and thoughtful product selection. Myth: One treatment can solve every skin concern.Fact: Many concerns need a layered approach, such as texture support, tone balancing, and barrier care. Myth: Stronger products always deliver better results.Fact: Overdoing actives can irritate the skin barrier and slow progress. Tolerance matters. Myth: Results should be immediate.Fact: Most skin improvements develop over time as inflammation settles and cell turnover normalizes. Myth: Sun protection is optional after treatments.Fact: Ultraviolet exposure can counteract gains by increasing uneven tone and accelerating visible aging. Myth: All skin types respond the same way.Fact: Sensitivity, dryness, and acne history change how you should approach intensity and frequency. Personal Experience When I began evaluating facial rejuvenation treatments, I focused only on the “headline” solution, such as a single device or a short clinic plan. After a few weeks, the changes were inconsistent. Some days felt smoother, but other days felt reactive. What corrected the pattern was a disciplined routine: gentle cleansing, stable moisturization, and consistent sun protection. The most noticeable improvements arrived when I matched the treatment intensity to my skin readiness. I also paid attention to small signals, such as tightness, stinging, or flaking. Those signals often indicate that the barrier needs support before you push for stronger interventions. This approach made results more predictable and reduced downtime stress. Split-surface diagram: barrier care, hydration, sun shield How to Choose Facial Rejuvenation Treatments Choosing the right facial rejuvenation treatments is less about trendiness and more about alignment. Start by describing your top priorities in plain language. Common goals include improving dullness, refining pores, softening the look of fine lines, or supporting even tone. Then match those goals to suitable options and a realistic maintenance plan. 1) Identify your primary skin goals Different concerns respond to different strategies. For example, uneven texture may benefit from gentle exfoliation and collagen-supporting interventions, while dryness-related “aging” often needs barrier restoration first. If you are unsure, a skin professional can help map your needs and reduce trial-and-error. 2) Assess skin sensitivity and history Skin that is prone to redness, acne flare-ups, or irritation can react strongly to over-aggressive steps. In that case, prioritizing barrier comfort can make later rejuvenation efforts more effective. A conservative start also helps you identify what actually supports your skin rather than what merely irritates it. 3) Build a treatment-and-routine matrix Think in systems, not isolated steps. Many rejuvenation plans combine professional or in-clinic procedures with supportive home care. Daily basics can amplify benefits by reducing inflammation and maintaining hydration. For example, cleansing and moisturization are not “extras”; they are the platform that allows other actives and procedures to work more smoothly. 4) Use sun protection as a non-negotiable foundation Even the best rejuvenation treatments can be undermined by UV exposure. Look for a broad, daily sunscreen with an appropriate SPF and comfortable wear. If you wear makeup, consider a formula that layers well without dragging or pilling. For acne-prone skin, a non-greasy texture can improve consistency. To support your routine, you can explore options such as SPF 50 sunscreen protection and daily sunscreen comfort. 5) Consider an evidence-based product pairing At-home skincare can support texture and tone while treatments are ongoing. When selecting products, focus on gentle cleansing, consistent moisturizing, and targeted actives you can tolerate. A common approach is to use a cleanser that removes oil without stripping, a hydrating moisturizer, and a serum that targets a specific concern. If you want a calmer baseline cleanse, you may consider a gentle cleanser. For hydration support, explore a hydrating lotion. What to Expect From a Rejuvenation Plan People often approach facial rejuvenation treatments expecting instant transformation. In reality, skin improvements follow a sequence: initial sensitivity or dryness may occur, then the skin stabilizes, and gradual clarity appears as the routine becomes consistent. Understanding this flow reduces disappointment and helps you judge progress accurately. Typical phases Assessment phase: Goals are defined, skin type is considered, and an intensity level is chosen. Adjustment phase: Your skin may feel different for a short period due to increased renewal or reduced friction from a refined routine. Stabilization phase: Barrier comfort improves and tolerance increases. Visible improvement phase: Texture, brightness, and firmness-related appearance often become more noticeable. How to evaluate progress without overreacting Track results with simple signals. Use a consistent photo angle and lighting at intervals, and keep your cleanser and moisturizer stable during the evaluation window. If you change multiple variables at once, it becomes difficult to determine what helped. For many people, the most meaningful success is not just how the skin looks on a “good day,” but how steady it remains over weeks. Timeline illustration: assess, adjust, stabilize, improve When to pause and reassess If you experience ongoing burning, persistent swelling, or worsening breakouts that do not settle, pause and reassess. Rejuvenation should feel manageable. The goal is sustainable improvement, not constant reactivity. Consulting a qualified skincare professional can clarify whether your plan is too intense or misaligned with your current skin barrier status. Skin Preparation and Daily Support A strong home routine supports facial rejuvenation treatments by keeping the skin barrier stable and lowering unnecessary inflammation. This does not require complicated steps. It requires consistent, skin-friendly choices that match your tolerance. Gentle cleansing to reduce friction Over-cleansing can strip protective lipids and make skin look dull. Choose a cleanser that feels comfortable and rinses cleanly. For example, a gentle foaming option can work for many oily or combination types, while a non-stripping cleanser can be helpful for dryness-prone skin. Hydration that supports barrier comfort Hydration is not the same as greasiness. A balanced moisturizer can reduce tightness and create a smoother surface where other steps apply more evenly. If your skin is sensitive, prioritize moisturizing ingredients and avoid unnecessary layering of multiple competing actives. For hydration and skin comfort, consider a supportive cream base and a gentle daily moisturizer. Targeted actives with cautious progression Many people add brightening or pore-supporting serums during rejuvenation. The key is to introduce actives gradually, especially if you are also undergoing in-clinic procedures. If you have acne history, you may prefer a formula designed to support clarity while remaining tolerable. For acne-prone or oilier skin, you may explore an acne-oriented SPF gel. For those focusing on brighter tone, consider a brightening serum. When vitamin C or exfoliating steps fit Vitamin C can support a brighter appearance and help reduce visible dullness. Exfoliating steps can refine texture when used carefully, but aggressive exfoliation can destabilize the barrier. If you add actives, choose one category at a time and allow your skin to adjust. For vitamin C support, you may review liposomal vitamin C support. For exfoliating balance or acne-related support, consider professional guidance to select the safest intensity. Aftercare for Smoother Results Aftercare determines how quickly skin feels normal again and how consistently you build momentum toward your goals. Aftercare is not only about avoiding mistakes; it is also about supporting your skin barrier so you can continue treatments with confidence. Stick to the least irritating routine In the days after a rejuvenation session, reduce friction. Avoid harsh scrubs and unnecessary layering. Use a gentle cleanser, a stable moisturizer, and sun protection. If you are introducing new products, do it later rather than immediately after a procedure. Protect from sun exposure every day Daily sunscreen can help maintain even tone and reduce the risk of post-treatment unevenness. Reapply when needed, especially if you spend time outdoors. Even small lapses can affect results over time. Manage comfort and dryness If skin feels dry or tight, prioritize hydration. Use moisturizers that feel smooth and non-irritating. If you notice increased redness, scale back active steps until comfort returns. Plan maintenance rather than chasing rapid change Rejuvenation is often cumulative. Instead of increasing intensity each cycle, consider a maintenance mindset that supports steady progress. Many people get better outcomes by staying consistent with daily care and allowing time for skin to respond to the plan. Final Thoughts & Takeaways Facial rejuvenation treatments are most effective when they are matched to your skin goals, skin sensitivity, and daily routine. Myths about instant results and universal approaches can lead to frustration and unnecessary irritation. A safer and more effective strategy is to build a supportive foundation: gentle cleansing, reliable hydration, and consistent sun protection. With that foundation, you can evaluate progress more clearly and sustain improvements over time. If you want a structured starting point, choose your primary goals, select suitable options with tolerance in mind, and keep your basics steady. The best plan is the one you can maintain consistently and safely. Q&A Section Are facial rejuvenation treatments suitable for all skin types? Many options can be adapted for different skin types, but suitability depends on sensitivity, acne history, dryness level, and the exact goals you are targeting. A tailored approach is usually safer than a one-size-fits-all plan. How do I know whether a treatment plan is too aggressive? Signs that a plan may be too intense include persistent burning, ongoing swelling, worsening irritation that does not settle, and frequent barrier breakdown such as severe flaking. When discomfort becomes the dominant outcome, reduce intensity and reassess. What role does daily skincare play alongside professional treatments? Daily skincare supports the skin barrier and helps maintain the improvements you seek. Gentle cleansing, reliable moisturizing, and consistent sun protection reduce inflammation and support more stable texture and tone over time. About the Author Allodermis Team The Allodermis team focuses on skin-friendly routines, evidence-informed skincare principles, and product selection designed to support barrier health. With expertise in dermatology-adjacent skincare education and practical care guidance, the team helps readers build consistent plans that align with realistic expectations. Thank you for reading, and for choosing a thoughtful approach to skincare. Disclaimer: This article is for educational purposes only and does not replace professional medical advice. Individual skin needs vary, and results depend on many factors, including skin sensitivity and routine consistency. Consult a qualified dermatologist or skincare professional before starting any treatment or making significant changes to your regimen.
Learn more
Hydrating Lotions for Dry Skin: Relief and Repair Tips
Hydrating lotions for dry skin are often the simplest path to smoother, more comfortable skin. When your skin feels tight, looks rough, or sheds dryness quickly after washing, the right lotion can help restore a healthier moisture balance. This guide explains how to choose a lotion that supports your skin barrier, how to apply it for best results, and how to avoid common mistakes. You will also find practical answers to frequent questions about daily hydration routines. Updated on: 2026-06-14 Dry skin improves when you choose a hydrating lotion with effective moisture-supporting ingredients and apply it consistently. The best options help with immediate comfort and also reduce the cycle of dryness and irritation. A good routine starts after cleansing, uses the correct amount, and includes gentle reapplication when needed. If you select the right texture for your climate and skin type, your hydration results tend to last longer. 1. Why Hydration Matters for Dry Skin 2. Myths vs. Facts 3. Step-by-Step Guide to Using a Hydrating Lotion 4. How to Choose the Right Lotion for Your Skin 5. Ingredient Signals to Look For 6. A Simple Daily Routine 7. Frequently Asked Questions 8. Summary & Key Takeaways 9. Q&A Section 10. About the Author Why Hydration Matters for Dry Skin Dry skin is not only a temporary inconvenience. It often reflects a weakened skin barrier, changes in humidity, frequent cleansing, or skin that lacks the lipids that help lock in water. When the barrier is not functioning well, water escapes more easily, and the skin may feel tight, itch, or look dull. Choosing Hydrating lotions for dry skin is a practical way to support the barrier. A well-formulated lotion can supply moisturizing humectants, emollients that soften roughness, and occlusive agents that reduce water loss. Over time, consistent hydration can help skin look smoother and feel more comfortable. It is also important to consider your daily routine. Cleansing can be a helpful step, but harsh soaps can worsen dryness. If you cleanse with a gentle option, you reduce the risk of stripping natural oils. Many people improve their comfort simply by switching to a cleanser designed for sensitive, dry skin. If you want to pair hydration with gentle cleansing, consider a formula such as Cetaphil Gentle Cleanser to support a less drying wash. Myths vs. Facts Myth: Dry skin means you need to skip moisturizer. Fact: Skipping lotion often makes dryness worse. Hydration supports barrier repair and comfort. If your lotion feels heavy, choose a lighter texture, not no lotion. Myth: Any lotion will hydrate equally. Fact: Ingredients matter. Look for humectants, emollients, and barrier-supporting components. Also consider fragrance-free options if your skin is reactive. Myth: Hydration is only needed at night. Fact: Morning hydration can reduce tightness before you go outside. Reapply when the skin feels dry, especially after washing. Myth: Once your skin looks better, you can stop. Fact: Consistency helps maintain comfort. Dryness often returns when the barrier support is removed. Moisture barrier diagram with droplet symbols and soft focus Step-by-Step Guide to Using a Hydrating Lotion For best results, use a method that maximizes water retention and reduces irritation. This approach is especially helpful when you are adjusting to a new product or restarting your routine. Cleansed and patted dry: Wash with a gentle cleanser and pat, do not rub. Rough friction can worsen dryness. Apply on slightly damp skin: Lotion tends to spread more easily and can help retain hydration when applied soon after cleansing. Use an adequate amount: A thin layer may not be enough for dry areas such as cheeks, elbows, or hands. Apply in small sections and smooth thoroughly. Focus on problem zones: Concentrate on areas that feel tight or look flaky. Do not ignore the surrounding skin, as dryness often spreads. Allow absorption: Give the lotion a few minutes to settle before dressing or applying other layers. Reapply when needed: If you are in a dry environment, dryness may return. Light reapplication can restore comfort. In addition, if your routine includes acne treatments or exfoliants, hydration becomes even more important. Many people notice that dryness appears when active skincare is layered without sufficient moisturization. How to Choose the Right Lotion for Your Skin Choosing the right lotion starts with your skin behavior. Some people have dry skin that feels tight but not itchy. Others have dryness that also includes sensitivity or redness. Your texture preference matters too. Thick creams can feel comforting, while thinner lotions may work better for daytime use. Begin by looking for a formula that matches your lifestyle and skin needs: For very dry skin: Choose a richer lotion with strong emollients and barrier-supporting ingredients. For daily wear: Select a lotion with a comfortable finish that does not pill under sunscreen or makeup. For sensitive skin: Consider fragrance-free or minimal-ingredient styles to reduce the chance of irritation. For frequent washing: Prioritize a lotion that helps maintain comfort after cleanser use. When you want a curated option designed for hydration needs, you can explore a dedicated hydrating product from a trusted catalog such as Cipla Excela Rich Facial Hydrating Lotion. Pairing the right moisturizer with gentle cleansing and sun protection often improves long-term results. Note that sunscreen is essential for skin health, particularly when dryness coexists with irritation. Even with excellent moisturizing, daily sun exposure can worsen the look of dry, uneven skin over time. A hydrating routine works best when it also includes sun protection. If you use a sunscreen regularly, check how your lotion layers under it. You may prefer a formula with good slip and quick absorption. For sun protection options, see i-Shield Sunscreen Cream SPF 50 PA. Ingredient Signals to Look For Healthy hydration usually comes from a blend of ingredient types. A single ingredient can help, but layered moisture support is more effective for many people. When selecting hydrating lotions for dry skin, scan for these signals. Humectants that pull in water Humectants attract and hold water in the outer layers. Common examples include glycerin and other moisture-binding agents. These ingredients often improve softness and reduce tightness. Emollients that smooth and soften Emollients fill in gaps between skin cells and create a softer surface. They improve the feel of dry skin and reduce roughness. Look for rich but skin-friendly emollient systems. Barrier-supporting agents that reduce water loss Some ingredients help limit excessive water evaporation. When your barrier is better protected, hydration lasts longer between applications. Consider hydration alongside exfoliation and acne care If you use acne or exfoliating products, dryness can be a side effect. In such cases, hydration should be deliberate. Select your lotion to support comfort without interfering with your regimen. For gentle skin-supporting options, you can also review Cetaphil Pro Oil Control Foam Wash if you need a cleanser that balances comfort and daily use. Cross-section of skin layers with moisture icons and shield outline A Simple Daily Routine Dry skin often improves when you follow a repeatable routine. The goal is to support hydration without overcomplicating steps. Below is a stable structure you can adapt. Morning Cleansing: Use a gentle cleanser and rinse with lukewarm water. Hydration: Apply your lotion while skin is slightly damp. Prioritize dry zones first, then extend outward. Sun protection: Apply sunscreen as the final step in the morning routine. This protects the skin barrier and helps maintain smoother texture over time. Evening Remove impurities: Cleanse gently to remove daily residue. Hydration: Apply lotion again. If you have very dry patches, you may use a slightly thicker layer. Optional targeted steps: If you use serums, apply them before lotion so hydration can seal in comfort. For people who layer products, sequence matters. Hydration should usually come after cleansing and before heavier treatments or after lighter treatments, depending on your skincare order. The key principle is simple: moisturizing should not be replaced by actives. If your dryness overlaps with uneven tone or texture concerns, consider adding targeted support carefully. For those exploring a facial serum approach, you may review Dermatica Aze Proactive Serum and then follow with a suitable lotion to keep skin comfortable. For conditions that involve acne and dryness together, choose a cleanser and hydration plan that do not intensify irritation. If you use acne-safe sun protection or acne-friendly skincare, it can help reduce the cycle of dryness. One example is IPCA Acne UV Gel SPF 50. Frequently Asked Questions How often should I apply a hydrating lotion? You should apply lotion at least once daily, typically after cleansing. If you feel tightness after washing, apply an additional thin layer. Consistent use often improves comfort more than occasional heavy application. Is a thicker cream always better than a lotion? Not always. A thicker product can help if your skin is severely dry. However, a lotion can work effectively if it contains strong humectants and emollients and if you use enough product. Choose based on how your skin feels and how your routine layers with sunscreen. What should I do if my skin stings after applying lotion? Stinging can indicate irritation. Stop using the product temporarily and switch to a gentler option. Consider fragrance-free formulas and ensure you apply on slightly damp skin. If stinging continues, it is wise to consult a qualified dermatologist. Summary & Key Takeaways Hydrating lotions for dry skin can improve comfort when they support your barrier, reduce water loss, and keep the skin feeling soft. Choose a formula based on your skin texture needs, apply it consistently after cleansing, and adjust your routine when dryness returns. With a simple morning and evening structure, many people achieve more stable hydration and a smoother look. Explore options from a trusted range, and select the lotion that best matches your skin response. Q&A Section What is the fastest way to relieve dry, tight skin? Apply a hydrating lotion to slightly damp skin soon after cleansing. Use an adequate amount, then focus on dry patches. If tightness is severe, you can reapply once after a short interval to restore comfort. Can hydration help with flaking? Hydration can reduce the appearance of flaking by improving the skin’s water balance and softening roughness. However, if flakes are persistent, you may need to review cleansing habits and consider gentle exfoliation only when your skin can tolerate it. Should I change my cleanser if I have dry skin? Often, yes. A gentle cleanser can prevent additional dryness. If your cleanser feels stripping, switch to a mild option and pair it with a consistent moisturizing routine. This combination usually improves dryness more than changing only one step. Will using sunscreen affect hydration? Sunscreen can feel drying on some skin types, especially if your moisturizer is too lightweight. If you notice dryness after sunscreen application, choose a lotion with a barrier-supporting texture and allow it to absorb before applying sunscreen. How do I know if my lotion is actually working? Signs of improvement include less tightness, fewer dry patches, smoother texture, and less redness from dryness. Evaluate over several days with consistent use, rather than judging after a single application. About the Author Section Written by an author team at Allodermis with expertise in dermatology-informed skincare education and ingredient-driven routines for everyday wellness. The goal is to help readers make confident choices that support skin comfort and barrier health. Thank you for reading, and may your daily hydration routine feel simple and effective. For more guidance, explore product details and usage tips on the Allodermis site. Disclaimer: This article is for general educational purposes only and does not replace professional medical advice. Individual skin needs vary. If you have persistent irritation, worsening dryness, or symptoms that concern you, consult a qualified healthcare professional.
Learn more
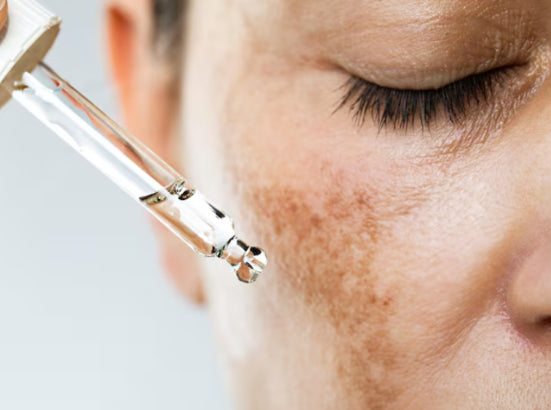
Brightening Serums for Pigmentation: What Works Best
Brightening serums for pigmentation are designed to target the look of uneven tone, dark spots, and dullness. Many people search for a focused routine that supports a more even complexion without overcomplicating skincare. In practical terms, these serums help deliver active ingredients to the surface and upper layers of skin where discoloration often appears. The right formula can also complement daily sun protection, which remains the foundation of long-term tone improvement. This guide explains how to choose, how to apply, and how to build a safe routine around brightening serums for pigmentation. Updated on: 2026-06-14 Brightening serums for pigmentation can help improve the appearance of uneven skin tone and dark marks. The best approach is to select an ingredient blend that matches the type of discoloration you notice. Consistent use, gentle cleansing, and daily sun protection work together for the most reliable visual results. You can also reduce irritation by introducing active serums slowly and pairing them with supportive hydration. Table of Contents Step-by-Step Guide Tips FAQs Wrap-up & Final Thoughts Step-by-Step Guide Choosing and using brightening serums for pigmentation is less about finding one miracle ingredient and more about building a routine that stays consistent. Follow these steps to improve the look of discoloration while reducing the risk of irritation. Identify the type of pigmentation you want to soften. Start by observing where the uneven tone shows up. Common categories include post-acne marks, sun-related dark patches, and general dullness. While labels vary, the goal is to match your serum choice to your main concern. Check your current routine for friction points. If you use harsh cleansers, frequent exfoliation, or multiple strong actives at once, your skin barrier may be stressed. Tone-improving actives work best when skin is calm. Consider using a gentle cleanser such as gentle cleanser to maintain comfort. Choose one brightening serum focus for your main goal. Look for key brightening categories such as vitamin C derivatives, niacinamide, alpha arbutin, tranexamic acid, kojic-acid derivatives, or licorice root extracts. These ingredients are often used to support an even appearance. A well-formulated serum typically includes stabilizers and humectants that help it feel pleasant on skin. Introduce the serum slowly to support tolerance. Use the serum a few nights per week at first. If your skin feels comfortable, increase frequency gradually. This approach is especially helpful when your routine includes other actives. Apply correctly for consistent coverage. Use a small amount and spread evenly over the areas you want to brighten. If you are treating the entire face for uneven tone, apply in thin layers to avoid heaviness. Let it absorb before applying moisturizers. Moisturize to reduce dryness and visual texture. Hydrated skin looks more even. Pair your serum with a non-irritating moisturizer. For daytime comfort, consider a hydrating lotion such as hydrating lotion to help maintain smoothness. Use daily sunscreen as a non-negotiable step. Dark marks can appear more noticeable when skin is exposed to ultraviolet radiation. A broad-spectrum sunscreen supports the goal of tone refinement. Consider a product such as SPF 50 UV gel or sunscreen cream depending on your skin type. Skin tone map with mild highlight overlays In practice, you will often see the most improvement when brightening serums for pigmentation are paired with consistent sunscreen and a gentle routine. Many people also benefit from a stable cleansing step to avoid barrier disruption. If you wear makeup, ensure it is removed with a soft cleanser rather than by aggressive rubbing. How to Pick Ingredients That Match Your Pigmentation Different ingredients may be better suited to different discoloration patterns. For example, vitamin C is commonly used for a bright look and antioxidant support. Niacinamide is frequently chosen for its balancing role and supportive hydration. Tranexamic acid is often selected for targeted dark marks. Kojic-acid derivatives are used for tone support. Alpha arbutin is frequently considered for unevenness linked to melanin activity. Rather than chasing many formulas at once, select one serum category that aligns with your primary concern. If you want to use additional actives, add them one at a time and monitor irritation. When to Use Your Serum in the Day Many users apply brightening serums for pigmentation in the evening to reduce daytime irritation risk and to support consistent nightly use. However, if a serum is designed for daytime, it may be used in the morning as well. If you use it in the morning, follow immediately with sunscreen. If you use it in the evening, follow with a moisturizer. To avoid stacking too many actives, keep your routine simple. A typical structure is cleanser, serum, moisturizer at night; cleanser, serum (or moisturizer), sunscreen in the morning. What About Multiple Serums? Multiple serums can work when they are layered with intention, but they can also increase the chance of irritation. If you already use a strong exfoliant or a heavy prescription-strength active, consider pausing additional brighteners. If you want variety, use one brightening serum consistently first, then evaluate results before adding a second. For people focused on acne-related marks, a routine that includes gentle cleansing plus a targeted brightening step is often more sustainable than frequent ingredient changes. If acne is still active, treat that condition first to prevent new marks from forming. Tips Prioritize barrier comfort. Hydration and gentle cleansing help the skin tolerate active ingredients. If you notice dryness or stinging, reduce frequency. Do not skip sunscreen. Even the best serum cannot fully counteract new pigmentation from ongoing sun exposure. Use one active at a time. This makes it easier to identify what helps and what irritates. Choose formulas with supportive textures. If a serum pills under moisturizer, consider adjusting the amount and allowing it to absorb longer before layering. Be patient with consistency. Visual changes typically improve gradually as skin cycles and pigment appears more evenly. Track results by area. Instead of judging the entire face at once, evaluate the areas with dark spots or uneven patches. When you are shopping for a brightening serum, it helps to focus on formulation details rather than only marketing claims. Look for stability, appropriate concentration, and an overall routine fit for your skin type. If you have sensitive skin, consider a calmer formula that includes soothing ingredients and avoids strong fragrance. Some shoppers prefer pairing their tone-focused serum with a product that supports cleansing without stripping. For example, if you want a stable baseline, a cleanser like oil-control foam wash can be considered for certain oily or combination routines. For daytime glow support, a hydrating lotion such as rich facial hydrating lotion helps maintain smoothness during active use. Routine timeline: cleanse, serum, moisturizer, sunscreen As you progress, your routine may include additional support products. However, keep the core structure stable. A consistent cleanser plus a dependable sunscreen strategy often makes brightening serums for pigmentation feel more effective. FAQs Are brightening serums for pigmentation suitable for all skin types? Most brightening serums can be used across many skin types, but tolerance varies. If you have sensitive skin, start with a low frequency approach and prioritize gentle cleansing and moisturizing. Patch testing on a small area can help you assess comfort before applying more broadly. How should I combine a pigmentation serum with sunscreen? Apply the serum first, allow it to absorb, and then apply sunscreen as the final step in your morning routine. If you notice any pilling, reduce the amount of serum and wait longer between layers. Consistent daily sunscreen use is essential to support an even appearance over time. Which ingredient categories are commonly used for dark spots and uneven tone? Common categories include vitamin C derivatives, niacinamide, alpha arbutin, tranexamic acid, kojic-acid derivatives, and licorice root extract. The best selection depends on your skin comfort, the main pattern of discoloration, and how your routine currently feels. Can I use a brightening serum and other skincare actives in the same routine? Yes, but it requires careful pacing. If you already use exfoliating acids or strong treatments, consider using the brightening serum on alternating nights. This reduces the chance of irritation and helps you monitor how your skin responds to each active ingredient. Wrap-up & Final Thoughts Brightening serums for pigmentation can be an effective part of a structured skincare routine when you choose ingredients that align with your main concern and use them consistently. The most reliable results usually come from pairing targeted serum application with gentle cleansing, barrier-friendly moisturizing, and daily sunscreen. If you feel irritation, reduce frequency and simplify your routine before adding more actives. Build from a calm foundation, then refine your approach until your skin looks more even and comfortable. CTA: Explore a targeted brightening option on Allodermis and select a serum that fits your routine needs. If you want additional guidance on building a simple regimen, review product descriptions and usage recommendations on the site. About the Author Section Allodermis is a skincare-focused brand guided by dermatology-informed product curation and a practical approach to ingredient selection. Our team develops content to help readers understand how to use brightening serums, build consistent routines, and maintain skin comfort. We aim to make skincare decisions clear and evidence-aligned. Thank you for reading, and we wish you success in creating a routine that supports your goals. Disclaimer: This article is for educational purposes only and does not replace professional medical advice. Individual results vary, and skincare tolerance depends on personal factors. If you experience persistent irritation, stop use and consult a qualified healthcare professional.
Learn more
Chemical Peels for Skin Rejuvenation: Benefits Guide
Updated on: 2026-06-13 Chemical peels for skin rejuvenation use controlled chemical exfoliation to improve the look of texture and tone. They can help reduce the appearance of dullness, uneven pigmentation, and rough surface feel. The best results depend on peel strength, your skin condition, and careful aftercare. When chosen responsibly, peels can support a consistent skincare routine and long-term skin clarity goals. Introduction Product Spotlight Step-by-Step How-To Personal Experience Summary & Recommendations Q&A Section About the Author Section Chemical Peels for Skin Rejuvenation: What They Do and Why People Choose Them Chemical peels for skin rejuvenation are a widely used skincare approach for improving visible skin quality. A peel applies a chemical solution that gently or more assertively exfoliates the surface layers. This controlled exfoliation can smooth rough texture, brighten dull areas, and refine the look of uneven tone. People often consider peels when their current routine is not delivering the clarity they want. Compared with daily exfoliation alone, a peel can provide a more concentrated “reset” effect. However, the outcome depends on correct selection and responsible use. Strength, ingredient type, skin sensitivity, and post-peel care all matter. In this guide, you will learn how chemical peels work, how to choose an option aligned with your goals, and how to plan a safe process. You will also see practical aftercare priorities that support a healthier-looking barrier. Product Spotlight: A Gentle Hydrating Foundation Before and After a Peel While chemical peels for skin rejuvenation require careful exfoliation, barrier support is equally important. A well-formulated hydrating lotion can help reduce the feeling of tightness and support comfort during recovery. For many routines, this is the simplest and most consistent way to improve peel tolerance. One example is a facial hydrating lotion designed for comfort and moisture balance: Facial hydrating lotion. When used as directed, it can help your skin stay supple while you focus on healing and gradual improvement. Hydration supports the look of smoother texture because moisturized skin reflects light more evenly. It also helps reduce the urge to over-exfoliate during recovery. Peels can be effective, but overcorrection can lead to irritation and setback. A stable hydration step makes the overall routine more predictable. Layered skincare routine icons and calming hydration symbols How hydration complements chemical exfoliation Hydration supports barrier comfort after exfoliation. Moisture can reduce the appearance of dryness-related flaking. Comfort encourages consistent sunscreen use, which is essential for long-term tone improvement. Step-by-Step How-To: Plan Chemical Peels for Skin Rejuvenation Safely Successful peels depend on preparation, correct timing, and disciplined aftercare. The following steps outline an evergreen process you can adapt with the help of a skincare professional. Always follow product instructions and clinician guidance for your specific peel type. Define your goal clearly. Decide whether you want brightness, smoother texture, or a more even appearance of dark spots. Different peel strengths and ingredient types are better aligned to different goals. Assess your skin readiness. If your skin barrier is actively irritated, very dry, or inflamed, postpone peel planning. Barrier recovery often comes first for a smoother, safer experience. Choose a peel category and intensity level. Chemical peels vary widely. Mild exfoliating acids typically prioritize gentle resurfacing, while stronger peels may target deeper uneven tone. Match intensity to tolerance and experience. Patch-test when recommended. If your peel process includes patch testing, follow it carefully. Patch testing helps you gauge reactivity and refine your approach. Cleanse with a non-stripping cleanser. Use a gentle wash to remove surface oils and sunscreen without pulling at the skin barrier. Consider gentle cleanser as a baseline option for many routines. Apply according to timing instructions. Chemical peel solutions must be used with precise timing. Avoid extending application time to “boost” results. Neutralize or rinse as directed. Follow the exact rinse or neutralization method specified for your peel product or clinician plan. This step is often critical for safety. Pause strong actives during recovery. During the immediate recovery window, reduce the number of exfoliants and irritation-prone products in your routine. This prevents compounding sensitivity. Use moisturizer consistently. Choose a hydrating formula and apply with clean hands. Hydration supports comfort and visible calm. Commit to sunscreen daily. Sun protection is essential after any peel. UV exposure can worsen uneven pigmentation and slow improvement. If you need a daytime option, consider SPF 50 sunscreen for daily protection. Common peel categories and what they target People frequently discuss alpha hydroxy acids for surface smoothing and beta hydroxy acids for more pore-focused exfoliation. For tone concerns, formulations may include ingredients that support more even-looking pigmentation over time. The best choice depends on your skin type, your sensitivity, and your primary target area. Personal Experience: The Moment I Stopped Chasing Immediate Results When I first explored chemical peels for skin rejuvenation, I focused heavily on the “after” appearance. I expected a dramatic change after a single session. Instead, the early days taught me a more useful lesson: recovery quality drives the final look. In my routine, I noticed that the skin looked its best when I treated the peel day as the start of a careful cycle. I used hydration consistently, avoided additional exfoliation during the recovery phase, and prioritized sunscreen even when the weather was not bright. The difference was not only in comfort. My overall tone looked more even over the following weeks, and my skin texture stayed smoother because the barrier had time to stabilize. This experience reinforced a practical truth: a peel is not only about the chemical action. It is also about the discipline after treatment. When aftercare is thoughtful, results become more consistent and less reactive. Timeline visuals showing preparation, peel, recovery, and SPF Summary & Recommendations: Build a Consistent Skin Rejuvenation Plan Chemical peels for skin rejuvenation can support smoother texture, improved brightness, and a more even-looking complexion when selected thoughtfully. The strongest predictor of a positive experience is not only the peel itself, but also your preparation and aftercare. For reliable outcomes, prioritize a gentle cleansing step, barrier-support hydration, and daily sunscreen. If you are also managing acne-prone areas or post-acne marks, use a targeted approach and avoid stacking too many active ingredients at once. If you want a simple routine structure that aligns well with peel planning, consider the following baseline priorities: Keep cleansing gentle with a non-stripping option such as gentle cleanser. Support comfort with a hydrating lotion such as facial hydrating lotion. Protect tone with daily sunscreen such as SPF 50 gel when appropriate for your skin type. Choose products that reduce irritation during the recovery phase. For personalized guidance, consult a licensed dermatologist or qualified skincare professional. They can evaluate your skin condition and recommend an intensity level that matches your goals and history. Q&A Section How often should chemical peels for skin rejuvenation be used? Frequency depends on peel strength, your skin sensitivity, and the specific ingredient system. Many people benefit from spacing peels far enough apart to allow full barrier recovery. If you are new to peels, start with a conservative schedule and reassess after visible comfort returns. Your clinician can set a pace aligned with your skin response. What should I avoid right after a peel? Directly after a peel, avoid additional exfoliation and products that commonly cause irritation, such as strong scrubs or multiple active layers at the same time. Keep cleansing gentle, moisturize consistently, and protect the skin with sunscreen. If stinging or unusual redness persists, pause active ingredients and seek professional advice. Can chemical peels help with uneven tone and dark spots? Many chemical peel systems can improve the appearance of uneven tone by accelerating surface turnover and supporting a more uniform surface. Results typically develop gradually with consistent protection from UV exposure and a stable skincare routine. When dark spots are prominent or persistent, a professional evaluation can help determine whether a peel plan or an alternative strategy is more suitable. Are chemical peels suitable for all skin types? Skin type and sensitivity influence peel selection. Some formulations are better suited for normal or resilient skin, while others are designed to be gentler for sensitive conditions. If you have a history of irritation, eczema flares, or active dermatitis, discuss options with a dermatologist before proceeding. Responsible selection reduces the risk of discomfort and improves consistency. How do I know which peel intensity is right for me? Choose intensity based on your experience level, skin tolerance, and the specific concern you want to address. Mild resurfacing can support initial clarity, while stronger peels may target deeper irregularities. A professional assessment can align the peel depth to your goals while minimizing downtime and risk. About the Author Section Jordan Ellis is a skincare content specialist with expertise in dermatology-informed routines, exfoliation principles, and barrier-first product selection. Jordan focuses on practical guidance that helps shoppers make safer, more consistent decisions in their everyday care. This article reflects general education and careful, responsible skincare planning. Thank you for reading. Disclaimer: This article is for educational purposes only and does not provide medical advice. Results vary by skin type and product use. For personalized guidance, consult a licensed dermatologist or qualified healthcare professional before using chemical peels or other active skincare treatments.
Learn more
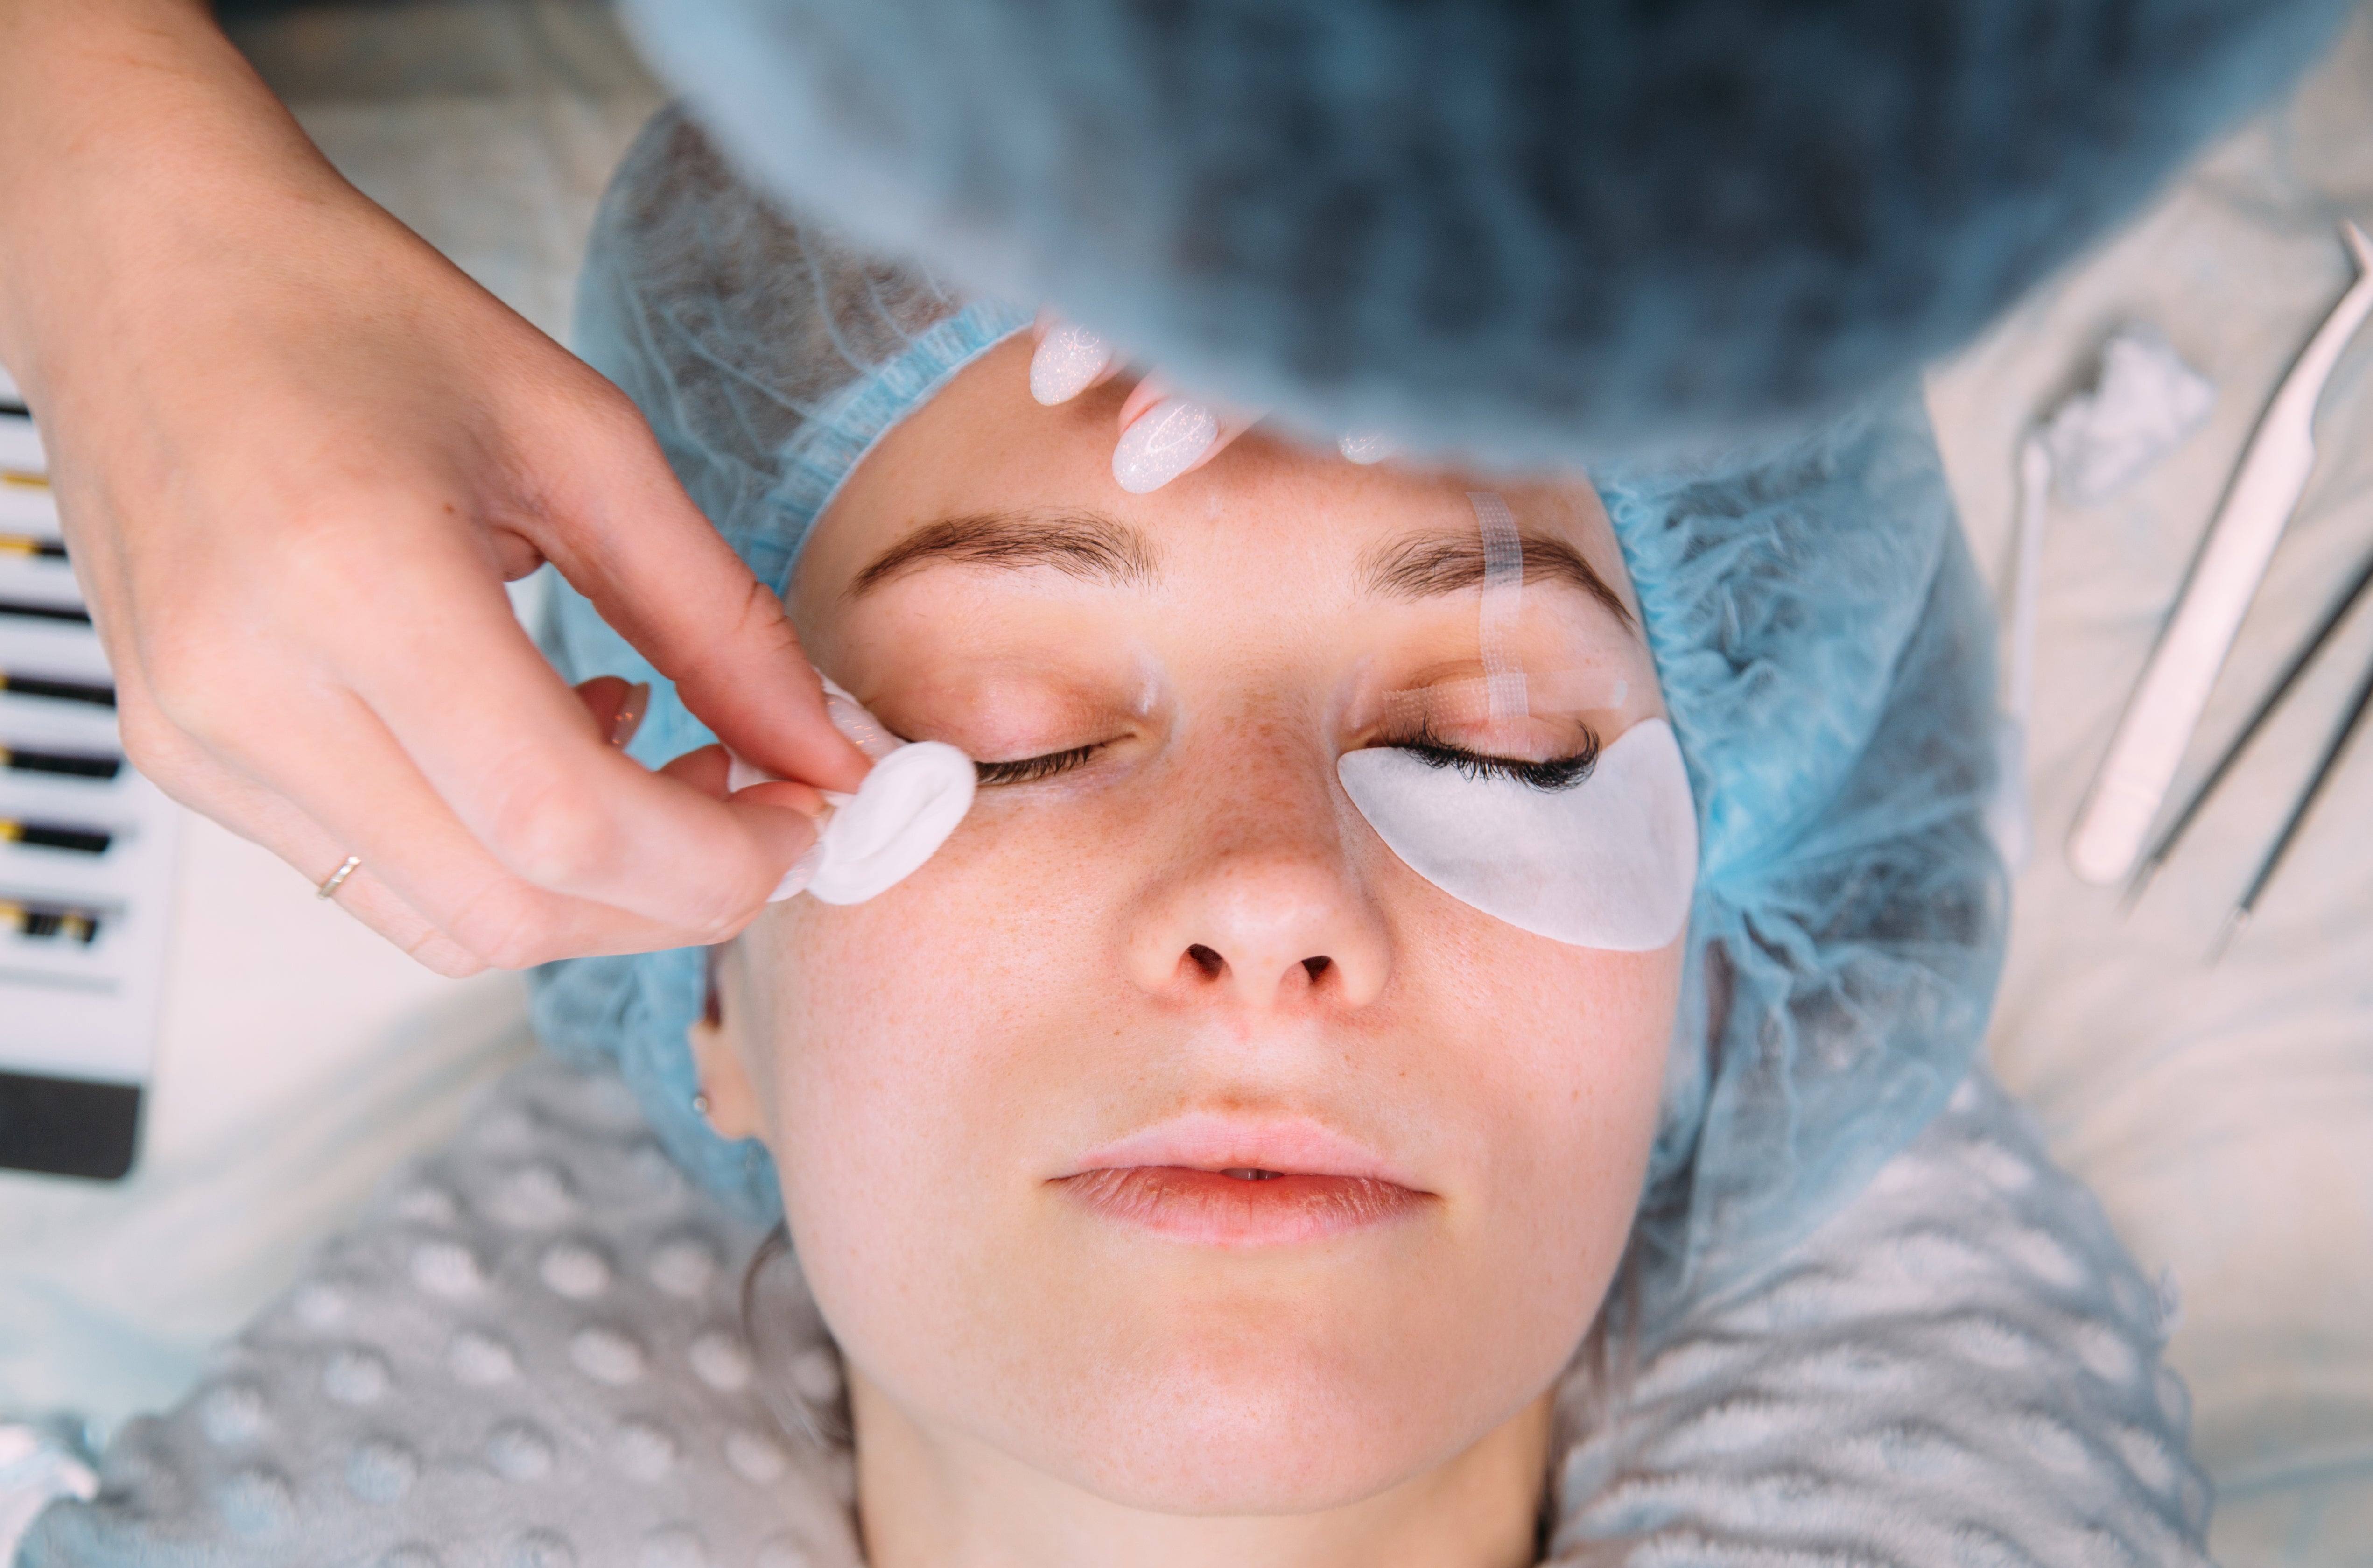
Laser Hair Removal Services: Cost, Process, Results
Updated on: 2026-06-13 Laser hair removal services can reduce hair growth and improve skin smoothness over time. A strong results strategy includes an initial consultation, the right device parameters, and a clear aftercare plan. Understanding skin and hair types helps you set realistic expectations and choose a suitable treatment plan. Consistent sessions and proper sun and skincare habits support safer, more uniform outcomes. Quick Benefits Myths vs. Facts Step-by-Step Guide Visual Understanding Frequently Asked Questions Summary & Key Takeaways Q&A Section About the Author If you are tired of frequent shaving, waxing discomfort, or inconsistent regrowth, laser hair removal services may be a practical alternative. This approach targets hair at the growth phase and can help reduce the overall density of unwanted hair. The best outcomes depend on the right candidate selection, a well-designed session plan, and careful preparation. This guide explains what to expect, how to choose a reputable clinic, and how to support smoother-looking skin between sessions. Myths vs. Facts Myth: Laser hair removal services work instantly. Fact: Results typically build over multiple sessions because hair grows in cycles. Your provider schedules treatments to align with active growth phases. Myth: It is only effective for light skin and dark hair. Fact: Many modern devices are designed to support a broader range of skin tones and hair types. Your consultation should include device selection based on your features and settings. Myth: More sessions always lead to better results. Fact: Quality matters more than quantity. An appropriate number of sessions, correct parameters, and effective aftercare influence outcomes and comfort. Myth: Shaving is not necessary before appointments. Fact: Providers usually recommend shaving shortly before treatment to reduce surface hair while keeping the target hair in place. Myth: Laser treatments eliminate all hair permanently for everyone. Fact: Many people experience long-term reduction, while some may need maintenance. Setting realistic expectations is essential. Step-by-Step Guide Schedule a consultation. Discuss your skin tone, hair color, past hair removal methods, and any relevant skin history. A qualified provider evaluates candidacy and safety. Plan your pre-treatment routine. Follow clinic instructions about shaving, avoiding sun exposure, and pausing certain products. Consistency helps your provider set parameters effectively. Ask about device and settings. A reputable clinic explains how they match technology to skin and hair characteristics. This includes discussing fluence, spot size, cooling method, and treatment intervals. Confirm a patch test when appropriate. Testing can help identify how your skin responds and can improve comfort during early sessions. Prepare for the session day. Arrive with clean, dry skin. Avoid deodorants, fragrances, or heavy lotions on the treatment area unless your provider requests otherwise. Understand what the procedure feels like. Sensations vary by person and area. Providers typically use cooling for comfort and safety. Use aftercare to support recovery. Your clinic may recommend gentle cleansing, soothing moisturization, and sun protection. Avoid heat exposure and exfoliating steps for the recommended timeframe. Track progress between sessions. Hair shedding and gradual reduction may occur over time. Keeping notes helps you discuss response and adjust the plan if needed. Maintain your results plan. Many people need periodic maintenance sessions. Your provider can advise based on your response and growth pattern. When you evaluate laser hair removal services, consider both performance and process. A strong clinic will focus on safety, individualized settings, and practical guidance. It should also help you build a predictable routine for hair removal, skin comfort, and sun management. Clinic checklist, skin type cards, cooling arrows How to Choose the Right Laser Hair Removal Services Choosing the correct provider can make the difference between a smooth treatment experience and avoidable complications. Start with professional standards. Look for licensed staff, clear consultation protocols, and informed consent practices. Ask whether they offer device guidance and whether they customize treatment plans for your skin and hair profile. Next, evaluate safety practices. A reputable clinic should discuss contraindications, manage realistic expectations, and provide clear preparation and aftercare instructions. You should be able to ask questions without pressure, and the provider should respond with clarity. If a clinic guarantees immediate or guaranteed permanent hair removal for every client, you should be cautious. Finally, consider your comfort goals. Some areas are more sensitive than others. A provider who offers comfort-focused techniques, such as cooling strategies and stepwise treatment for new clients, can improve your overall experience. Skin prep and sun management Skin preparation directly influences effectiveness and comfort. Your provider may ask you to avoid sun exposure and tanning before sessions. Sun-managed skin helps reduce the risk of irritation and supports more consistent energy delivery. After treatment, strict sun protection is essential because treated skin may be more reactive for a short period. If you want to support a consistent skincare routine, consider gentle cleansing and barrier-friendly moisturization. For example, you may prefer a mild cleanser from your current routine. You can explore options such as a gentle cleanser at Cetaphil Gentle Cleanser and pair it with a supportive daily plan guided by your provider. Hair removal habits between sessions Between visits, you may be advised to shave rather than wax or pluck. This maintains the presence of hair structures that the treatment targets. Avoid methods that remove hair from the follicle during the period your provider recommends. Consistent preparation also helps your provider maintain treatment accuracy. It is also important to avoid harsh exfoliation during recovery windows. If you use actives in your skincare routine, ask your provider when it is safe to resume. Thoughtful timing helps reduce unnecessary dryness or sensitivity. Session timeline calendar, shield icon for aftercare Frequently Asked Questions How many sessions are typically needed? Most people require multiple sessions to target hair during active growth phases. The exact number varies by treatment area, hair density, and individual response. Your provider can estimate a plan during consultation after reviewing your skin and hair characteristics. Does laser hair removal hurt? Many clients describe the sensation as mild to moderate and often comparable to a fast snap of a rubber band. Comfort tools such as skin cooling and customized settings can help. You can ask about comfort strategies during your consultation. What should I avoid before and after treatment? Clinics usually advise avoiding sun exposure, tanning, and certain skin products around appointment dates. After treatment, gentle skincare and sun protection are commonly recommended, while heat, exfoliation, and irritants may be restricted for a short period. Summary & Key Takeaways Laser hair removal services can offer long-term hair reduction when the treatment is matched to your skin and hair type and supported by careful preparation and aftercare. Choose a clinic that emphasizes safety, individualized settings, and clear guidance rather than unrealistic promises. With consistent sessions and smart skin habits, you can move toward smoother-looking skin with fewer ongoing hair removal steps. If you want to strengthen your daily skincare routine, consider exploring barrier-friendly products on Allodermis and discuss your approach with your laser provider. Q&A Section Is laser hair removal suitable for all body areas? Many providers treat common areas such as legs, underarms, and the bikini region. Suitability depends on the skin tone, hair color, and sensitivity of the area. A consultation helps determine which zones can be treated effectively and safely, and which areas may require modified settings or staged sessions. Can I use skincare products like sunscreen or moisturizers after sessions? Yes, moisturizers and sunscreen are often part of aftercare. Your provider may recommend a specific timeframe before using certain actives. For daily sun protection, you may consider a well-tolerated sunscreen option from your routine. For example, you can review available facial sunscreen products such as I Shield Sunscreen Cream SPF 50 PA, while still following your clinic guidance on timing and application amount. Why does hair sometimes shed after treatment? After each session, treated hairs may shed gradually. This does not necessarily mean the session failed. It often reflects the hair moving out of its active growth process. Providers typically monitor the response across sessions and adjust parameters if needed. How do I prepare for my first appointment? Plan to follow clinic instructions on shaving and skincare. Arrive with clean skin, and avoid new products that could increase sensitivity. If you have questions about your routine or products, confirm them before the appointment so the treatment area remains in an optimal condition. What results can I realistically expect? Laser hair removal services usually lead to reduced hair growth over time. The degree of reduction depends on hair thickness, growth cycles, and individual biology. Many clients also report softer, finer hair as treatments progress. A good provider will explain realistic outcomes and discuss maintenance based on your response. How can I support comfort during the course? Support comfort by following aftercare instructions and avoiding triggers that may increase redness or dryness. Hydration, gentle cleansing, and sun protection can help. If you experience unusual irritation, contact your provider promptly for guidance. Do I need to stop using certain skincare actives? Some actives may be paused around treatment time to minimize irritation risk. This can include strong exfoliants or other ingredients that affect skin sensitivity. Your provider can advise what to stop, what to continue, and when to resume based on your exact regimen. About the Author Allodermis contributes to skincare education with a focus on practical, patient-centered guidance. This article reflects expertise in everyday skin routines, ingredient awareness, and safe consultation principles for aesthetic services. The goal is to help readers make informed decisions with clarity and confidence. Thank you for reading, and we encourage you to choose professional care for your individual needs. Mandatory Disclaimer: This article is for informational purposes only and does not replace professional medical advice, diagnosis, or treatment. Individual results vary. Consult a qualified provider before starting any laser treatment, especially if you have skin conditions, a history of adverse reactions, or are using active skincare ingredients or medications. Additional resource: Luxury Hair Growth Oil: How to Apply for Best Results
Learn more
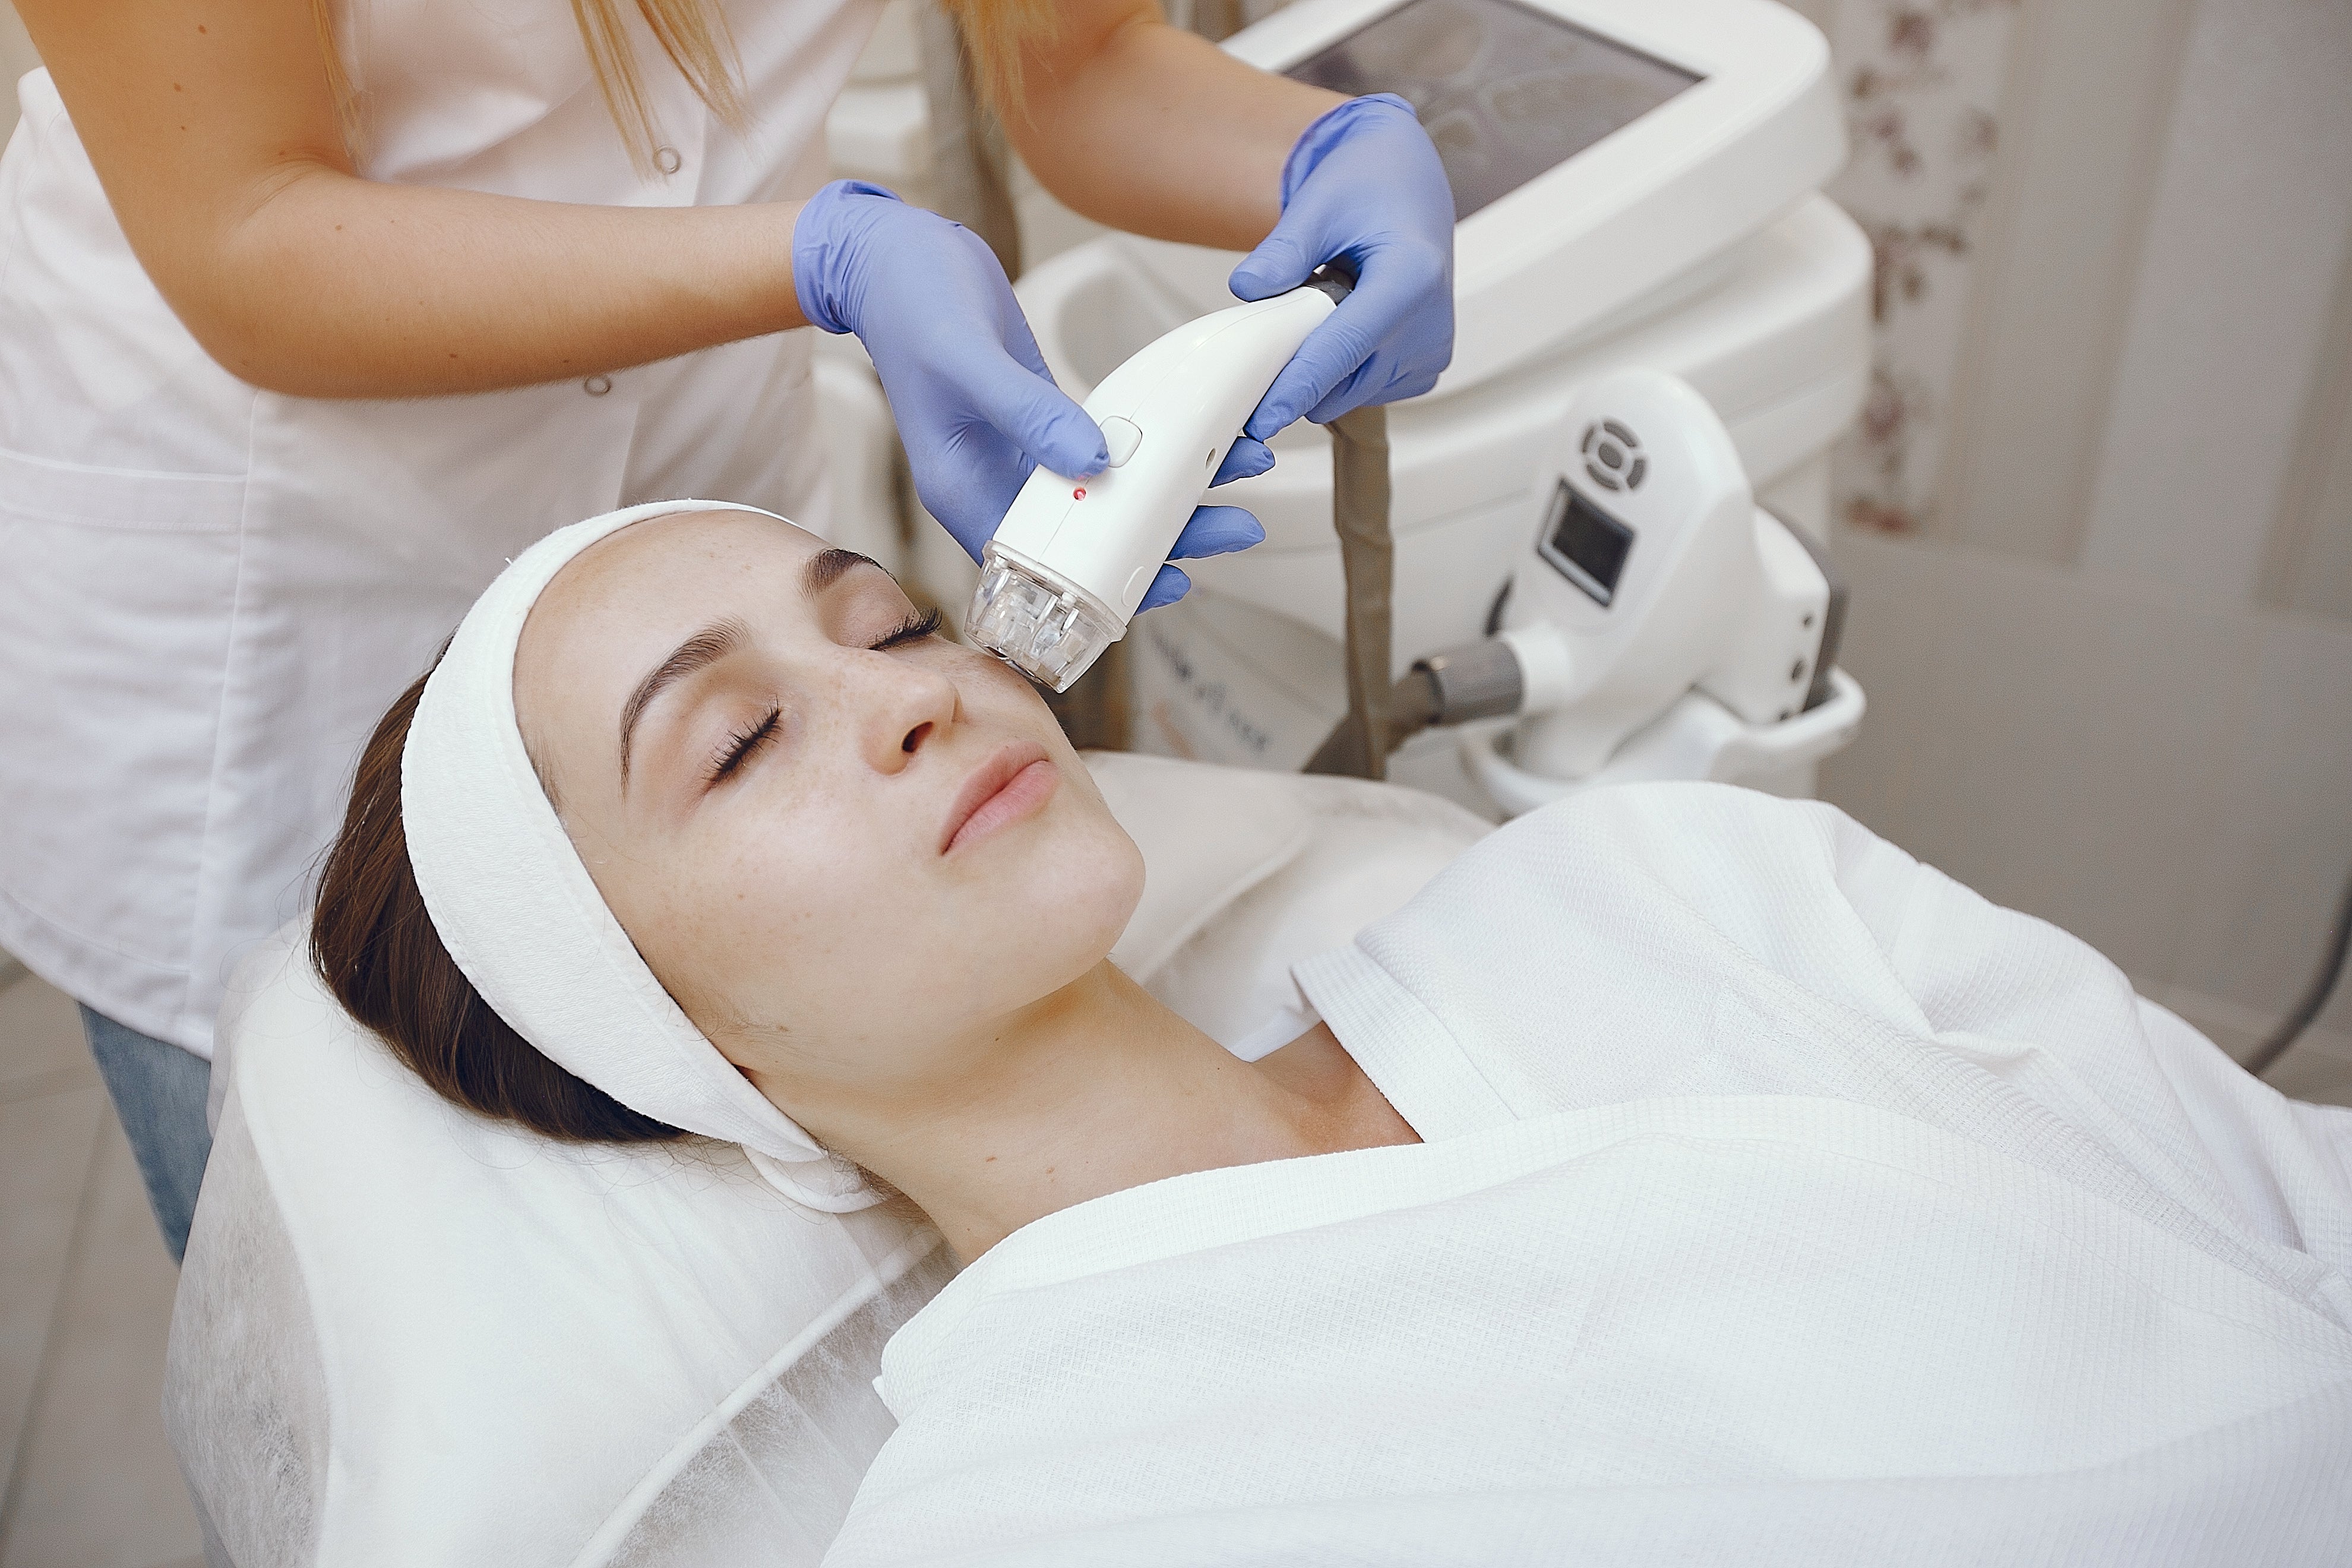
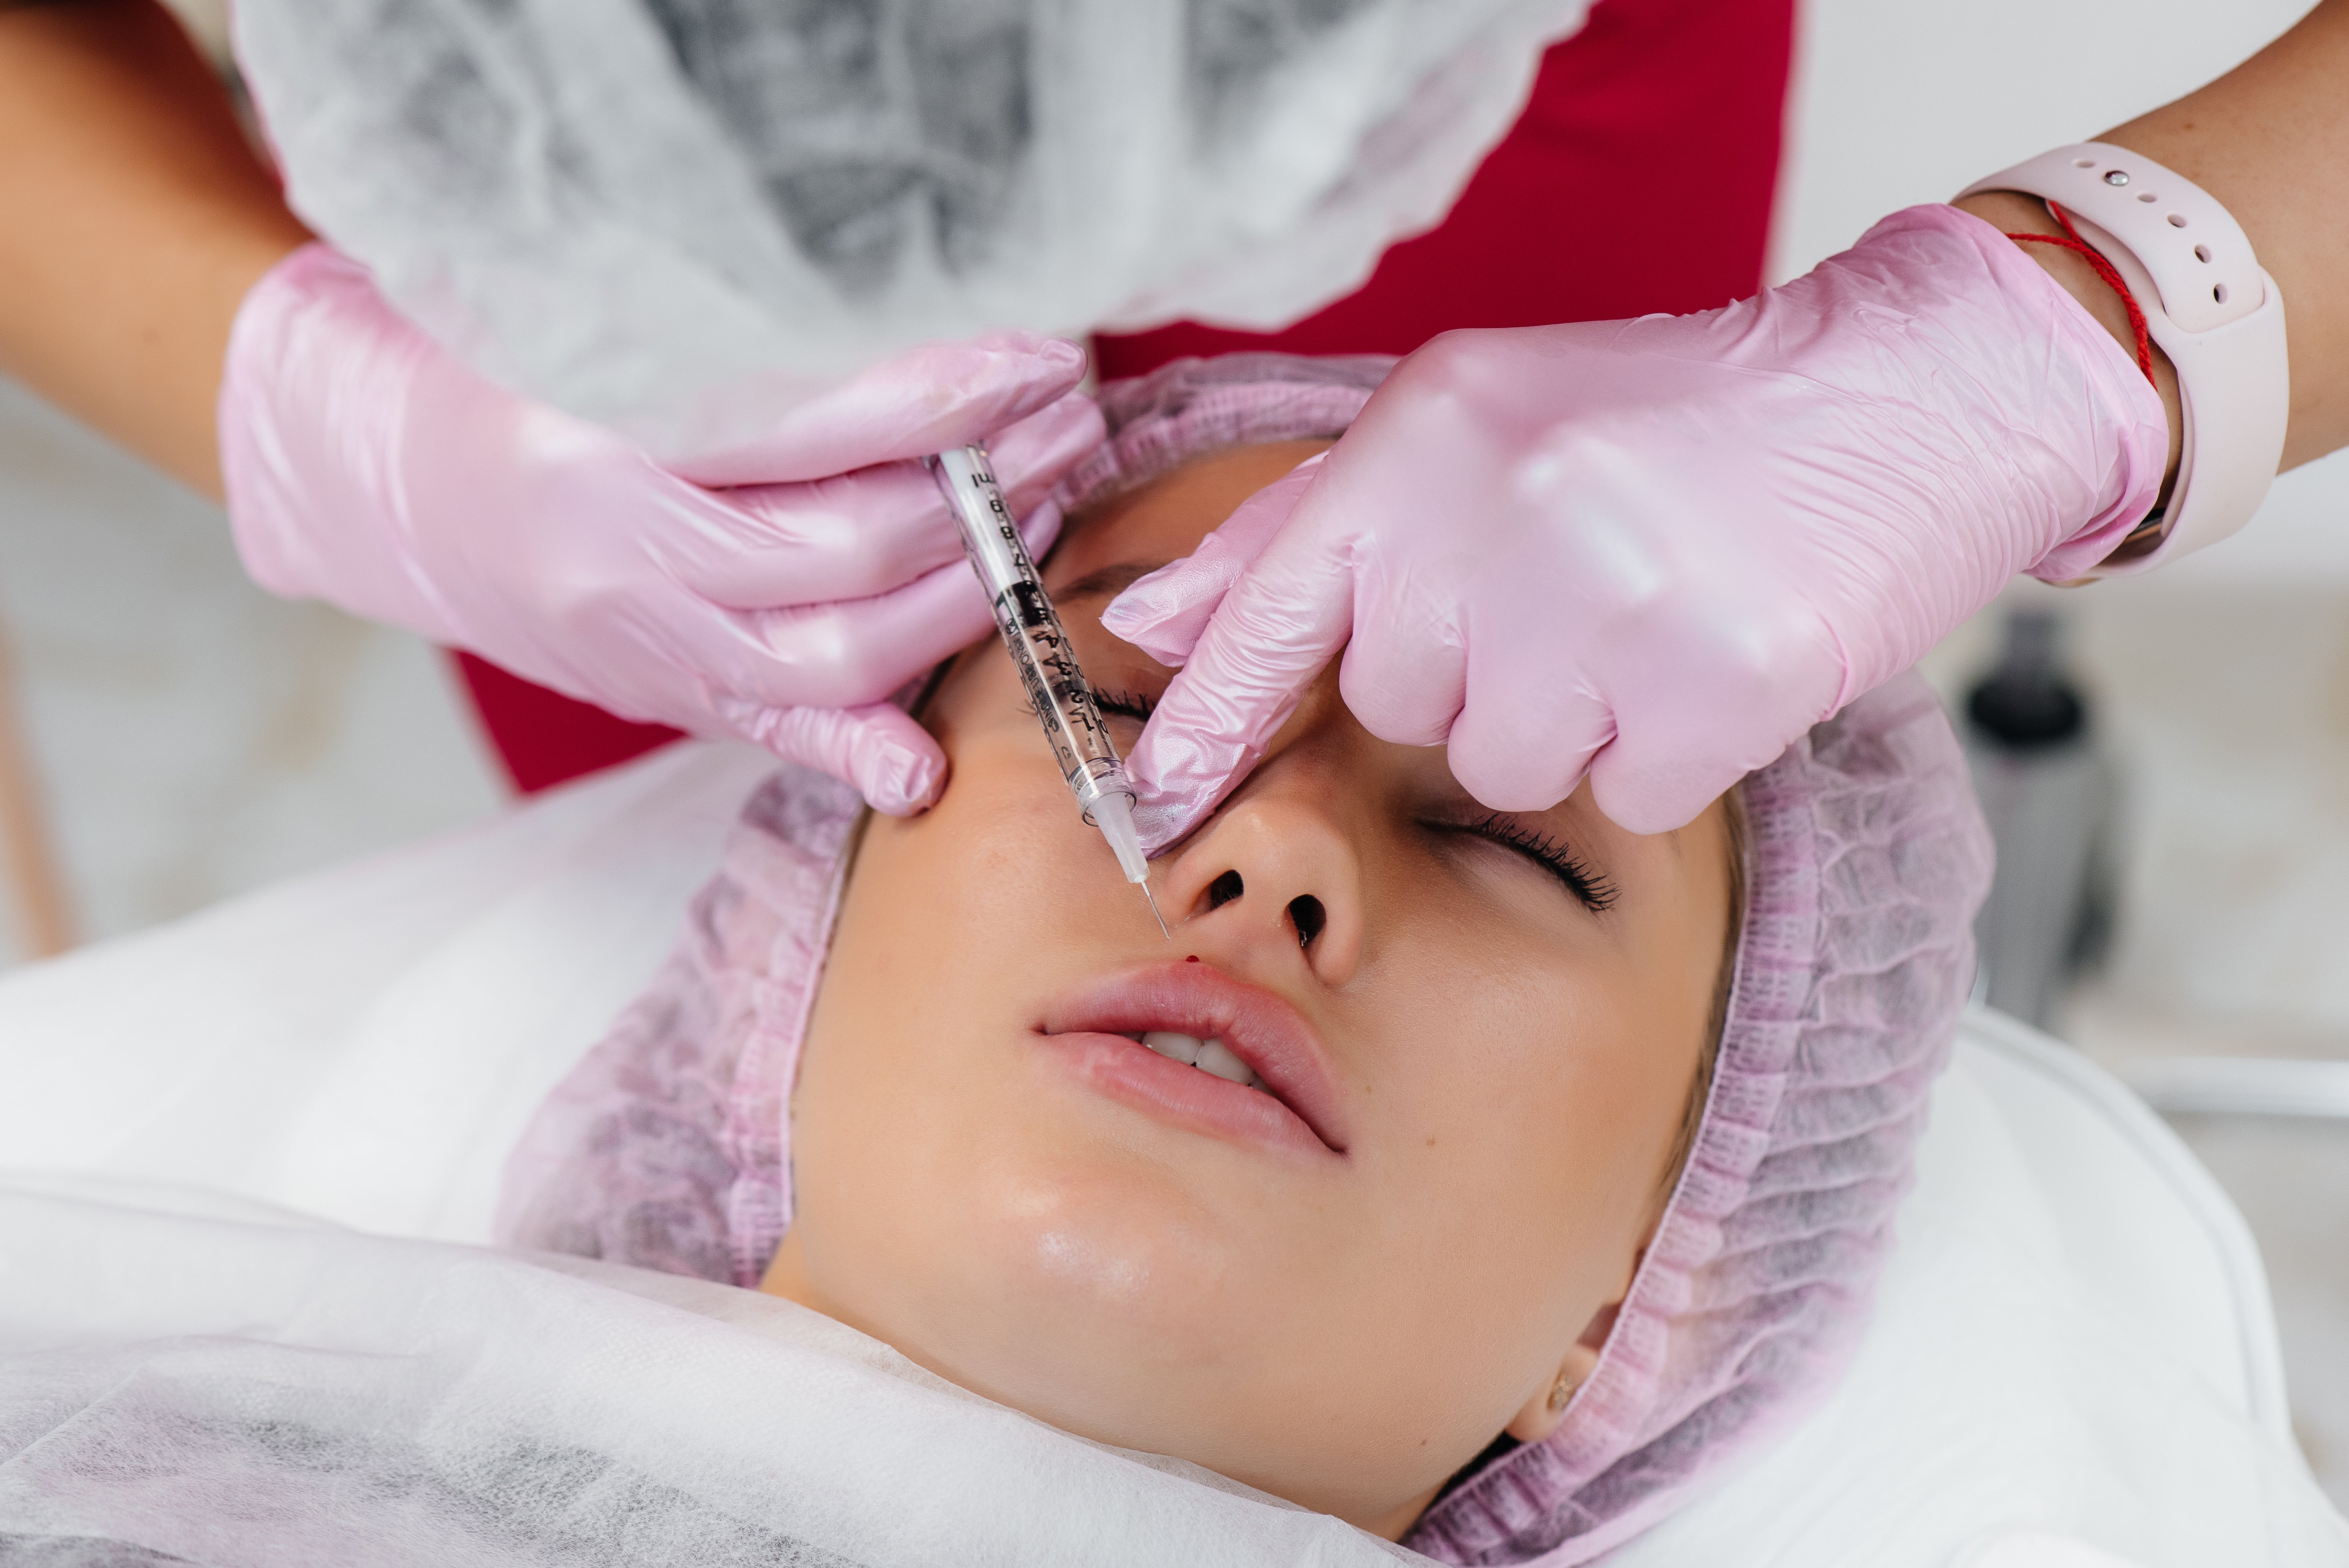
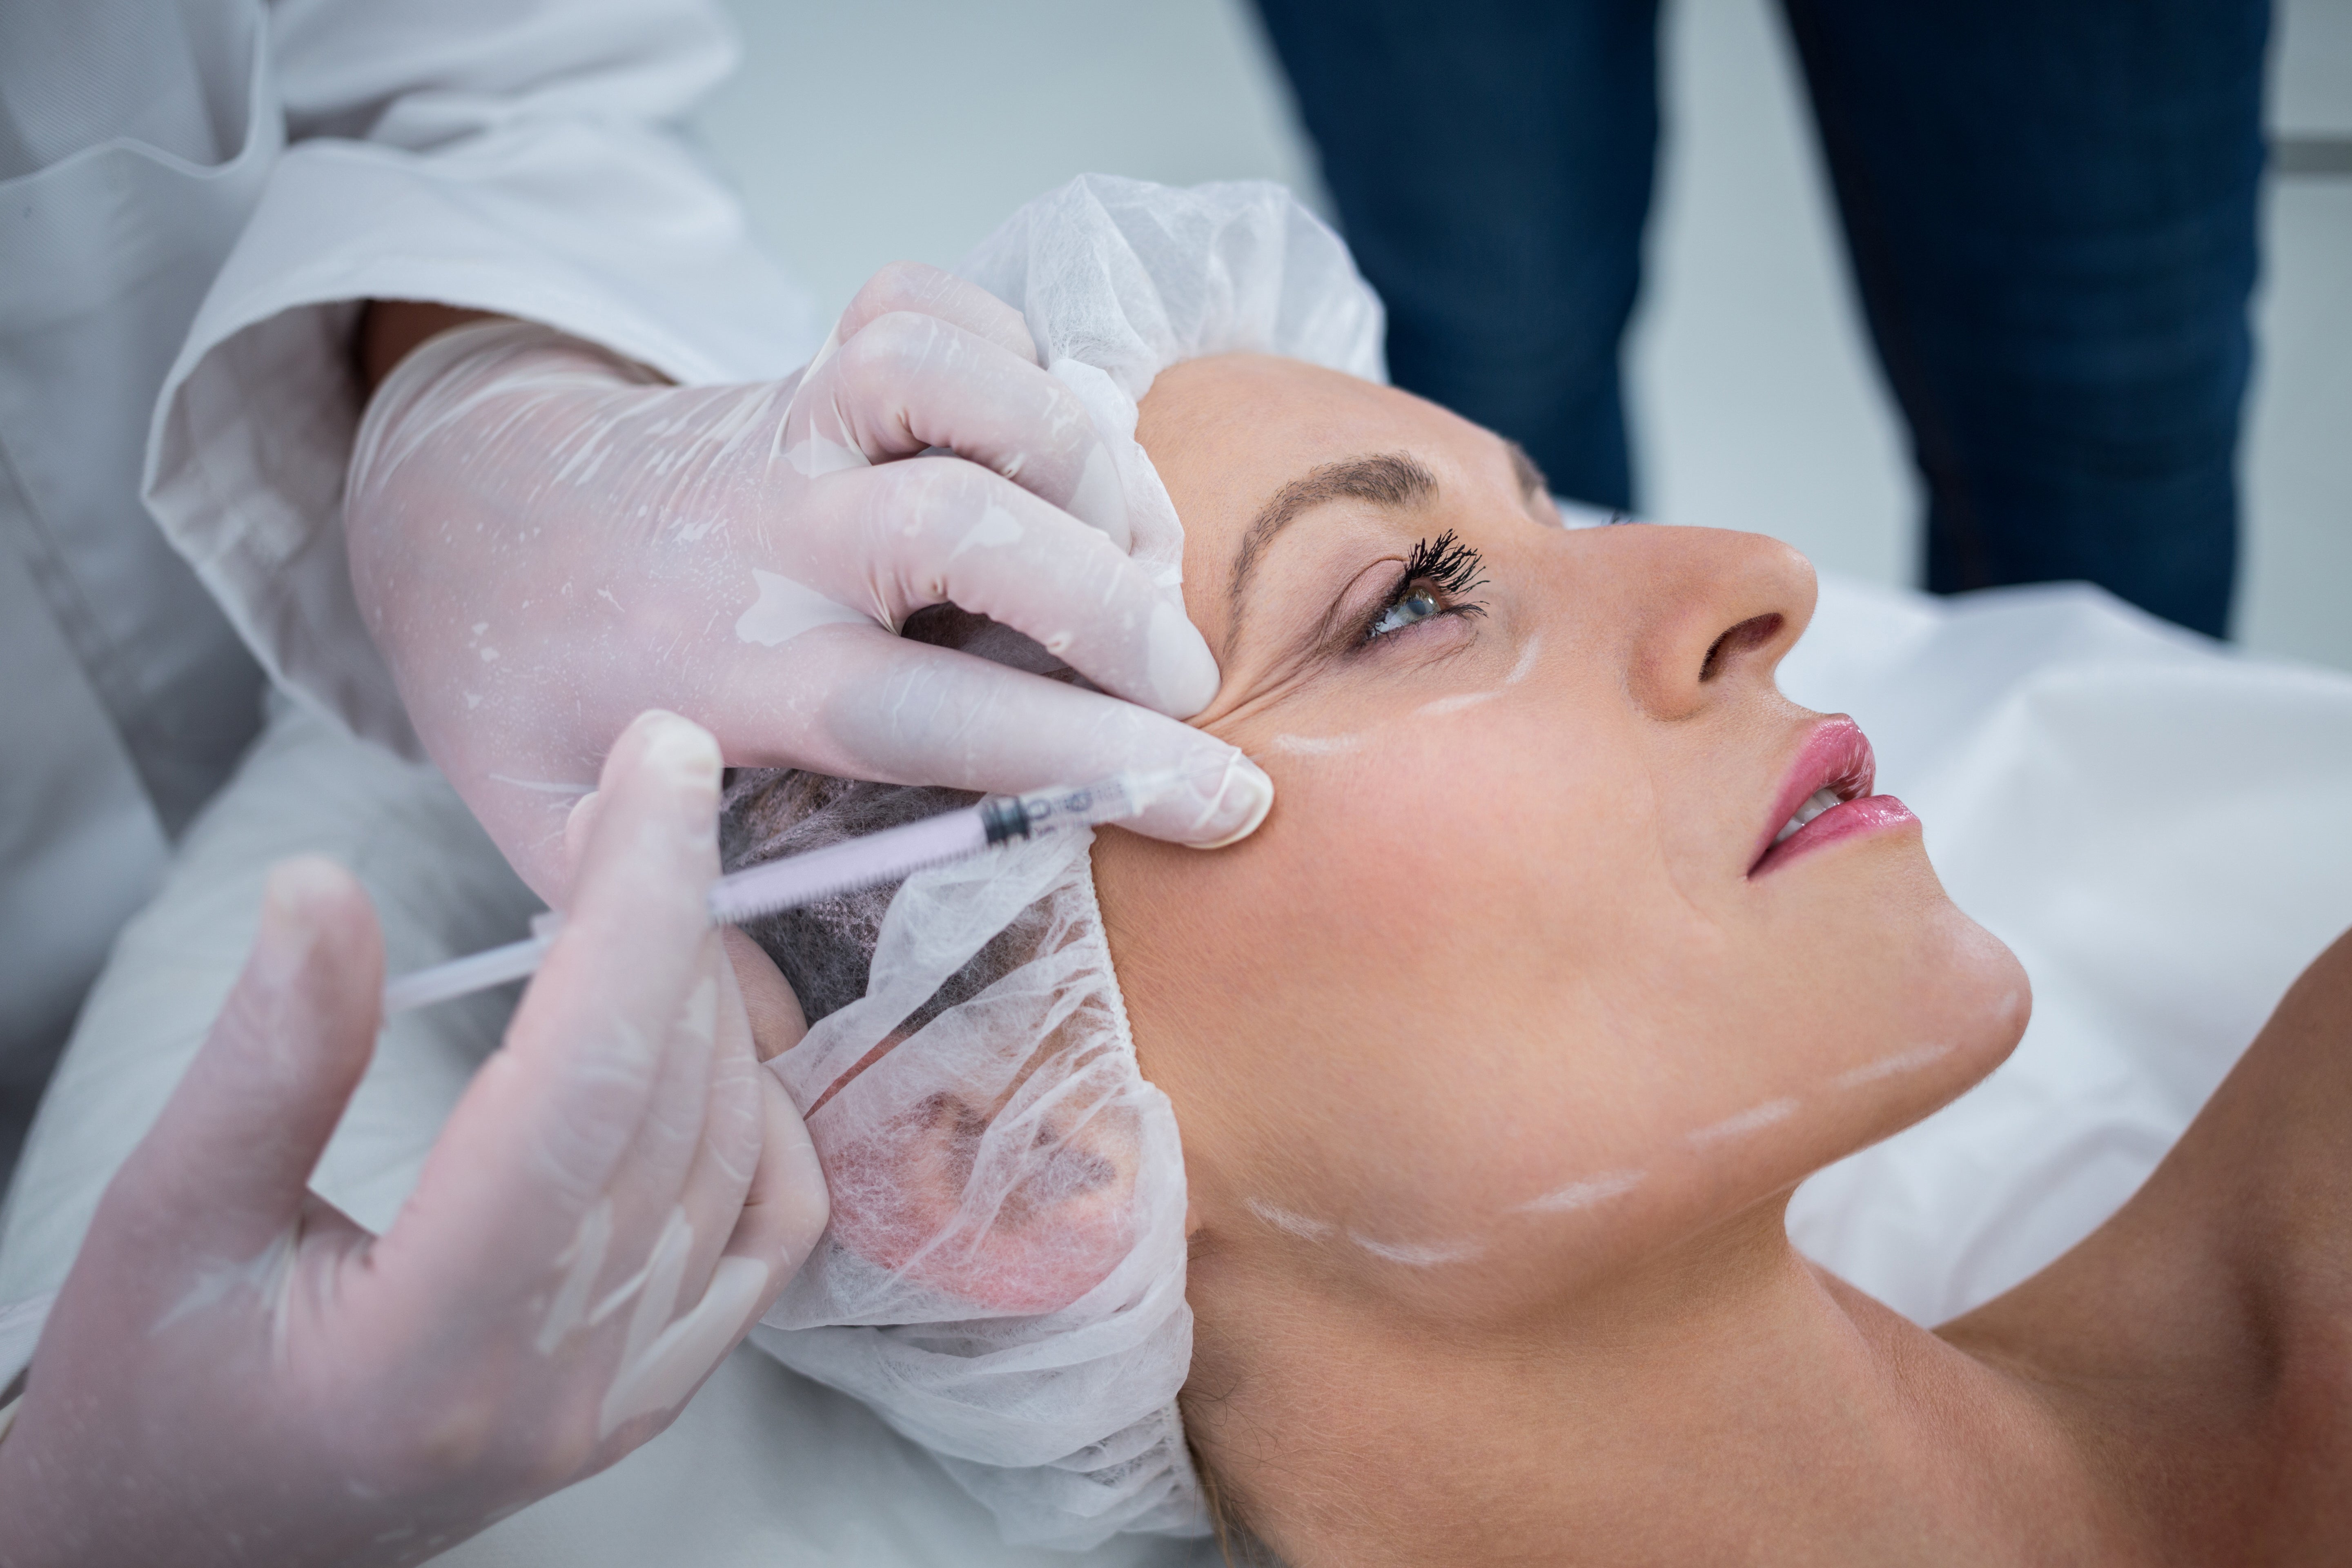
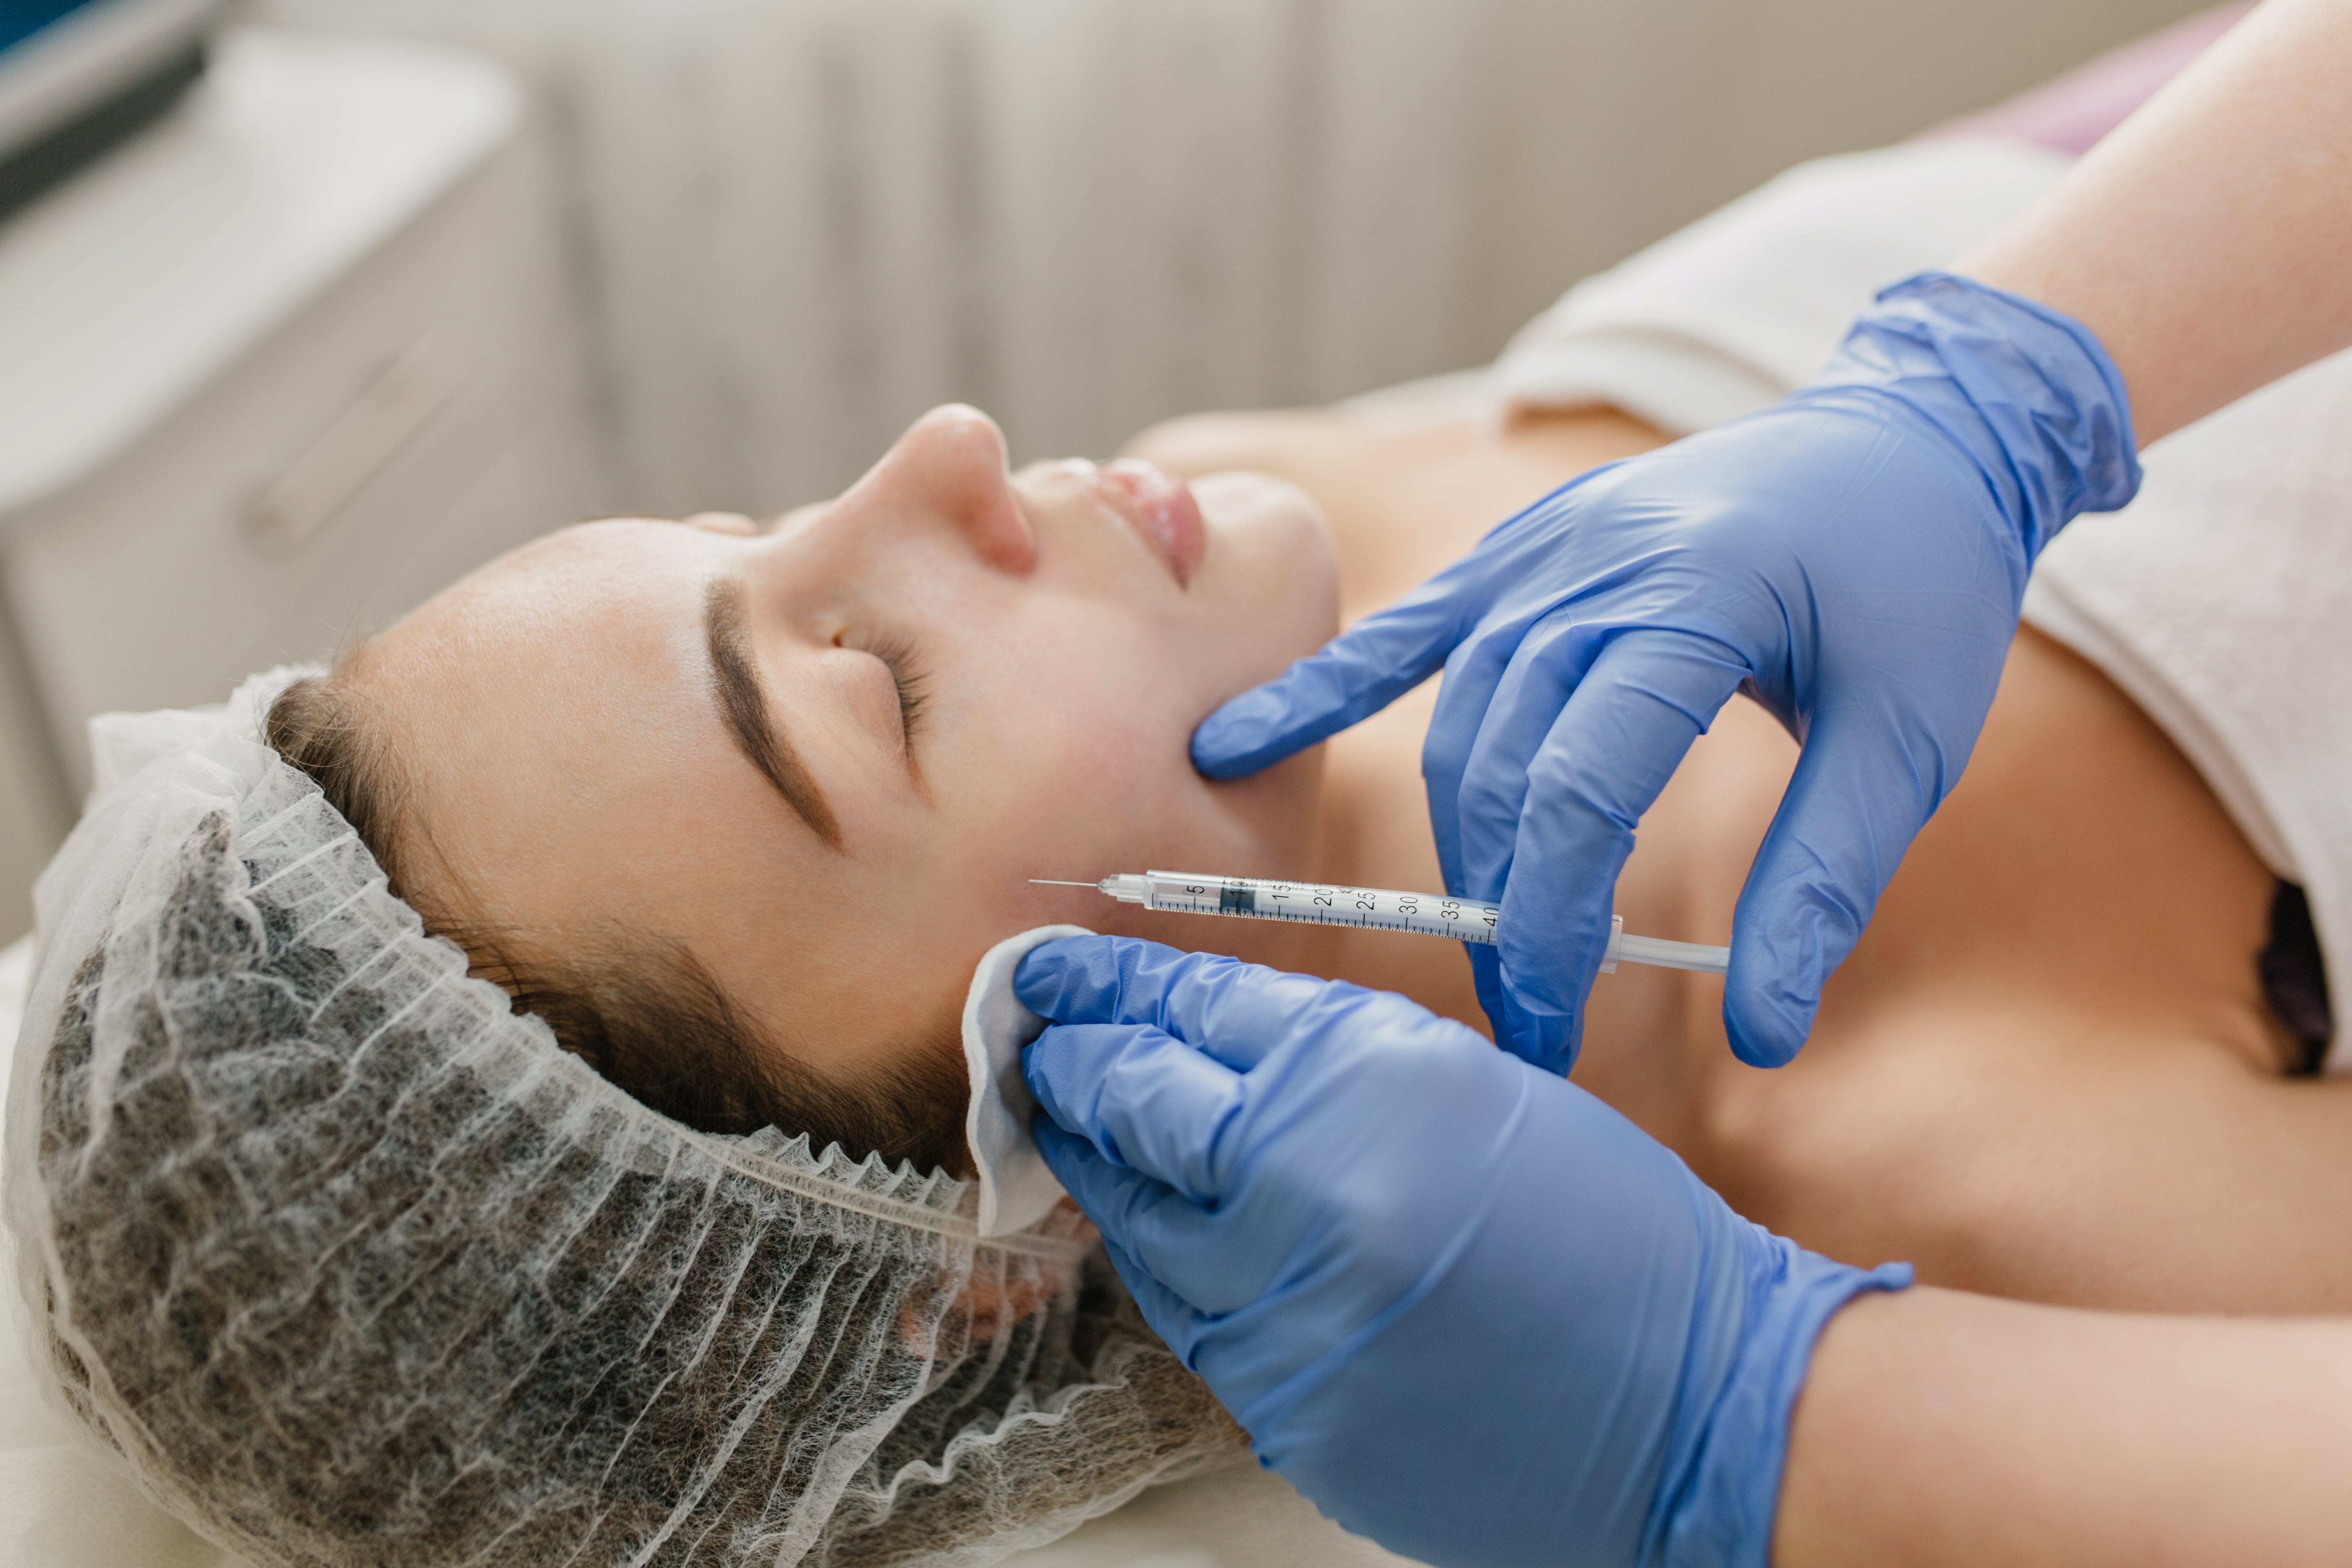
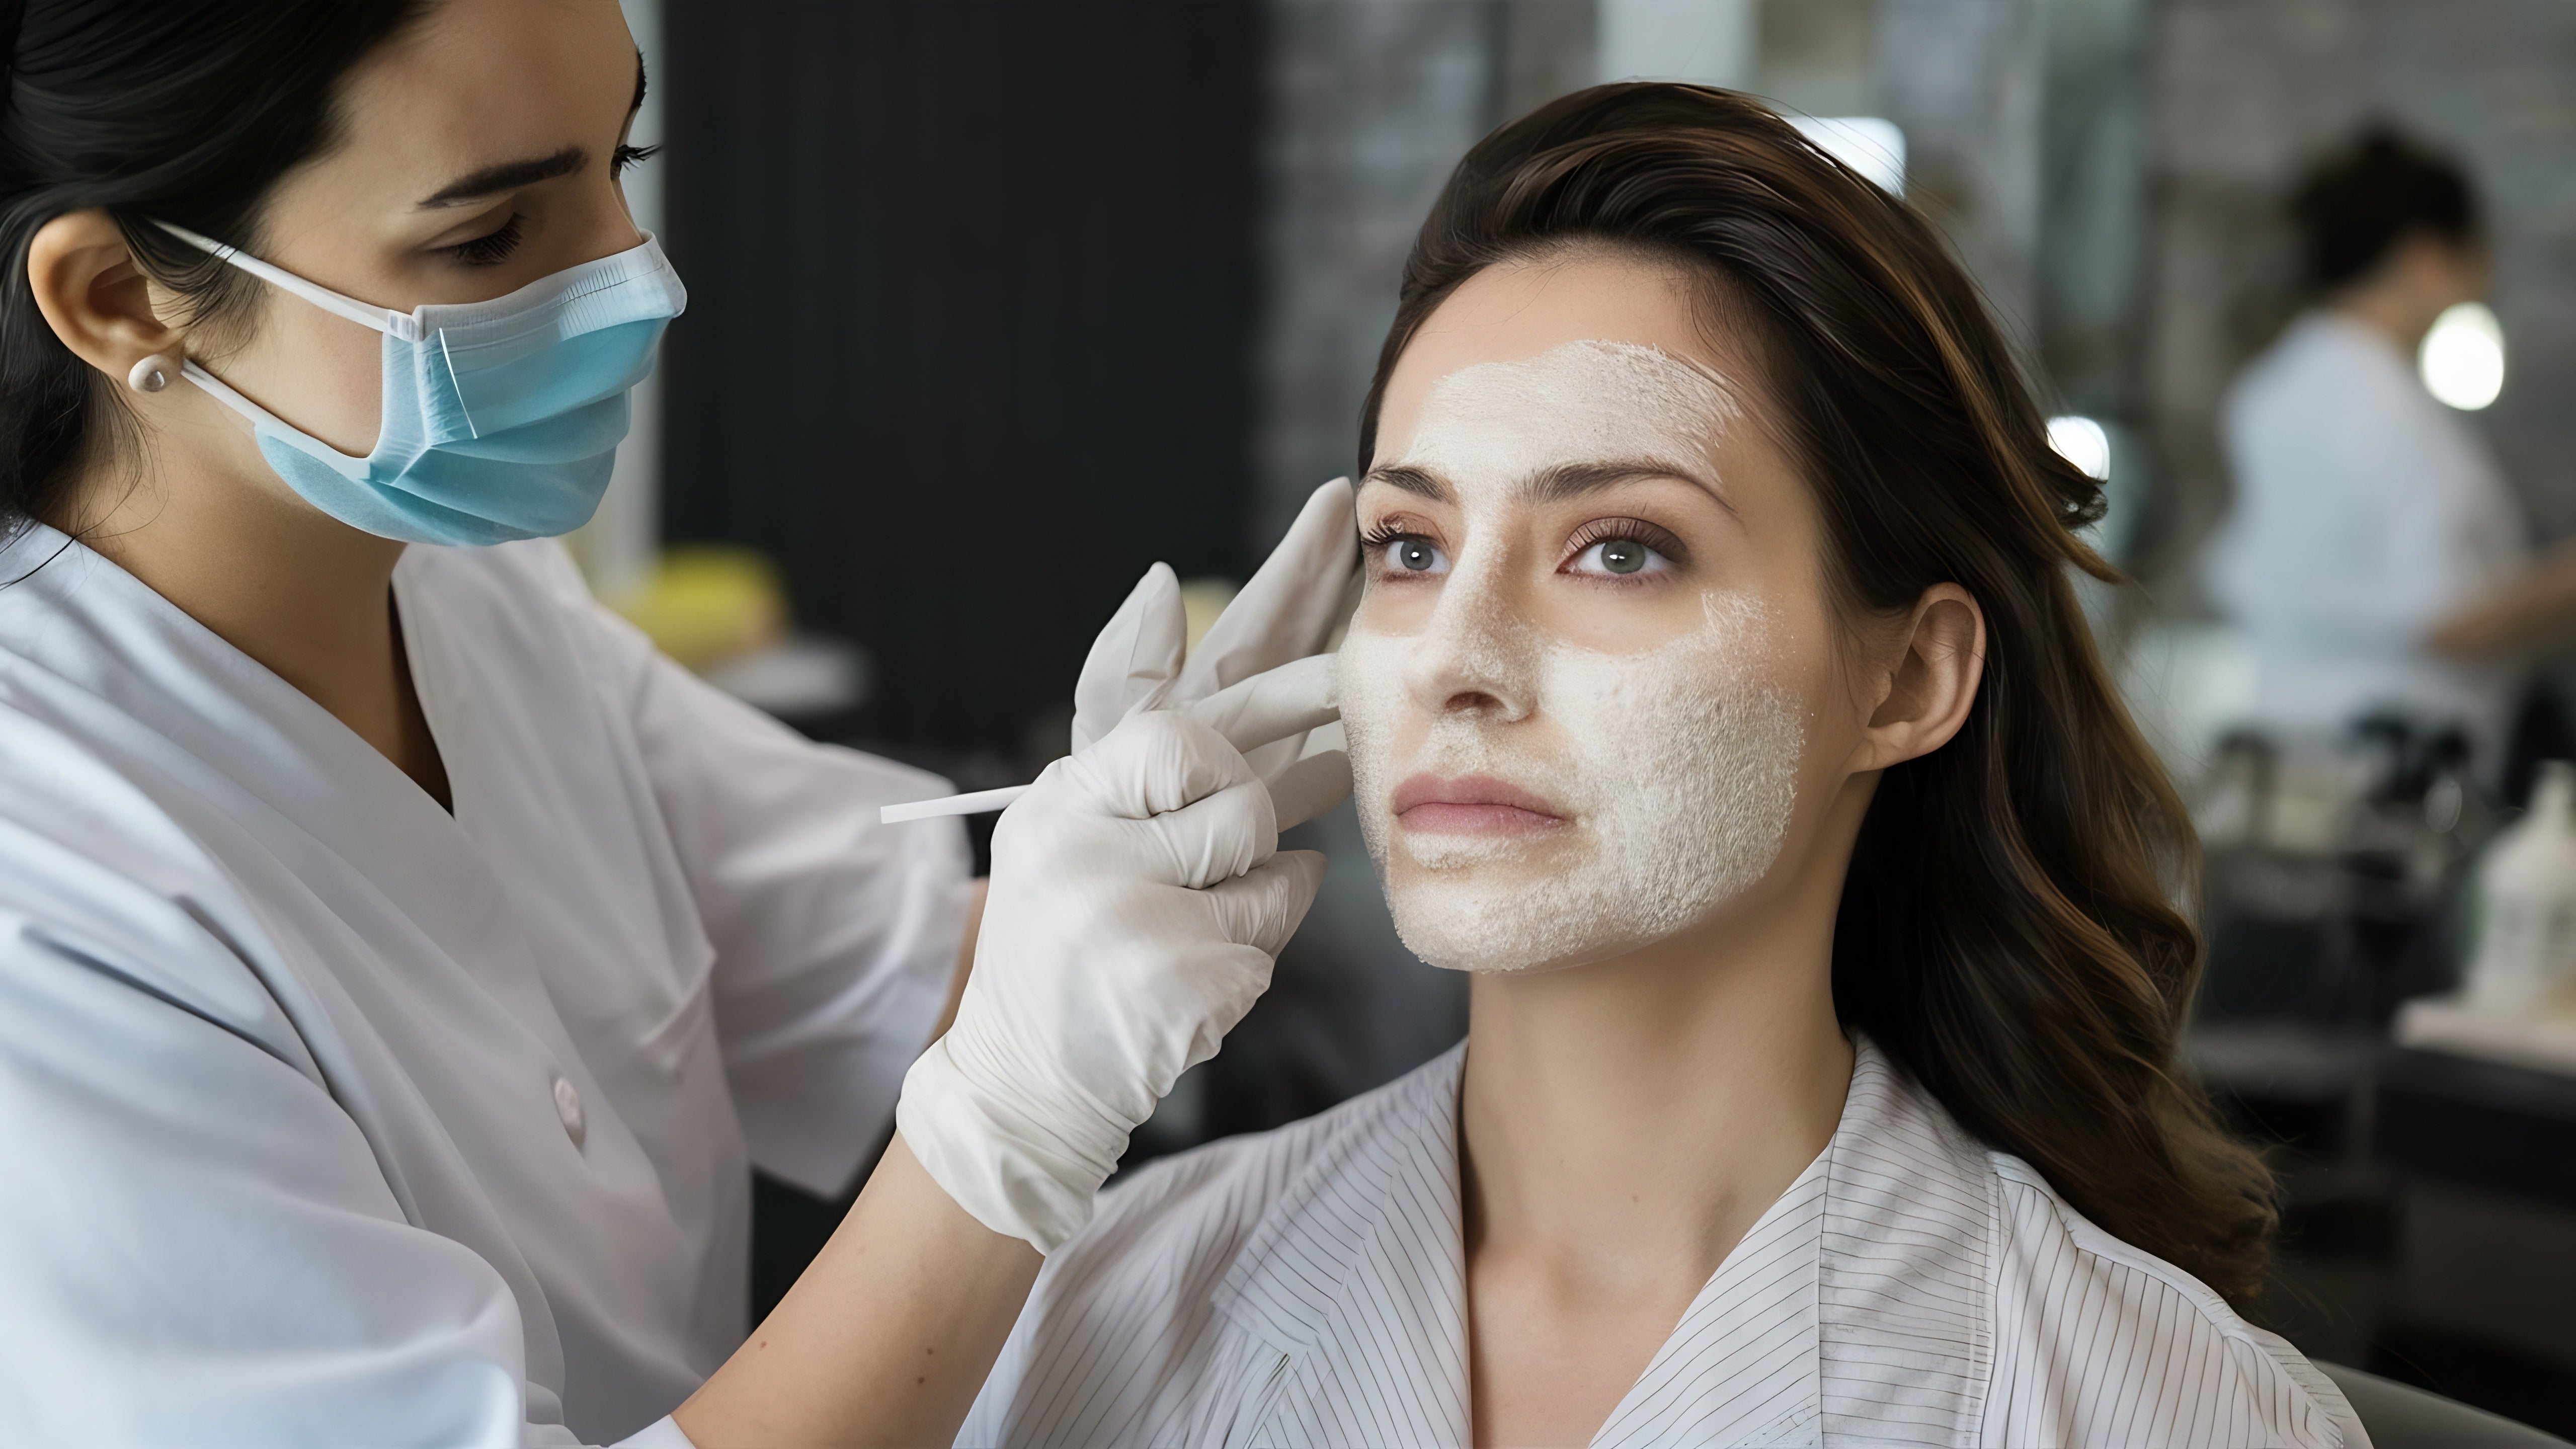
Non-surgical Aesthetic Options: What to Expect
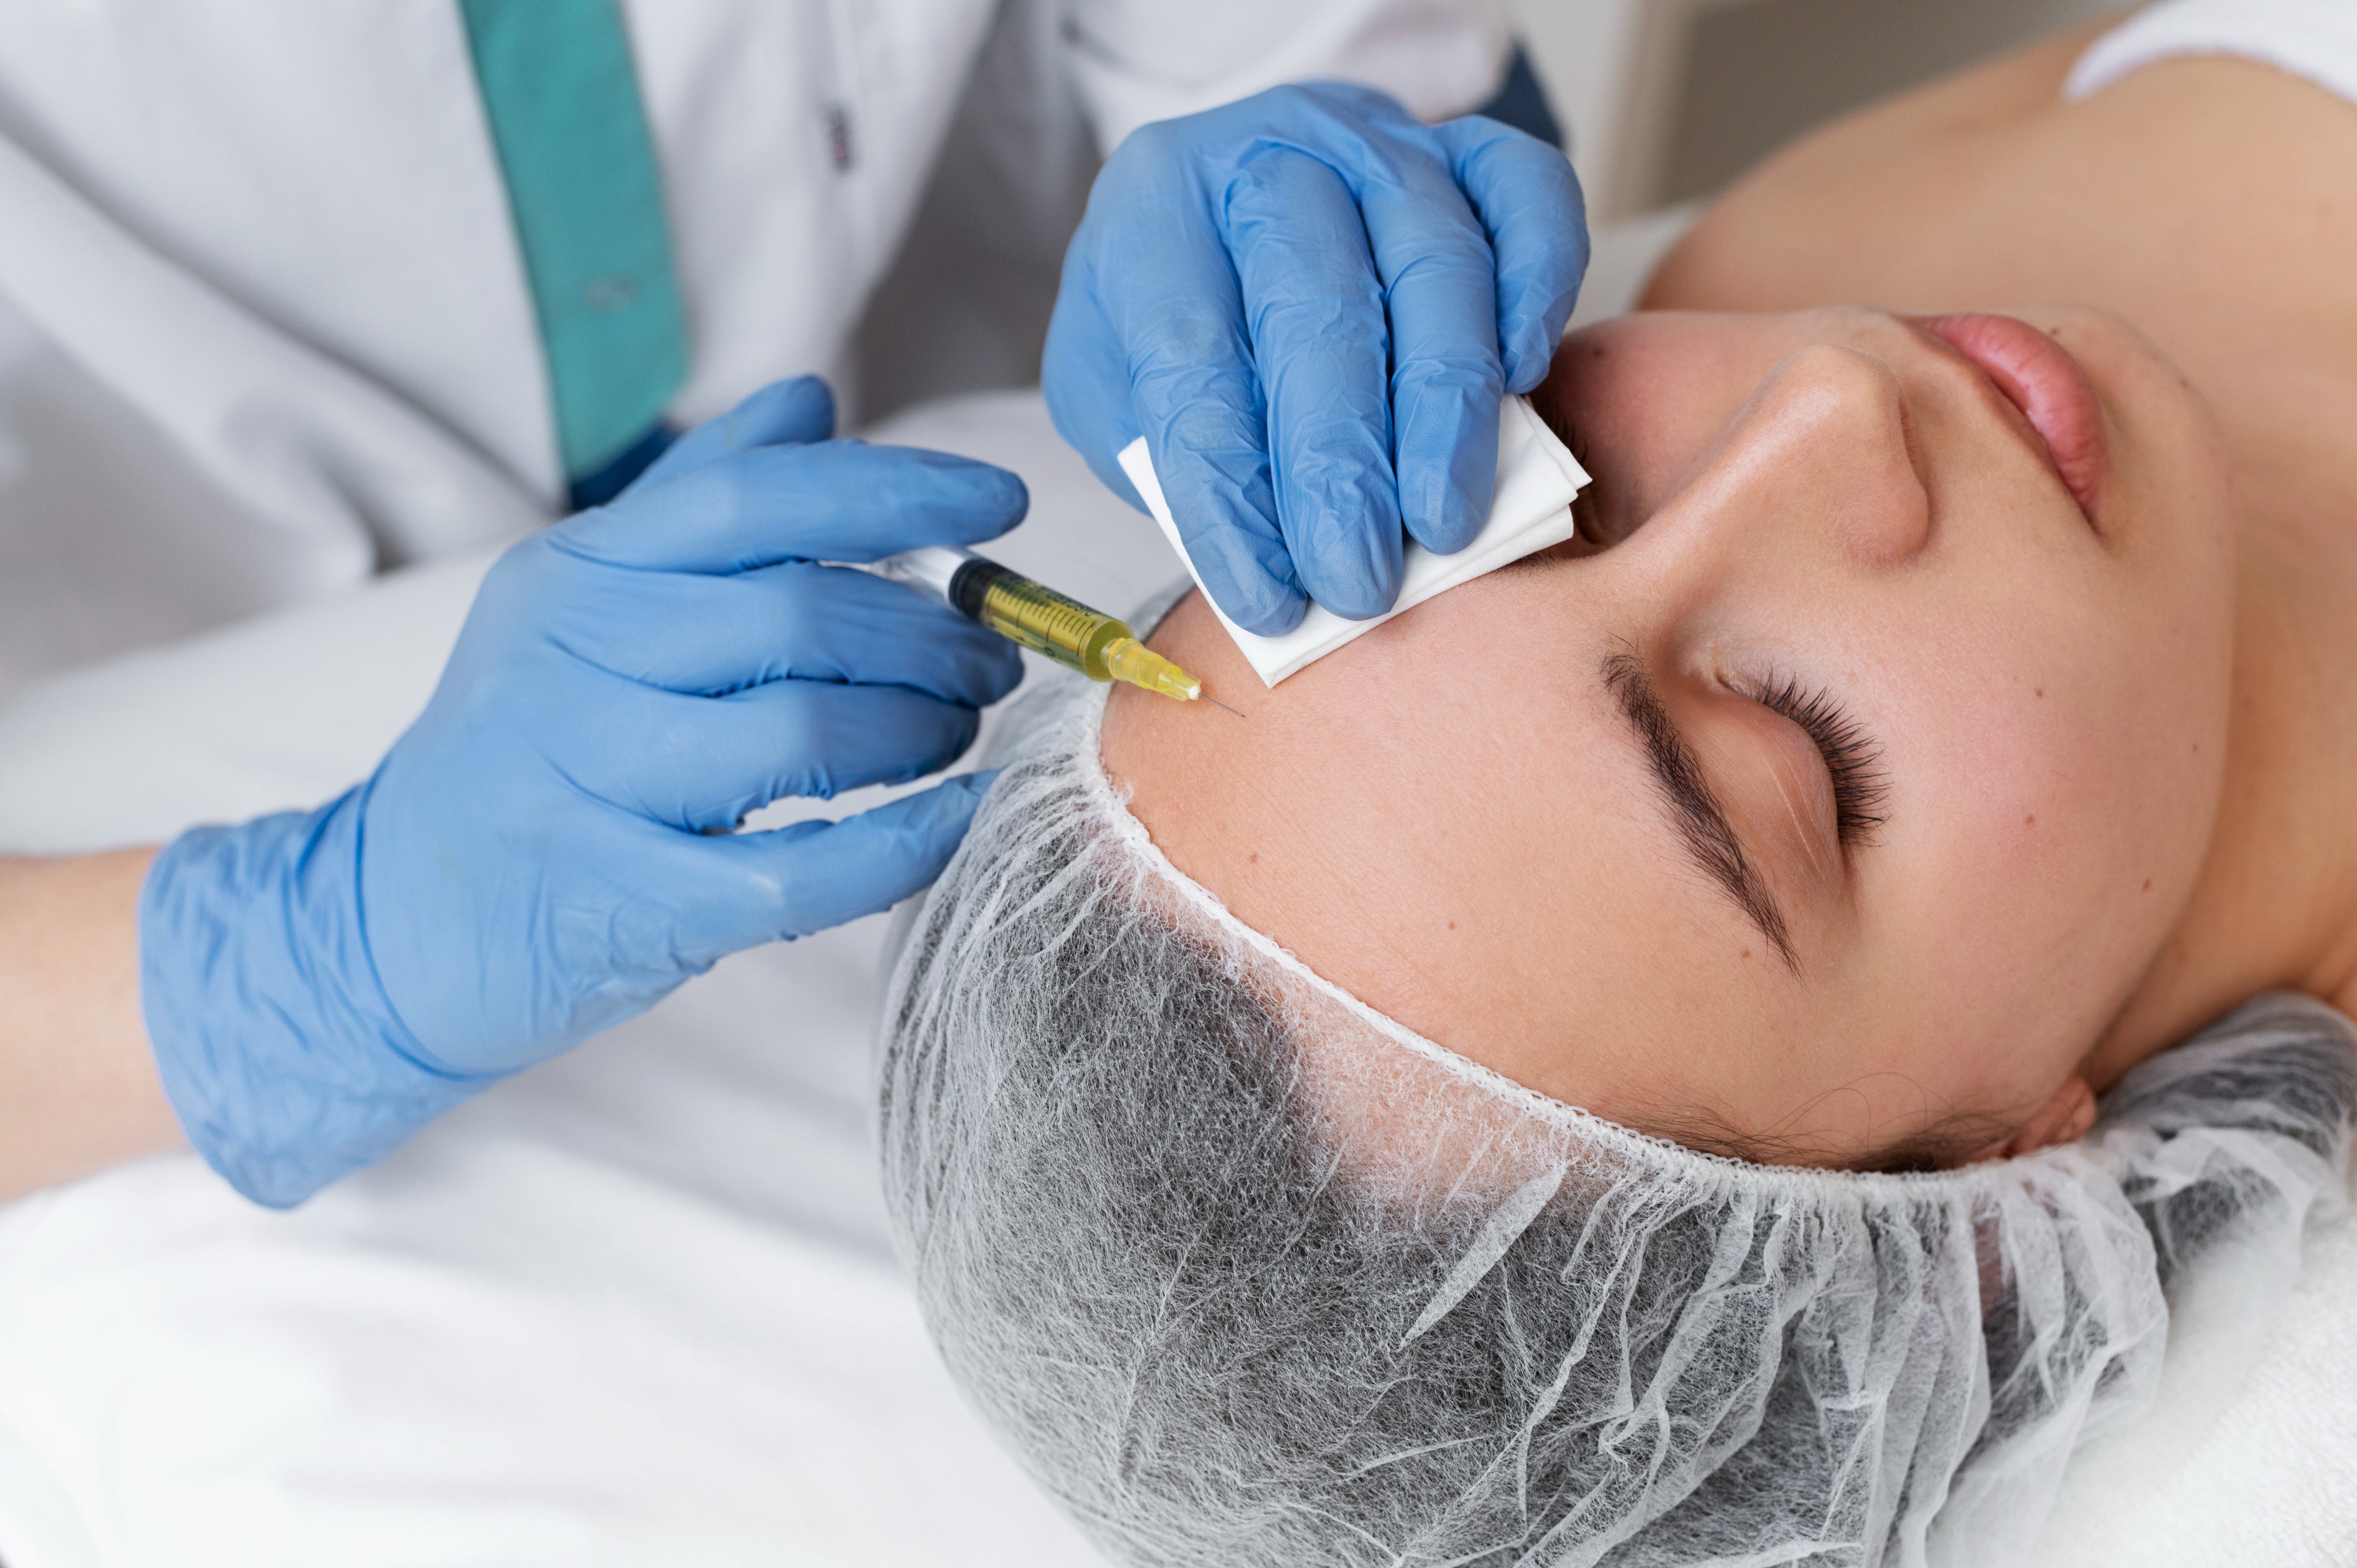
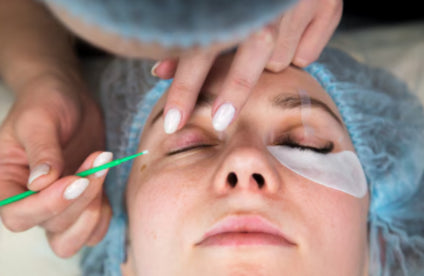
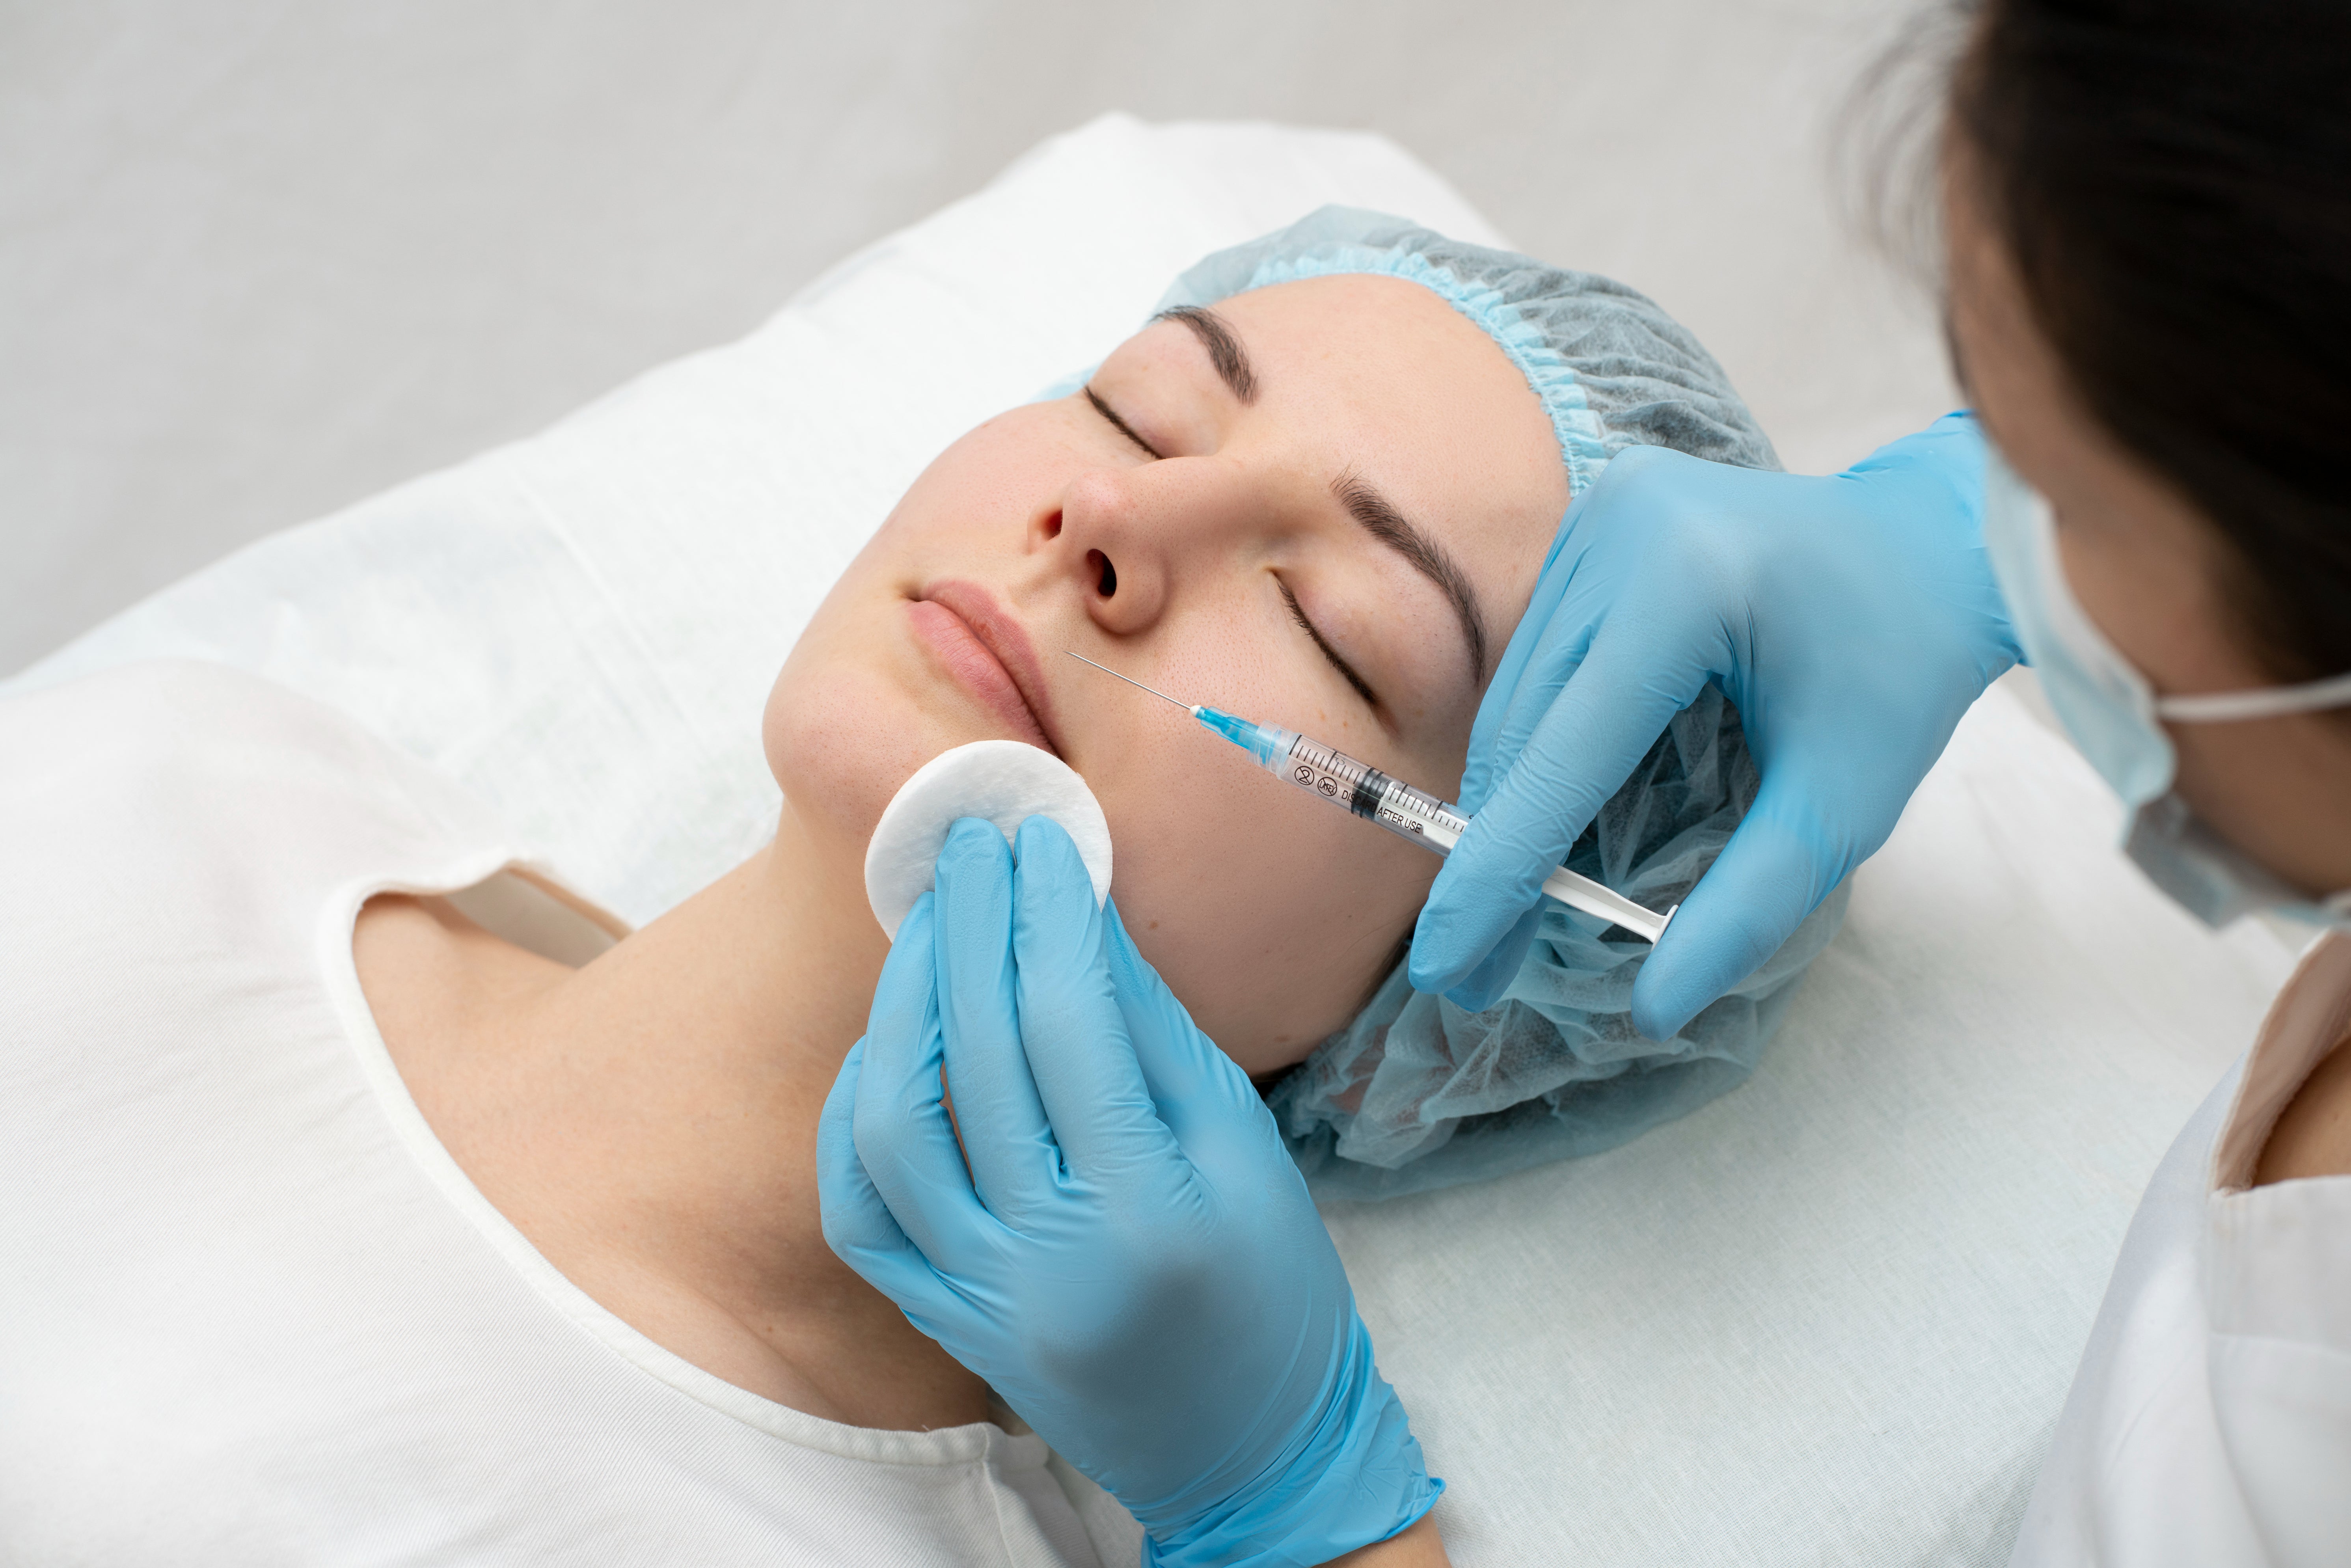
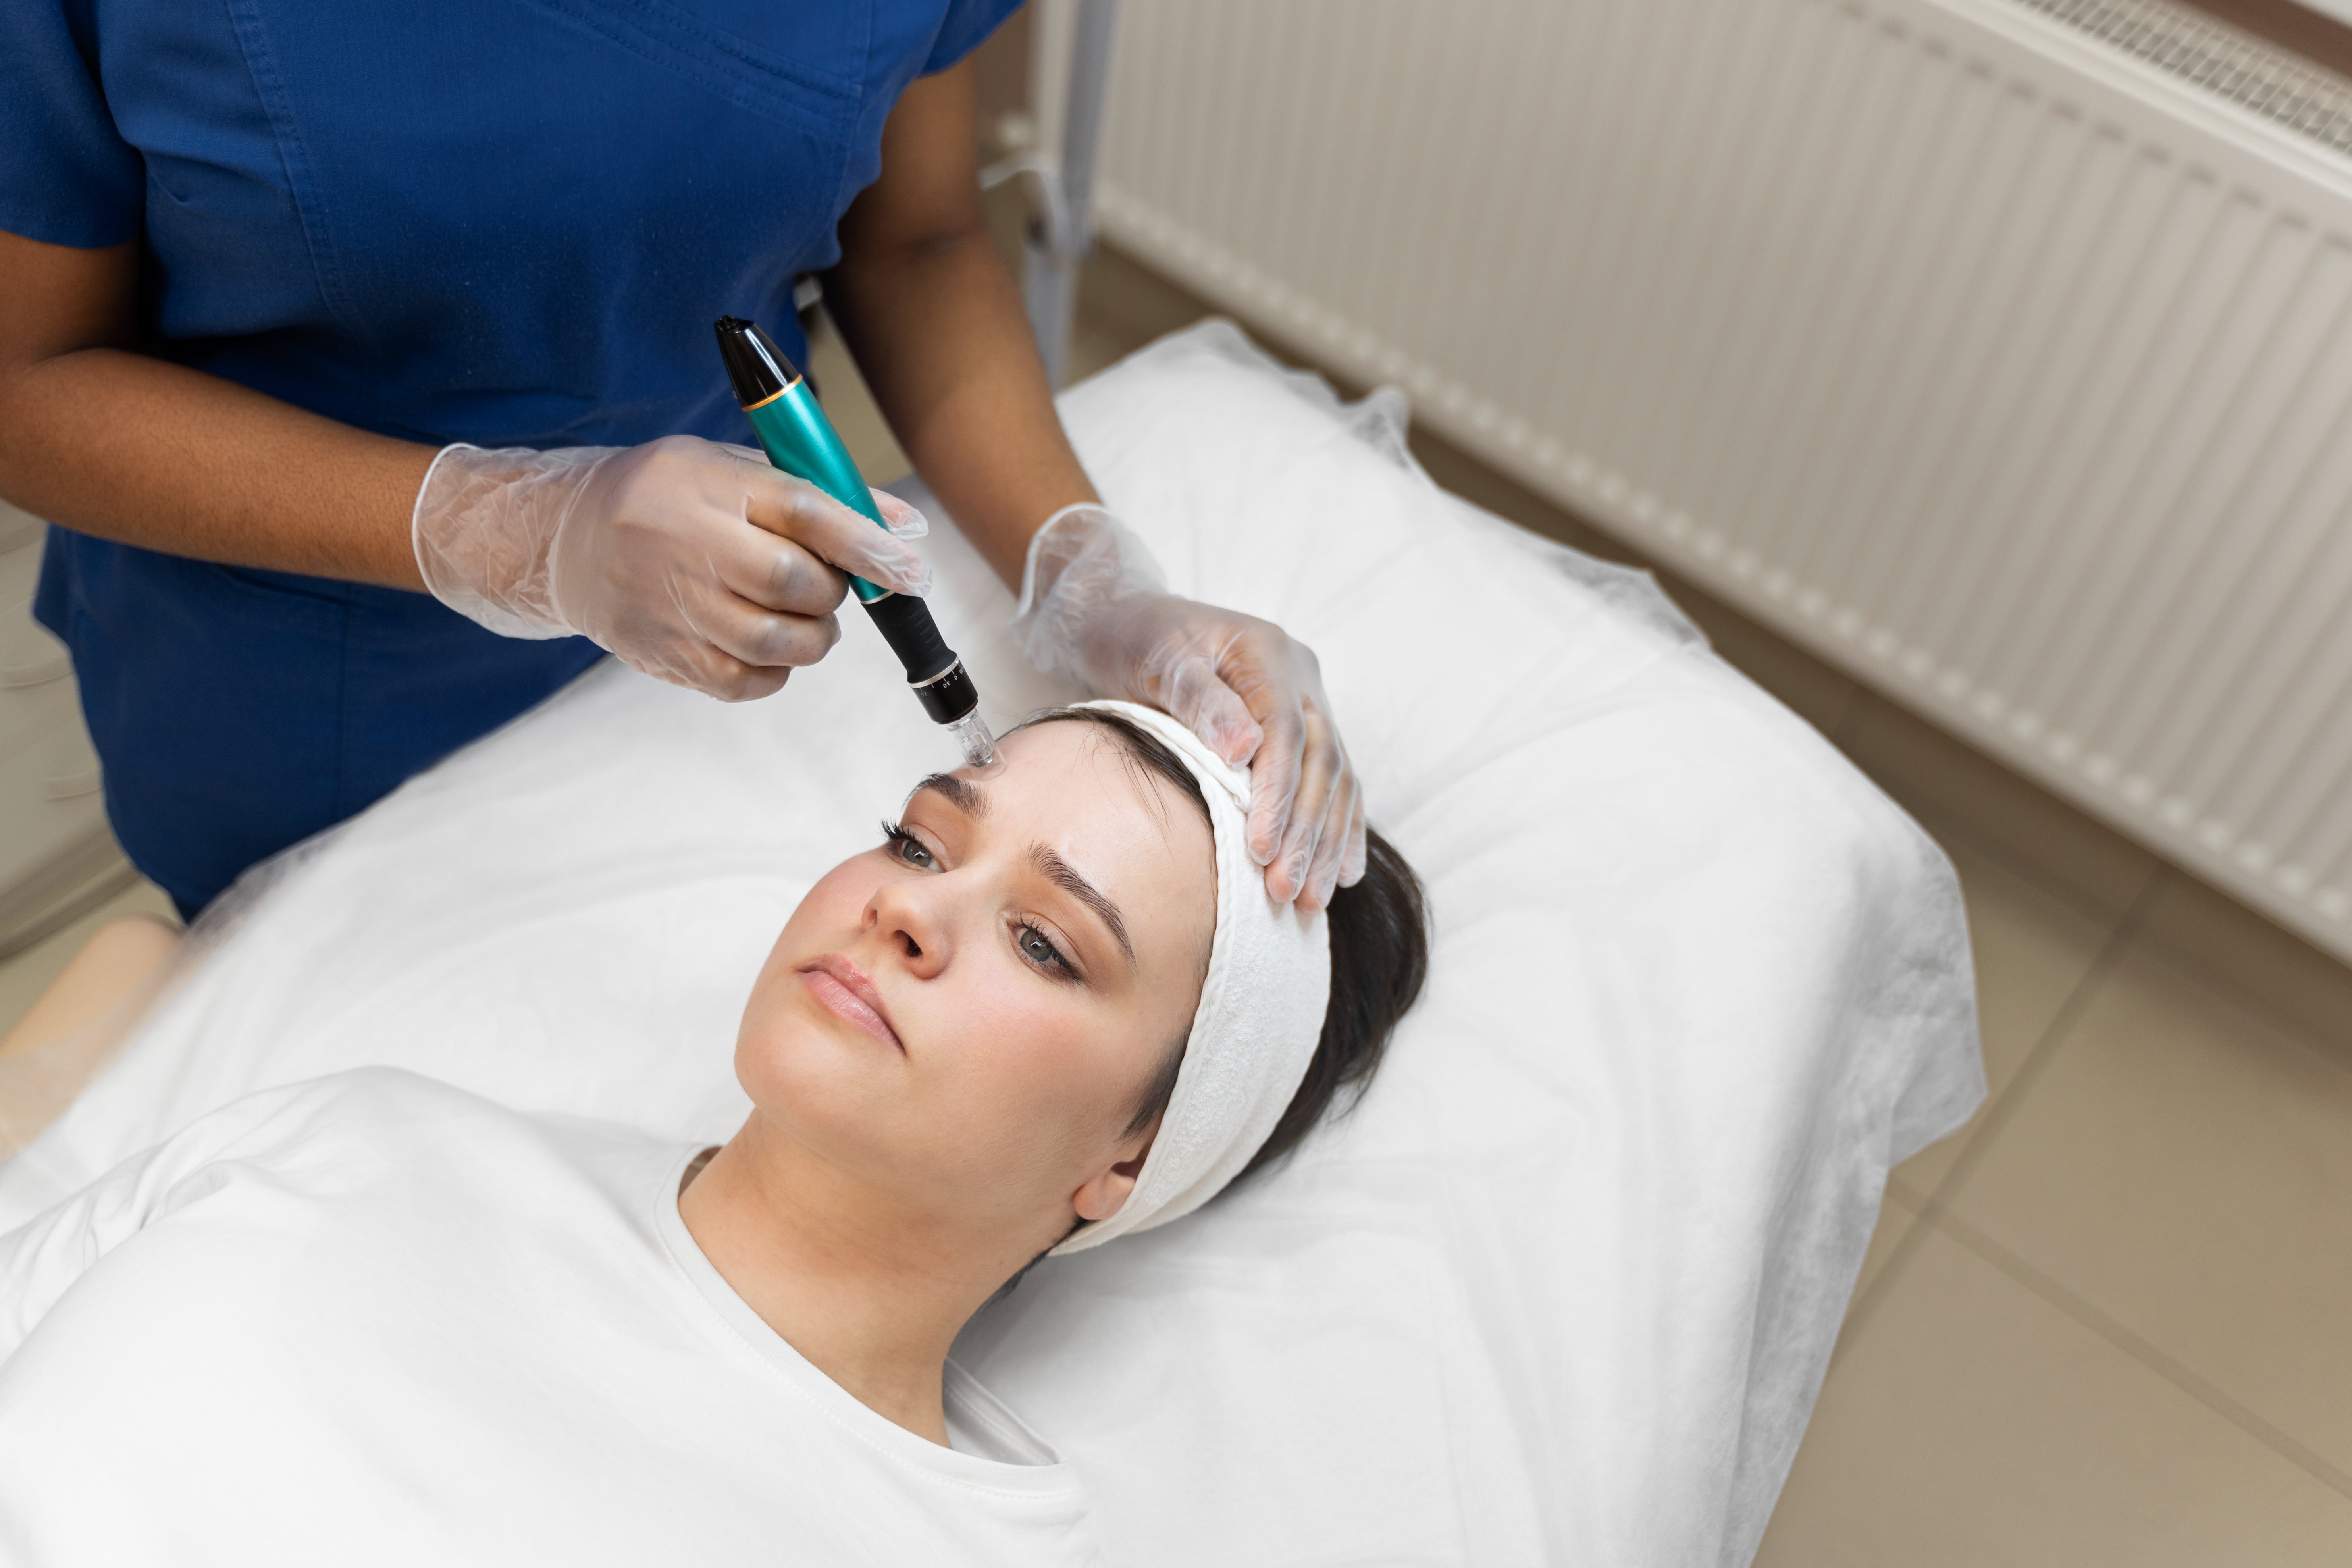
Updated on: 2026-06-12 Non-surgical aesthetic procedures can help many people improve skin appearance without the downtime associated with surgery. However, outcomes vary based on skin health, device choice, treatment plan, and realistic expectations. This guide explains how to evaluate options, prepare properly, and choose a qualified provider. You will also learn which questions to ask during a consultation and how to support results with a structured skincare routine. Table of Contents 1. Non-surgical aesthetic procedures: What they are and why people choose them 2. How to decide which approach is appropriate 3. How-to steps for safer, better results 4. Consultation checklist and provider red flags 5. Pair treatments with evidence-informed skin care 6. Common timelines and what to expect during care 7. FAQ 8. Closing thoughts 9. About the Author Non-surgical aesthetic procedures: What they are and why people choose them Non-surgical aesthetic procedures are cosmetic treatments that aim to improve skin appearance and concerns such as uneven tone, texture irregularities, early signs of aging, and minor contour issues, without performing surgical incisions. These services often include energy-based techniques, injectable options administered by licensed professionals, and topical regimens designed to support the skin barrier and visual clarity. Many individuals prefer these approaches because they generally involve less downtime and can be integrated into everyday routines. It is essential to view non-surgical aesthetic procedures as part of a broader care strategy. The best results usually come from alignment between your goals and the right modality, combined with consistent skin preparation and aftercare. A reputable clinic will discuss both benefits and limitations, explain expected maintenance, and help you choose a plan suited to your tolerance, skin type, and lifestyle. Illustration of skin goals, tools, and careful planning How to decide which approach is appropriate Deciding among non-surgical aesthetic procedures begins with a clear goal. Instead of focusing on a specific trend, define the primary concern in plain terms. Examples include “reduce the look of dullness,” “improve hydration and comfort,” “support a smoother skin texture,” or “minimize visible spots over time.” When goals are specific, the consultation becomes more precise and the treatment plan is easier to evaluate. Next, assess baseline skin health. Barrier integrity often determines how well skin responds to procedures and topical products. If your skin is frequently irritated, inflamed, or reactive, the first priority may be barrier support and gentle cleansing. This approach can reduce the risk of complications and can improve the stability of your results. Finally, consider maintenance. Many non-surgical aesthetic procedures rely on gradual changes and cumulative effects. Some concerns respond better to ongoing support rather than a single session. Your plan should include a realistic path for follow-up care, including home routines and protective habits that reduce external triggers. How-to steps for safer, better results The following steps are practical and broadly applicable when selecting non-surgical aesthetic procedures. They emphasize safety, communication, and consistency. Set measurable objectives. Describe the outcome you want and the time horizon you find reasonable. Aim for clarity, not perfection. Document your skin history. Note past reactions, current medications, allergies, prior cosmetic treatments, and any recurring conditions. Bring this information to the appointment. Choose a qualified provider. Seek licensing, verified credentials, and a clinic process that includes informed consent and risk discussion. Ask who performs the procedure and what training they hold. Request a tailored plan. Avoid one-size-fits-all recommendations. A responsible provider will evaluate your skin type and concerns and will propose a staged approach when appropriate. Start with skin preparation. In many cases, consistent gentle cleansing and hydration support outcomes. If your skin barrier is compromised, procedures may feel uncomfortable and results may appear less even. Use sunscreen consistently. Broad-spectrum sun protection helps protect visual improvements and reduces the chance of new pigmentation. Incorporate sunscreen into your daily routine. Follow aftercare instructions precisely. Aftercare guidelines are designed to protect the skin and optimize response. If you are unsure about any instruction, ask for written guidance. Track changes objectively. Use neutral lighting and consistent angles for simple photos. Keep notes on comfort, visible texture, and any sensitivity so follow-up decisions are informed. Consultation checklist and provider red flags A strong consultation should feel structured, educational, and balanced. During your visit, ask about your skin evaluation, the rationale behind the chosen method, and what you can reasonably expect across multiple sessions. You should also learn how the clinic measures progress and how they manage side effects if they occur. Useful questions include: What is the primary mechanism for addressing my concern? Which skin types are best suited, and what adjustments are considered for sensitive skin? What are common side effects and how long do they typically last? How many sessions are usually needed, and what maintenance interval is recommended? What home care changes should I make before and after treatment? What criteria would cause you to pause, adjust, or decline treatment for safety reasons? Red flags to watch for include guarantees of identical results, vague explanations, pressure tactics, lack of informed consent, and absence of a clear aftercare plan. A credible clinic will address risks and will encourage questions. This approach supports trust and helps you make decisions aligned with both goals and safety. Pair treatments with evidence-informed skin care Skincare support does not replace professional care, but it can influence comfort, evenness, and overall appearance. A consistent routine often includes gentle cleansing, hydration, targeted actives when appropriate, and daily sun protection. When selecting products, prioritize barrier-friendly formats and formulations that suit your skin sensitivity. For cleansing, consider gentle options that support the skin barrier. For example, you may review products such as Cetaphil Gentle Cleanser if you prefer a non-stripping cleanse. If acne-prone skin is part of your concern, using a dedicated routine can be helpful; for instance, you may explore Acne UV Gel SPF 50 for daytime protection that aligns with acne-prone needs. Hydration and protective skincare also matter. Many people benefit from a balanced moisturizing step that helps reduce dryness and friction during treatment cycles. A product like Excela Rich Facial Hydrating Lotion can support daily comfort when used consistently. For brightening goals, some routines incorporate vitamin C or pigment-focused actives. If you want to explore a vitamin C approach, consider AZE Proactive Serum as part of a plan discussed with your provider, especially if you are balancing sensitivity. For pigment and tone concerns, users sometimes consider targeted cleansers such as PigmentBio Foaming Face Wash in the context of their overall care strategy. When using any active ingredient, remember that tolerance builds with consistency and gradual introduction. If your skin reacts, reduce frequency and prioritize barrier support. Your provider may recommend temporary adjustments around treatment days to improve comfort and outcomes. Before-and-after look using consistent lighting and notes Common timelines and what to expect during care Non-surgical aesthetic procedures often work through gradual improvement rather than immediate transformation. Some skin-related changes may become visible as inflammation settles and hydration improves. Others may take longer as collagen remodeling or pigment stabilization occurs. The exact timeline depends on the modality, your baseline concern, and how consistently you follow home care recommendations. During care, you may notice changes in comfort before visible changes in tone or texture. This does not mean the procedure is ineffective; it often reflects how skin adapts. Monitoring should focus on both appearance and tolerance. If you experience unusual reactions, persistent discomfort, or worsening texture, contact your provider promptly rather than waiting for it to resolve on its own. Aftercare consistency often determines how evenly results appear across the treated area. Avoid actions that undermine barrier function, such as aggressive scrubbing or skipping sun protection. Also note that environmental factors such as harsh weather, dry indoor air, and frequent temperature swings can affect hydration and perceived smoothness. Where relevant, your provider may recommend a staged plan. Staging can help calibrate intensity and allow your skin to adapt between sessions. This approach can be particularly helpful for people with sensitive skin or for those pursuing multiple concerns at once. For an additional lifestyle perspective that supports overall wellness routines, some customers also explore community-centered pet and home care resources such as Jovia Paws. While these activities are not related to aesthetic treatment outcomes, they can contribute to better routines and stress management, which indirectly supports skin comfort through consistent habits. FAQ Are non-surgical aesthetic procedures suitable for all skin types? Many non-surgical aesthetic procedures can be adapted for different skin types, but suitability depends on your specific concern, barrier health, and sensitivity. A qualified provider will evaluate your history and adjust settings, product choices, and spacing between sessions. If you have a history of irritation or pigmentation sensitivity, discuss it explicitly during consultation. What should I avoid before and after a treatment cycle? Providers commonly advise avoiding harsh exfoliation, aggressive cleansing tools, and unnecessary changes to your routine around treatment dates. Sun protection and gentle skin care are usually emphasized. Aftercare instructions may include temporary pauses on certain actives depending on the procedure and your skin response. How do I measure progress without overreacting to normal variation? Use consistent lighting and simple photo documentation. Focus on trends over weeks rather than day-to-day fluctuations. Comfort changes, hydration stability, and gradual improvement in tone or texture are often more meaningful than short-term variations. If you notice worsening symptoms, contact your provider for guidance. Closing Thoughts Non-surgical aesthetic procedures can be an effective option when chosen with clear goals, a qualified provider, and a structured routine that supports your skin barrier. Safety comes from informed consent, realistic expectations, and consistent aftercare. Use the consultation checklist to ask precise questions and ensure your plan is tailored rather than generic. With disciplined home care and professional follow-up, you can pursue visible improvements while maintaining skin comfort and long-term consistency. About the Author Author Name: Allodermis Editorial Team Bio and Credentials: The Allodermis Editorial Team focuses on skincare education and consumer guidance. The team reviews topical routines, ingredient strategies, and clinic-prepared aftercare principles to help readers make informed decisions about skin health. With expertise in dermatology-adjacent content standards and evidence-aligned skincare communication, the team supports thoughtful, responsible choices. We encourage readers to begin with a consultation and to adopt a consistent, barrier-friendly routine. Disclaimer: This article is for general educational purposes only and does not constitute medical advice, diagnosis, or treatment. Individual results vary. Consult a licensed healthcare professional or qualified provider to evaluate your situation, discuss risks, and determine an appropriate plan. If you have a medical condition or a history of adverse reactions, seek personalized guidance before undergoing any aesthetic procedure.
Learn more
Moisturizers for Sensitive Skin: How to Choose Safely
Updated on: 2026-06-12 Moisturizers for sensitive skin help support the skin barrier and reduce day-to-day discomfort. The right formula can lower the risk of irritation by using gentle ingredients and avoiding common triggers. A consistent routine also improves hydration and comfort, especially when your skin feels reactive. Use this guide to choose well, apply correctly, and know when to adjust your product choices. 1. Why Sensitive Skin Needs Different Moisturizers 2. Personal Experience: Learning What My Skin Needed 3. Key Advantages of Barrier-Friendly Moisturizers 4. Quick Tips for Choosing and Using Moisturizers for Sensitive Skin 5. How to Build a Safe Routine Around Moisturizing 6. Ingredients and Practices to Avoid 7. Summary & Next Steps 8. Q&A Section 9. About the Author Why Sensitive Skin Needs Different Moisturizers Sensitive skin often behaves like a warning system. It can react to friction, weather changes, harsh cleansers, and even normal skincare routines. When the skin barrier is weak, water can escape more easily. This leads to dryness, tightness, and a higher chance of redness. Moisturizers for sensitive skin are designed to calm irritation and support the barrier so your skin can feel stable again. A good moisturizer does more than hydrate. It helps reinforce the outer layer of skin by adding emollients and barrier-supporting ingredients. It can also reduce friction during daily activities. With better barrier function, many people experience fewer flare-ups and more comfortable skin texture over time. In practice, the best results come from choosing a formula that matches your triggers. Some people are sensitive to fragrance, essential oils, or certain preservatives. Others react to strong active ingredients. A gentle approach keeps your routine predictable. If you are also reviewing tools and application habits, this can be useful: Choosing a Safe Tool for Sensitive Skin: A Practical Guide. Personal Experience: Learning What My Skin Needed Years ago, I thought the solution was to “wash better” and “treat faster.” I selected multiple products at once, including richer cleansers and aggressive actives. My skin responded with a pattern that felt familiar: dryness after cleansing, redness after moisturizer, and itchiness that showed up in the late afternoon. The pattern was consistent, even though I changed brands. What changed everything was the order and the gentleness. I simplified my routine and used a plain, barrier-supportive moisturizer. I applied it soon after cleansing, then avoided extra steps that could add friction. Over time, the tightness reduced. My skin looked calmer and felt less reactive. The biggest lesson was that sensitive skin often needs predictability, not more product layers. Calm skin shield icon over hydration droplets Key Advantages of Barrier-Friendly Moisturizers Moisturizers for sensitive skin can provide benefits that go beyond comfort. When you choose a formula with barrier support, you often notice improvements in consistency, appearance, and tolerance. Below are key advantages that commonly matter to people with reactive or easily irritated skin. Barrier support: Ingredients such as glycerin, ceramide-supporting agents, and emollients help reduce water loss and improve resilience. Less irritation from daily routines: A well-tolerated moisturizer can reduce friction caused by cleansing, shaving, or environmental exposure. Better hydration stability: Hydration that lasts longer can reduce tightness and flaky texture. Improved tolerance for other skincare: When your skin barrier is healthier, active ingredients and sunscreen are easier to tolerate. Comfort across seasons: Many sensitive-skin routines need different levels of hydration in dry or hot conditions. For a complete approach, consider pairing moisturizers with a gentle cleanser. If you prefer a mild option, you may review Cetaphil Gentle Cleanser as part of a minimal routine. Quick Tips for Choosing and Using Moisturizers for Sensitive Skin Small adjustments often make a large difference. Use the following steps to choose a moisturizer and apply it in a skin-friendly way. Check for fewer potential triggers: Start with fragrance-free or low-irritant formulas when your skin is reactive. Look for barrier-friendly hydration: Seek ingredients like glycerin, panthenol, and barrier-supporting emollients. Patch test consistently: Apply to a small area for several days to observe redness or itching. Apply on slightly damp skin: Moisturizer locks in water more effectively when your skin is not fully dry. Use the right amount: A thin layer can work for light textures, while dry areas may need a slightly thicker application. Introduce one change at a time: If you switch multiple products, it becomes hard to identify the cause of irritation. Reassess after weather changes: Increase hydration during colder, drier months. Hand applying a thin layer, split-face calm vs red How to Build a Safe Routine Around Moisturizing A moisturizer works best when the full routine supports it. Sensitive skin can be affected by cleansing strength, water temperature, and sun exposure. A stable routine reduces variability and helps your skin adapt. 1) Choose a gentle cleanse Over-cleansing can worsen sensitivity by stripping natural oils. Use a mild cleanser and avoid very hot water. If you want a dependable, gentle option, consider Cetaphil Pro Oil Control Foam Wash for daily cleansing needs. Even if you are not oily, mild cleansing is often easier on sensitive skin than strong foam formulas. 2) Apply moisturizer at the correct time Apply moisturizers for sensitive skin soon after cleansing. This helps reduce dryness that appears after washing. For daytime, moisturize first, then apply sunscreen. For nighttime, moisturize after cleansing and allow your skin to recover without extra friction. 3) Layer strategically, not excessively If you use serums, choose gentle hydration first and leave strong actives for later when your skin is stable. When your barrier is healthy, your skin can better tolerate targeted ingredients. If you prefer a soothing facial hydrating step, you may review Cipla Excela Rich Facial Hydrating Lotion as a comfort-focused layer. 4) Protect with sunscreen Sun exposure can increase visible redness for many people with sensitive skin. Consistent sun protection helps prevent irritation cycles. If you need a sunscreen option compatible with sensitive routines, explore I Shield Sunscreen Cream SPF 50 PA as part of your daily plan. For evening routines, some people also benefit from a corrective or calming product after moisturizing. However, the safest approach is to focus on barrier support first and add complexity gradually. Ingredients and Practices to Avoid Not every sensitive reaction is caused by the same ingredient. Still, there are patterns that commonly worsen irritation. Being selective helps you keep your skin calm and reduce unnecessary risk. Common ingredient triggers to evaluate Strong fragrance blends: Even “light” fragrance can irritate reactive skin. Essential oils in high concentrations: Some people tolerate them poorly. Very high alcohol content: Alcohol can feel drying or irritating for certain skin types. Harsh exfoliating agents: Frequent strong exfoliation can weaken the barrier. Multiple new active ingredients at once: Simultaneous changes increase the chance of irritation. Practices that increase irritation Scrubbing or cleansing with a rough tool: Friction can trigger redness. Over-layering: Too many layers can trap residue and increase sensitivity. Not removing sunscreen properly: Gentle cleansing is essential, especially if you wear sunscreen daily. Using hot water: Heat can worsen dryness and inflammation. Skipping moisturizer in dry environments: Dry air can pull moisture out quickly. If your sensitive skin is also acne-prone, the decision becomes more specific. Look for gentle hydration that does not feel heavy. You may prefer a product approach that supports comfort while remaining compatible with acne routines. If you want an example of how dermatology-focused skincare can be structured, consider reviewing a formula designed for clarity and moisture balance, such as Cipla Excela Rich Facial Hydrating Lotion for hydration comfort. Summary & Next Steps Moisturizers for sensitive skin support barrier health, reduce water loss, and help your skin feel steady. The most reliable results come from gentle formulas, consistent application timing, and routine simplicity. Choose a moisturizer that aligns with your triggers and introduce changes one at a time. Next steps: Review your cleanser, select a barrier-friendly moisturizer, and apply it soon after cleansing. Use sunscreen daily and reassess your routine when weather conditions change. If irritation continues, consider pausing new products and seeking guidance from a qualified healthcare professional. To strengthen your routine further, you may explore additional comfort-focused options and supportive skincare categories on Allodermis while keeping your choices simple and testable. Q&A Section How often should I apply moisturizers for sensitive skin? For most people, applying moisturizer once or twice daily is sufficient. Apply it after cleansing and again when the skin feels dry or tight. If you live in a dry climate, daytime reapplication may improve comfort. Consistency matters more than frequent changes to multiple products. Can I use a moisturizer if my skin stings after cleansing? Stinging can indicate barrier stress. Choose a gentle, fragrance-free moisturizer and apply it on slightly damp skin to reduce friction. If stinging becomes worse or you develop significant redness, stop the product and allow your skin to calm before retesting a different formula. Are thick moisturizers always better for sensitive skin? Not always. Thicker textures can help dry areas, but some people find heavy products more irritating if they feel occlusive. The best choice is the texture that your skin tolerates while still providing comfort. Consider using a thicker layer on dry zones and a lighter layer on other areas. What should I do if my sensitive skin reacts to a new moisturizer? Discontinue use immediately and return to your previous, well-tolerated routine. Avoid adding new active products until your skin stabilizes. When you choose a replacement, patch test carefully and introduce only one variable at a time. About the Author Allodermis is an editorial team focused on skincare education with practical, barrier-first guidance for sensitive complexions. The author team reviews ingredient behavior, routine design, and daily comfort strategies grounded in dermatology-aware principles. This post reflects an evidence-informed approach to simplifying sensitive skincare without unnecessary complexity. Thank you for reading, and may your routine support skin that feels calm and stable. Disclaimer: This article provides general skincare education and is not a substitute for professional medical advice. Individual reactions vary, and persistent irritation should be evaluated by a qualified healthcare professional. Always patch test new products and follow label instructions.
Learn more
Laser Hair Reduction: Dermatologist Explained Guide
How it Works • Benefits • Safety for Indian Skin • What to Expect Where evidence-based dermatology meets long-term hair reduction. 📞 9717503031 | 🌐 www.allodermis.com/appointments AIIMS MD Dermatologists • Medical Supervision • SkinType Safe Protocols What Is Laser Hair Reduction? Laser Hair Reduction (LHR) uses focused light energy to target melanin within hair follicles. The absorbed heat selectively damages follicular stem cells, leading to progressivelong-termrm reduction in hair growth. Why It Works Targets hair in the anagen (active growth) phase Reduces hair thickness, density, and regrowth speed Preserves surrounding skin when done correctly Backed by clinical evidence for longterm reduction Why Laser Is Better Than Waxing or Shaving No repeated skin trauma Fewer ingrown hairs and folliculitis No cuts, burns, or rough regrowth Smoother skin texture over time Cost-effective compared to lifetime waxing or shaving Benefits of Laser Hair Reduction at Allodermis ✔ Longterm permanent hair reduction ✔ Quick sessions (5–45 minutes depending on area) ✔ Zero downtime – resume work immediately ✔ Safe for dark, sensitive, acne-prone Indian skin ✔ Reduces ingrown hairs & inflammation ✔ Improves skin smoothness and tone ✔ Economical over the long run Why Choose Allodermis for Laser Hair Reduction? 1. DermatologistLed Treatment AIIMS MD dermatologists oversee every case, ensuring correct laser physics, safe parameters, and medical judgment. 2. RootCause Evaluation We assess: Hormonal patterns (PCOS, thyroid, insulin resistance) Genetics and hair growth cycle Medications and stress contributors 3. USFDAApproved Laser Technology Suitable for: Indian and melaninrich skin Tanned skin Thick or coarse hair Sensitive areas 4. Advanced Comfort Systems Integrated cooling for reduced discomfort and enhanced safety. 5. Personalised Energy Mapping Laser wavelength, fluence, and pulse width are customised per patient. 6. Ethical, Transparent Care No unnecessary sessions. No hidden costs. No exaggerated promises. Treatable Areas Women Upper lip, chin, full face Underarms, arms, legs Bikini / Brazilian Chest, abdomen, back Full body Men Beard shaping Neck (front & back) Chest, shoulders, arms Back, abdomen, legs Fullbody grooming StepbyStep Laser Hair Reduction Protocol 1. PreTreatment Consultation Skin & hair analysis Hormonal evaluation (if indicated) Patch test Custom session plan 2. Before the Session Shaving of area Cleansing & eye protection 3. During Treatment Cooling gel application Laser pulses delivered under dermatologistset parameters Realtime safety adjustments 4. After the Session Cooling and soothing care No downtime 5. FollowUps Most patients need 6–8 sessions, depending on: Hair density Hormonal profile Skin type Treatment area Is Laser Hair Reduction Safe for All Skin Types? Yes—when performed using skintype appropriate technology and settings. Allodermis protocols are designed for: Dark and sensitive skin Acneprone skin Tanned skin Hormonal hair growth Risks & Side Effects Laser Hair Reduction is globally safe and wellstudied. Temporary effects may include: Mild redness or warmth Temporary pigmentation changes Rare paradoxical hair growth These are typically short-lived and managed under dermatologist care. Aftercare Guidelines Avoid hot showers for 24 hours Avoid sun exposure for 48 hours Apply sunscreen regularly Do not wax or thread between sessions Use calming gel if advised Frequently Asked Questions Is laser hair reduction permanent? Most follicles are permanently disabled. Some people may need maintenance due to hormonal factors. Does it hurt? Feels like a mild warm snap; cooling systems reduce discomfort. How long is each session? Between 5 and 45 minutes, depending on the area. Is it safe during periods? Yes. Can men undergo laser hair reduction? Absolutely. Beard shaping and body grooming are common indications. Pricing Philosophy at Allodermis Final cost depends on: Hair density Area size Hormonal background Laser parameters Number of sessions required We follow transparent, ethical, medically justified pricing. Medical References Anderson RR. Selective Photothermolysis, Science Taylor SC. Laser Safety in Skin of Color, JAAD Haedersdal M. Laser Hair Reduction Outcomes, JEADV ✍ Written by: Swaraj Dhar Co Founder Allodermis || Sociopreneur || Technologist LinkedIn ID: https://www.linkedin.com/in/swarajdhar/ Reviewed by : Dr Alok Sahoo MBBS, MD Dermatology and Venereology AIIMS Delhi LinkedIn ID: https://www.linkedin.com/in/dralokderma/ Updated On : 12 Dec 2025 Clinic entity: Allodermis Skin Clinic Local context: Delhi NCR | Gurgaon | Bhubaneswar
Learn more
PRP Therapy for Hair Loss: What to Expect & Results
{TLDR} PRP therapy for hair loss is a procedure that uses concentrated plasma to support scalp biology and the hair growth cycle. It is often considered for pattern hair loss and hair thinning, especially when paired with an evidence-based hair care plan. Results depend on diagnosis, baseline hair density, and consistent follow-up. Knowing the benefits, limits, and preparation steps can help you make a safer and more informed decision. Updated on: 2026-06-11 Table of Contents 1. What You Should Know 2. Product Spotlight: Scalp-Friendly Support 3. Did You Know? 4. Pros & Cons Analysis 5. FAQ Section 6. Conclusion & Call to Action 7. About the Author What You Should Know About PRP Therapy for Hair Loss PRP therapy for hair loss is commonly discussed as a way to improve scalp environment and potentially strengthen hair follicles. The core idea is to use your own blood components, process them into a platelet-rich form, and place them into the scalp. This approach aims to influence signaling pathways that guide the hair growth cycle. When people face thinning hair or see early signs of pattern hair loss, they often want a treatment that is focused on the scalp rather than only the hair strand. PRP is frequently positioned as a scalp-targeted option, and many clinical protocols include a series of sessions followed by maintenance. However, the best plan depends on the cause of hair shedding, baseline density, and how your skin and follicles respond to stimulation. Because hair loss has multiple drivers, a careful assessment is essential. Dermatologists may evaluate hair pull tests, scalp inflammation, family history, and sometimes blood work when nutritional or hormonal factors are suspected. This helps align expectations with what a scalp procedure can reasonably do, and it reduces the risk of choosing a treatment that does not match the root cause. In practical terms, a strong hair loss strategy usually combines in-office options with everyday scalp care. The goal is to maintain a clean, balanced scalp environment so that any follicle-focused therapy can work with less interference from irritation or product buildup. Product Spotlight: Scalp-Friendly Support While PRP therapy involves in-office treatment, daily scalp care supports comfort and helps you stay consistent with your plan. Many people benefit from gentle cleansing and barrier-friendly hydration, particularly when scalp conditions such as dryness or sensitivity coexist with hair shedding. For example, a mild cleanser and a soothing routine can reduce friction, limit harsh stripping, and support scalp comfort. You should choose products that do not aggressively dry the scalp, especially when you are pursuing any follicle-focused therapy. If you want an example of gentle cleansing in a hair-friendly routine, consider this internal resource: Cetaphil Gentle Cleanser. Gentle formulas can help you wash without over-drying, which may be relevant for some users who notice scalp tightness when their hair loss regimen becomes more complex. Illustration of scalp comfort with gentle cleansing cues For those who use additional scalp products, it is also important to avoid heavy buildup. A routine that balances cleansing and light conditioning can support a stable scalp environment. If your scalp is reactive, prioritize fragrance-free or low-irritant approaches and introduce changes one at a time. Some users also explore topical actives as part of a broader plan, but selection should match your skin profile and tolerance. If you are unsure, it is best to discuss product choices with a qualified clinician who can consider your scalp condition, history, and therapy schedule. Additional dermal support and barrier maintenance may be helpful as well. For moisturization support, you may review hydration support options, choosing only what is appropriate for your scalp or surrounding hair-bearing areas. Did You Know? PRP stands for platelet-rich plasma, which is created by concentrating platelets from your own blood. Preparation quality and injection technique matter, because consistent delivery into target scalp layers is central to protocol design. Some patients notice scalp redness or mild tenderness after sessions, which typically resolves as healing progresses. Hair growth is cyclical, so changes, if they occur, often become more visible after multiple growth cycles rather than immediately. Pros & Cons Analysis Below is a practical overview of benefits and limitations commonly discussed with PRP approaches for hair thinning. This section is designed to help you weigh options logically, without assuming universal outcomes. Category Potential Benefits Potential Limitations Biologic mechanism Uses your own platelets to deliver concentrated growth-factor signals to the scalp environment. The degree of effect varies by diagnosis, baseline follicle activity, and individual biology. Safety profile Since it uses autologous components, risks related to foreign substances may be reduced. As with any procedure involving skin penetration, risks include irritation, temporary swelling, and post-procedure discomfort. Consistency and schedule Structured series protocols may be paired with maintenance visits for longer-term management. You may need time and commitment; stopping early may reduce the chance of meaningful improvements. Expectation management Can be integrated with established hair-loss strategies to support overall treatment goals. PRP is not a universal fix. Some causes of hair loss require different or additional treatment. If you consider PRP therapy for hair loss, focus on a comprehensive assessment first. If your hair shedding is driven by inflammation, low iron or other nutritional factors, thyroid imbalance, or androgen-related mechanisms, the most effective plan may involve targeted therapies beyond scalp injections. Timeline map of clinic sessions and follow-up checkpoints Another practical point is to treat scalp health as part of the same system. If your scalp barrier is compromised, harsh washing, strong fragrances, or irritant actives can worsen comfort and adherence. A consistent, gentle routine supports a stable baseline while you evaluate response to in-office procedures. FAQ Section Who is a candidate for PRP therapy for hair loss? Most candidates are people with patterned thinning, early-to-moderate hair density reduction, or other scalp-focused causes identified by a qualified clinician. Eligibility depends on the underlying diagnosis, scalp condition, and realistic expectations. A professional evaluation is important to confirm that PRP aligns with your specific hair loss pattern and severity. What should I do before and after a PRP session? Before a session, follow the clinic instructions for scalp preparation, which may include avoiding certain topical products for a short window. After the procedure, you should follow the same guidance for washing, hair styling, and sun protection. If you experience unusual pain, prolonged swelling, or signs of infection, contact your clinic promptly. How many sessions are typically needed, and when do results appear? Protocols vary by provider and individual factors, but many plans use multiple sessions to support a sustained follicle-stimulation period. Because hair growth cycles take time, noticeable improvement is usually gradual. Clinicians often assess response over several months while tracking scalp comfort, shedding, and density changes. Are there side effects or risks? Common short-term effects include redness, mild tenderness, and temporary scalp sensitivity. Risks increase when sterile technique is inconsistent or when a patient has uncontrolled scalp conditions. Selecting an experienced, properly equipped provider can reduce avoidable risks. Can PRP therapy be combined with other hair loss treatments? Often, yes, when clinically appropriate. A combined plan may include evidence-based topical or oral therapies, along with gentle scalp care. Combination strategies require clinician oversight to avoid conflicting schedules, irritation from multiple topicals, and unrealistic expectation stacking. Conclusion & Call to Action PRP therapy for hair loss is best understood as a scalp-focused stimulation approach that may support hair growth biology in selected patients. The strongest outcomes tend to come from an individualized diagnosis, a consistent protocol, and a supportive daily routine that protects scalp comfort and reduces irritation. If you are exploring PRP, begin with a formal hair and scalp assessment and discuss how your specific hair loss cause influences expected results. Then, build a gentle, consistent scalp care routine to help you stay comfortable throughout the process. To support your routine with thoughtful skincare choices, you may browse internal options such as gentle cleansing and consider complementary care guided by your clinician’s recommendations. Disclaimer: This article is for educational purposes and does not replace medical advice, diagnosis, or treatment. Individual results vary, and you should consult a qualified healthcare professional for guidance tailored to your condition. About the Author The author is a skincare and dermatology-focused content specialist at Allodermis with expertise in hair and scalp care education, evidence-based routine building, and consumer-safe product guidance. The editorial approach prioritizes clarity, safety, and practical decision support for readers exploring scalp therapies and supportive skincare. For personalized recommendations, consult a qualified clinician or dermatologist. Thank you for reading.
Learn more